Home is a docking port, her warmth is enough to melt all sorrows; home is a platform for take-off, her power helps you to fly to the paradise of dreams; home is a warm cradle, everything about her is our ultimate concern; In this International Family Day, we wish you and your family is happy and joyful.
Author: admin
Eglobal Brand Story
_02.jpg)
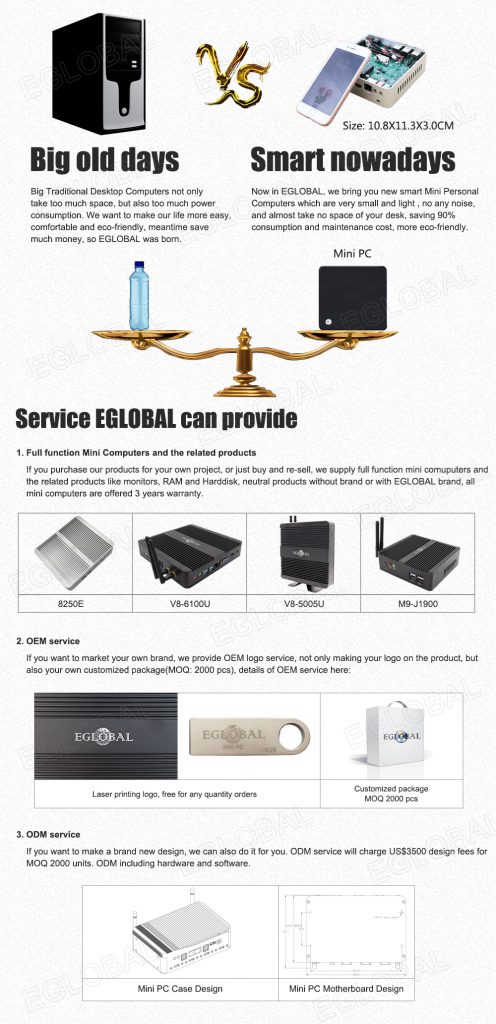
Eglobal Technology Co., Limited (Hong Kong) was registered in Hong Kong in 2009 and founded its own brand “EGLOBAL”. It is a high-tech enterprise specializing in the production and operation of thin clients and fan mini computers. The company’s products mainly involve cloud terminals, computer terminals, Net Computer, mini desktop, mini TV boxes, ultra-quiet fanless mini computers, etc.
Eglobal Technology Co., Limited adheres to the concept of “People-oriented, quality as guarantee, integrity management”, focuses on technological advantages, and is committed to the development of economic, energy-saving, stable, safe, simple and fast mini computers. Our products are widely used, such as schools, governments, enterprises, banks, hospitals, offices, terminal kiosks, POS, CCTV, KTV, etc. At the same time, we developed and produced a cloud computer, a host can support multiple users, selling in developing countries. The plant area will be expanded to about 3000 square meters in 2020.

The future looks bright, the future looks promising. Don’t Forget Why We Started and Move Forward Bravely!

Pay homage to the Nurses, Fight against the epidemic together!
Earth Day 2020——Treasure the Earth, People and Nature Coexist in Harmony
Earth Day 2020 will mark the 51th anniversary of this holiday. Typically, Earth Day is assigned a different theme or area of focus each year. This year’s theme is “Treasure the Earth, People and Nature Coexist in Harmony”.
What is the Earth Day?
Earth Day (Earth Day), which is April 22 each year, is a festival set up specifically for the protection of the world ’s environment. Low-carbon life improves the overall environment of the earth. Earth Day was initiated by Gaylord Nelson and Denis Hayes in 1970. Today, Earth Day celebrations have grown to 192 countries around the world, with more than 1 billion people participating each year, making it the world ’s largest folk environmental festival.
What should we do?
1. Garbage classification
2. Save water
3. Turn off lights
4. Save paper
5. Green and low-carbon travel
6. Reuse
7. Participate in planting trees
8. Purchase energy-saving appliances
9. Conservation of wild animals
10. Protect the heart of the earth-the ocean
We should take these as a concept and turn it into an action, not only on the Earth Day, but also in our daily life, consciously inherit and persevere.
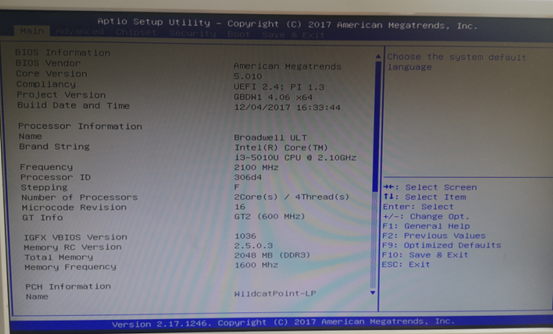
EGLOBAL Mini Computer M3_2955U_5005_4500 s5 RTC wake settings
1.On boot up of the computer. Tap the ESC button repeatedly until you see this screen pop up.
2. Hit the right arrow key one time to end up here at the “Advanced” screen
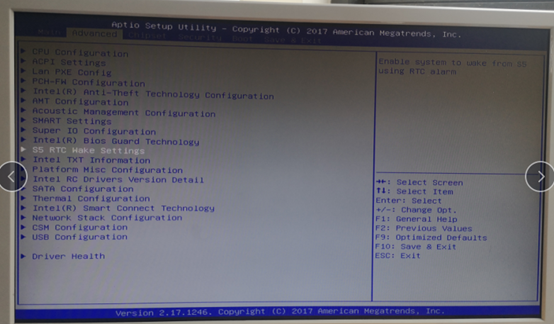
3. On the screen you can see the S5 RTC wake settings , Press “Enter”,you will see the screen pop up
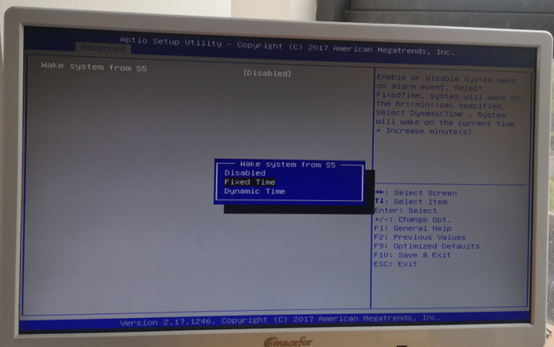
4. You can set the time you want the pc start boot
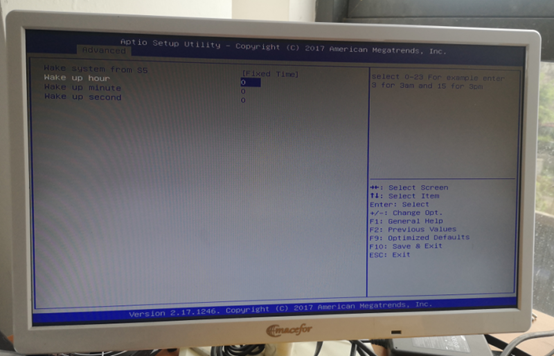
5. When you finshed the setting, pls press F10 to save the settings.
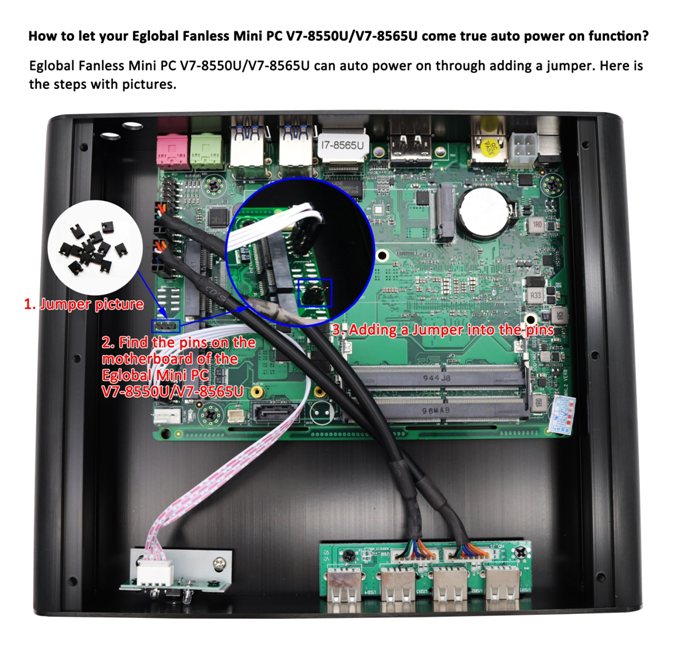
How to let your Eglobal Fanless Mini PC V7-8550U/V7-8565U come true auto power on function?
Fighting Against the “COVID-19” We are together
In 2020, the new year, the coronavirus has become the hottest and most concerned issue in the world, and it can be said that it is the focus of focus. The coronavirus has caused many difficulties in life and work and psychological pressure on the public and medical workers.
What we should do and how to action at this critical moment is really deserves careful consideration. In China, we have basically controlled the coronavirus very well under the China Government leadership, and there has been no continuous growth. The entire staff of the Eglobal MiniPC also would like to give some small suggestions in the fight against the coronavirus as the followings:
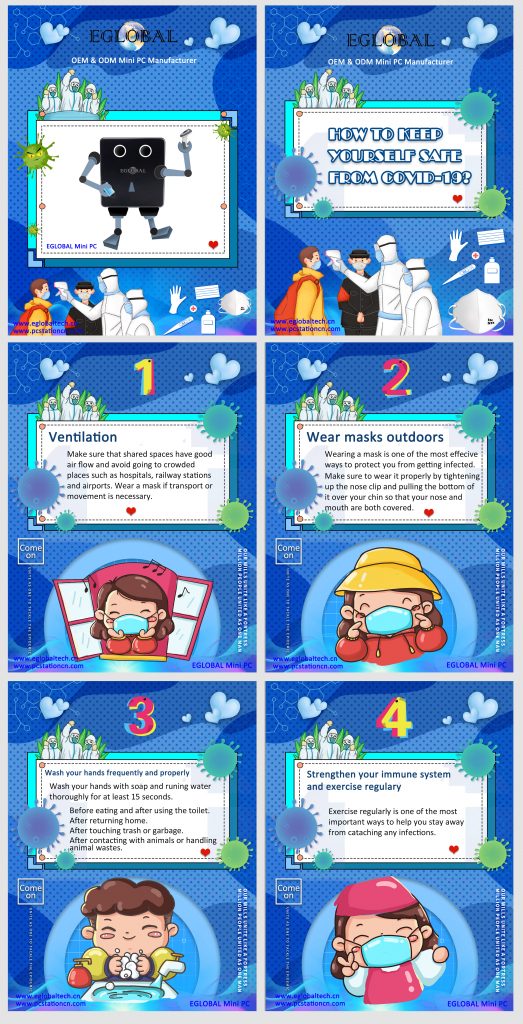
Let’s join hands and cheer for the world. As long as everyone has firm confidence, works together, scientific prevention and control, and precise policy, we will surely win the fight against the coronavirus
EGLOBAL Mini Computer M3-2955U Bios Update for AC Power Option
- On boot up of the Facility Controller. Tap the Delete button repeatedly until you see this screen pop up.
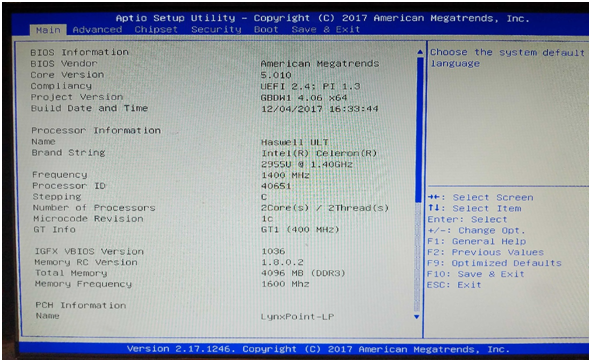
- Hit the right arrow key twice to end up here at the “Chipset” screen
- On this screen hit the down arrow to highlight “PCH-IO Configuration”
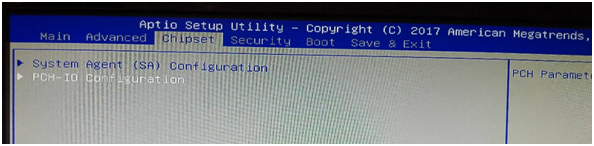
- Once “PCH-IO Configuration” is highlighted, hit enter to select it.
- You will show up at this screen
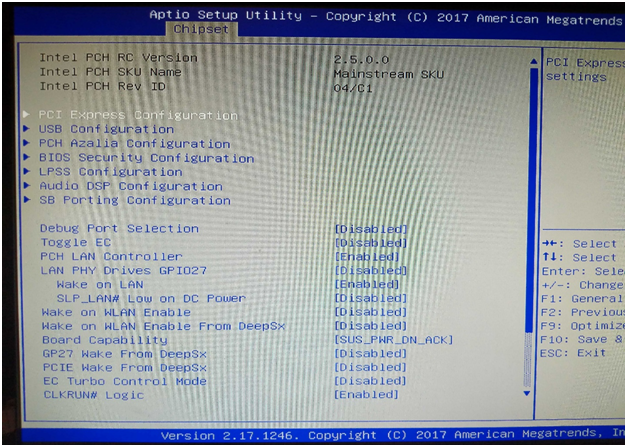
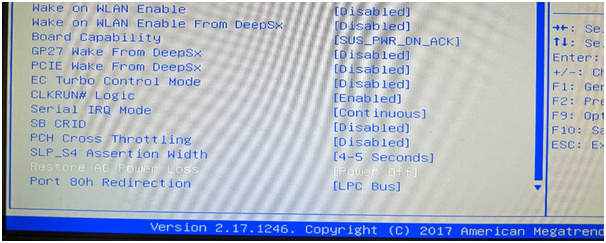
- Move down until you highlight the setting for “Restore AC Power Loss”
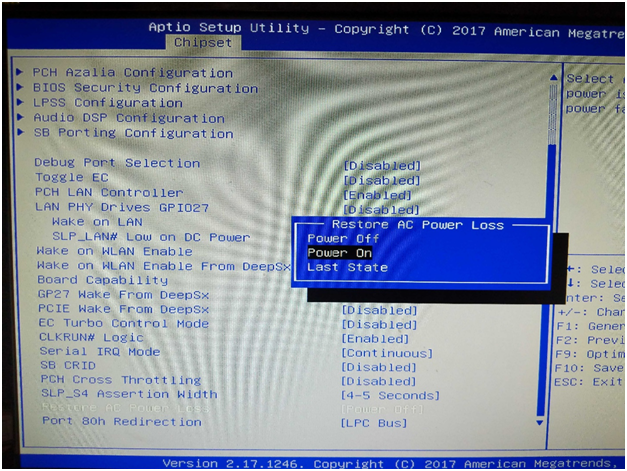
- Hit enter once it is highlighted and then select “Power On”
- Now hit escape to back out of the “Chipset” menu
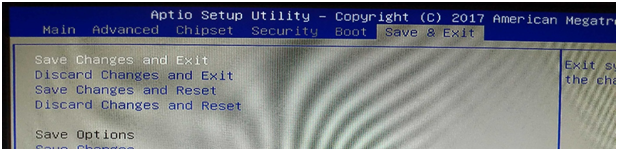
- Hit the right arrow three times to move over to the “Save & Exit” screen
- Hit enter on the first highlighted item: “Save Changes and Exit”
Simplified instructions:
- Delete (Repeatedly)
- Right
- Right
- Down
- Enter
- Up
- Up
- Enter
- Down
- Enter
- Escape
- Right
- Right
- Right
- Enter
- Enter
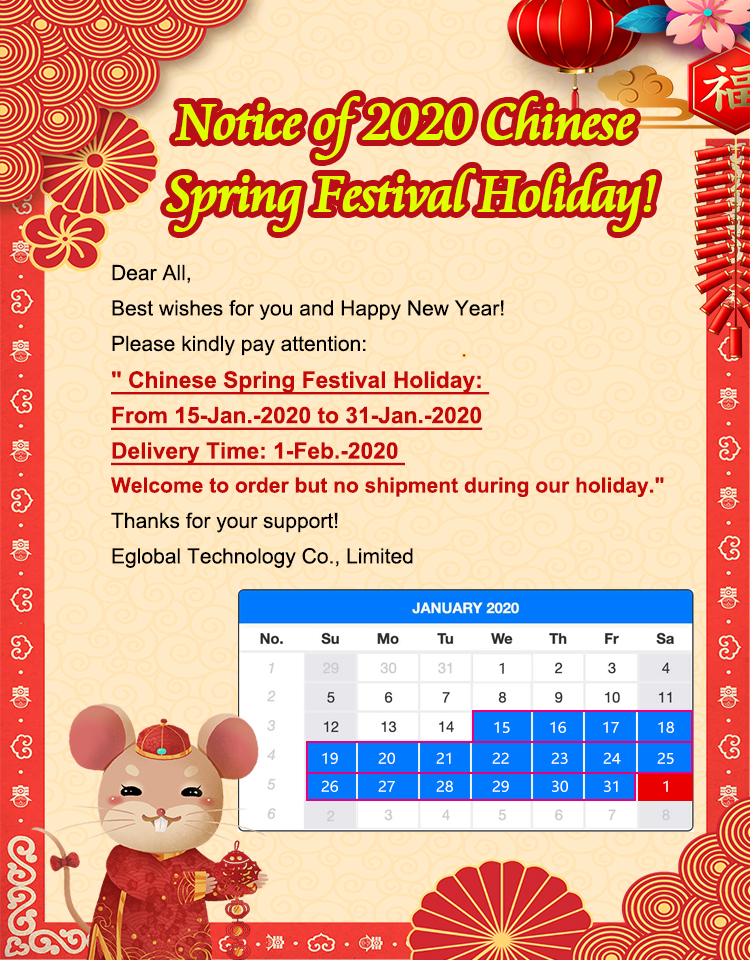
Notice of Eglobal 2020 Chinese Spring Festival Holiday!
How to set up multiple monitors on Windows 10 with Eglobal Mini PC
Are you getting into a dual or triple-monitor setup? Here are the best tips to configure all the displays without third-party software on Windows 10.
Before configuring a multi-monitor setup
Before diving into this guide, make sure that all the necessary cables are connected to the monitors and computer. This includes connecting power and video signal using VGA, DVI, HDMI, or DisplayPort (recommended) cables.
If you’re not sure, you can always note the make and model of the monitor, and search online for the manufacturer manual to get a better idea on how to connect the display.
How to rearrange multiple displays on Windows 10
Although you can connect a monitor to any of the available video ports on the graphics card, when setting up a dual-monitor or triple-monitor setup, it’s easy to plug them in the wrong order. While they will still work, you may run into issues using the mouse and running applications until you rearrange them correctly.
To rearrange monitors on Windows 10, use these steps:
- Open Settings.
- Click on System.
- Click on Display.
- Under the “Select and rearrange displays” section, drag and drop each display to rearrange them according to their physical layout on your desktop.

Quick tip: When rearranging monitors in the Display settings page, make sure that all monitors align at the top perfectly. Otherwise, you’ll have problems moving the mouse cursor between monitors from the corners.
5. Click the Apply button.
Once you complete the steps, Windows 10 will understand the physical layout of the screens, and you’ll be able to work across each display and run apps without issues.
If you’re not sure which monitor you’re selecting, click the Identify button to figure out. If one of the monitors isn’t showing up, make sure it’s receiving power and connected correctly, and click the Detect button. In the case that you’re still having problems, reset their connections (or restart your computer), and try the Detect button again.