Thanks a lot for your always support of our mini pc computers, we would like to inform you that we will have 7 days holiday soon to celebrate the 70th anniversary of China.
Please be informed that our factory and office will be closed from 1st Oct. to 7th Oct. for National Day Holiday. We will resume to Normal Operation on 8th Oct.
In that period we cannot ship out any goods, so if you have any needs of our Eglobal products, please kindly arrange your order in advance to avoid delaying your shipment during the holiday period.
We are sorry for the inconvenience may occur and thanks for your understanding.
Do you know how the Fanless
Mini pc heat dissipation?
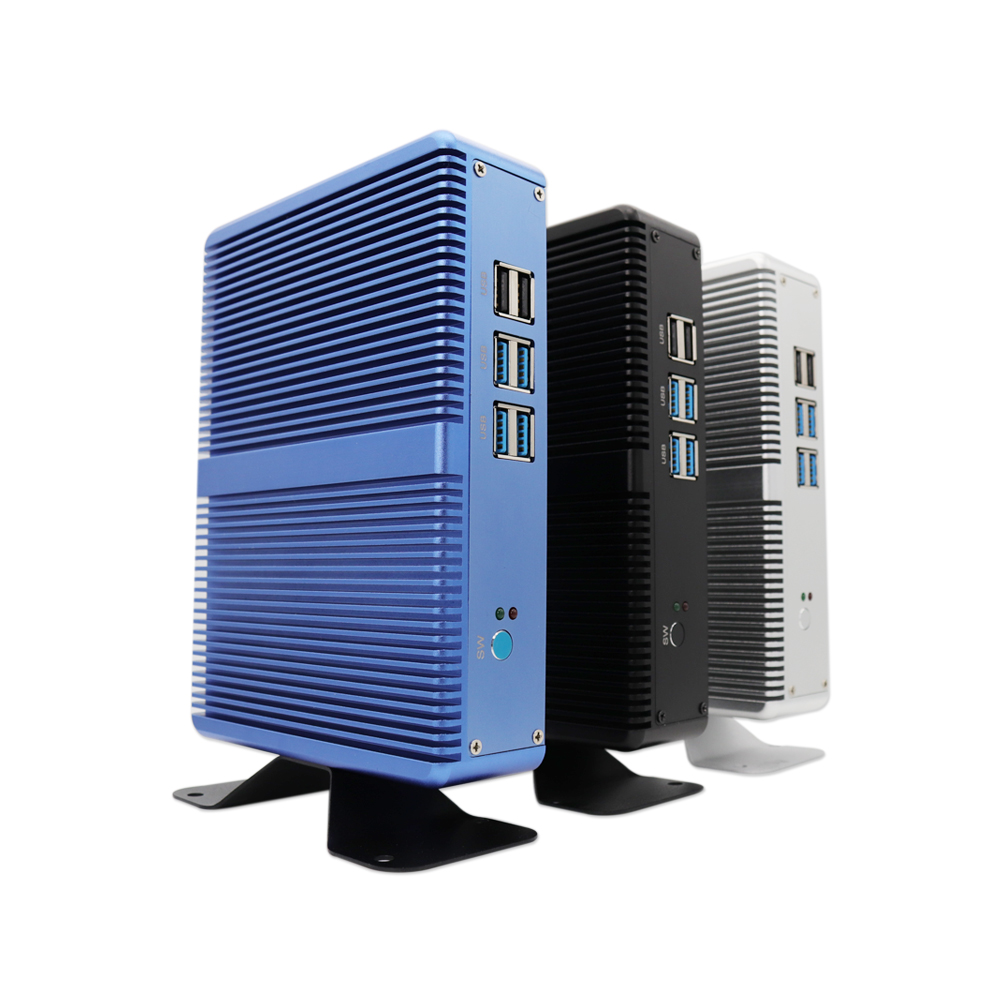
Our M3 series mini pc
computer, the case only 173x127x39mm is made of 100% Full Aluminum Alloy
material with high-quality crafts for heat dissipation without a cooling fan
and no any noise, the motherboard is also customized 120x120mm which match with
the case perfectly. Any colors can be customized such as black, silver, blue,
purple, etc, too.
M3 serial is our 2019 hot
selling cheap series fanless mini pc with windows or Linux operating system
pre-installed, lots of onboard processors are available, including the Intel
Celeron 2955u, Intel Celeron N3150, Intel Celeron J1900, Intel Pentium 4405u,
Intel Pentium 4415u, Intel Core i3-4010u, Intel Core i5-4200u, Intel Core
i7-4500u, Intel Core i3-5005u, Intel Core i7-5500u, Intel Core i3-7100u, Intel
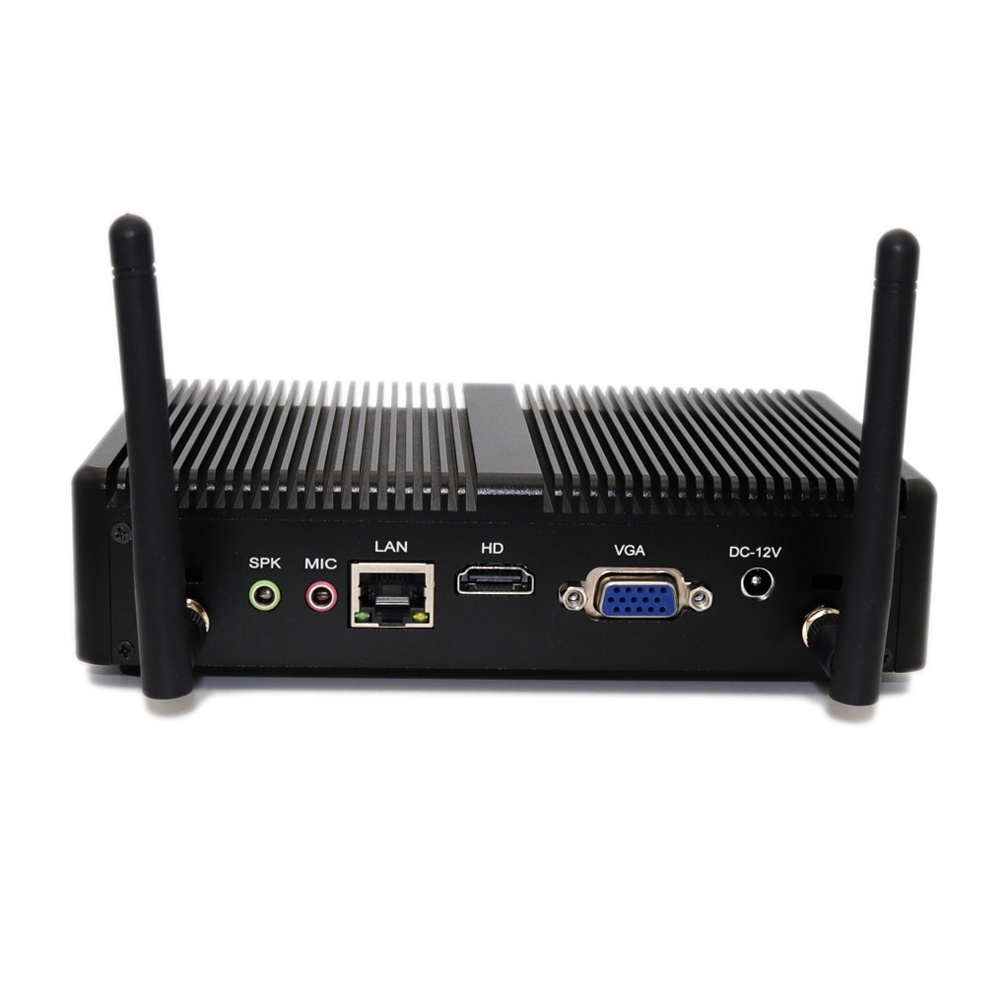
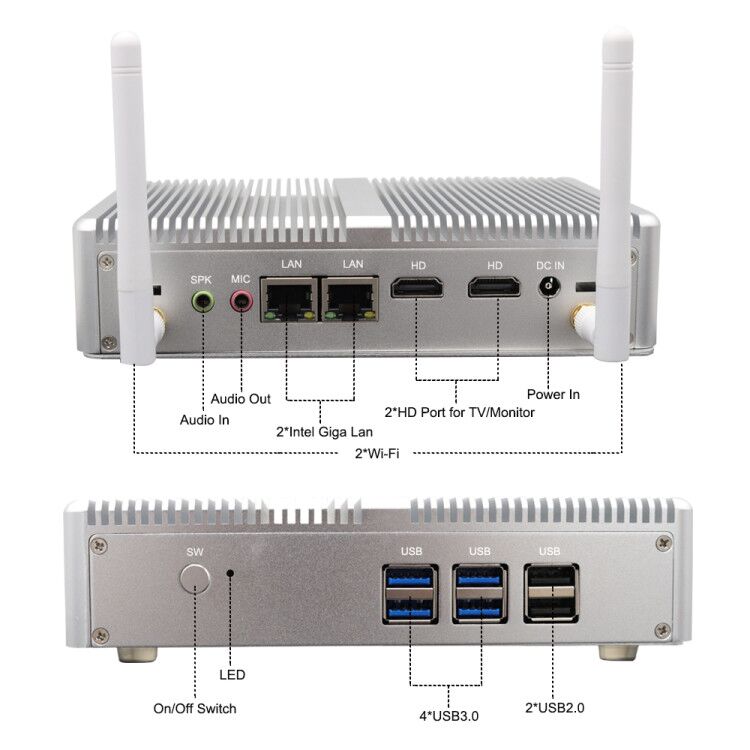
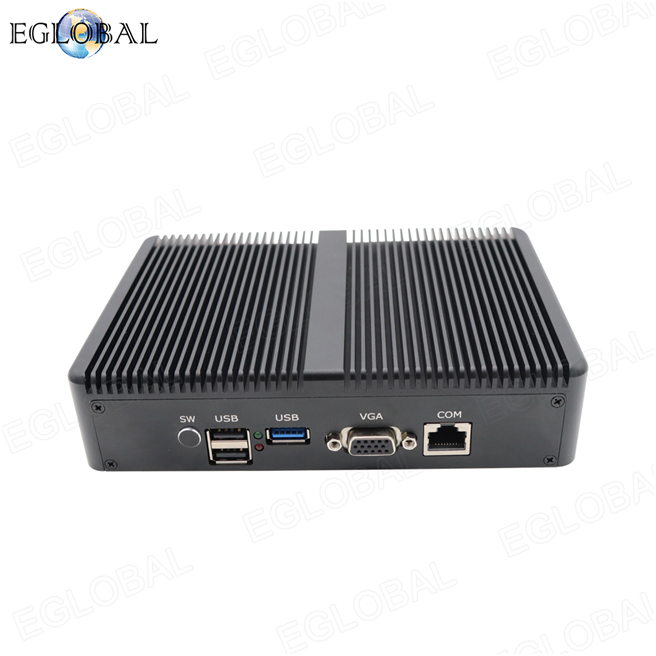
Core i5-7200u. Also the interface also can be optional. VGA, HDMI, LAN, MIC,
SPK, USB rich ports on the M3 series mini pc . If you need 2 RJ45 Gigabit LANs
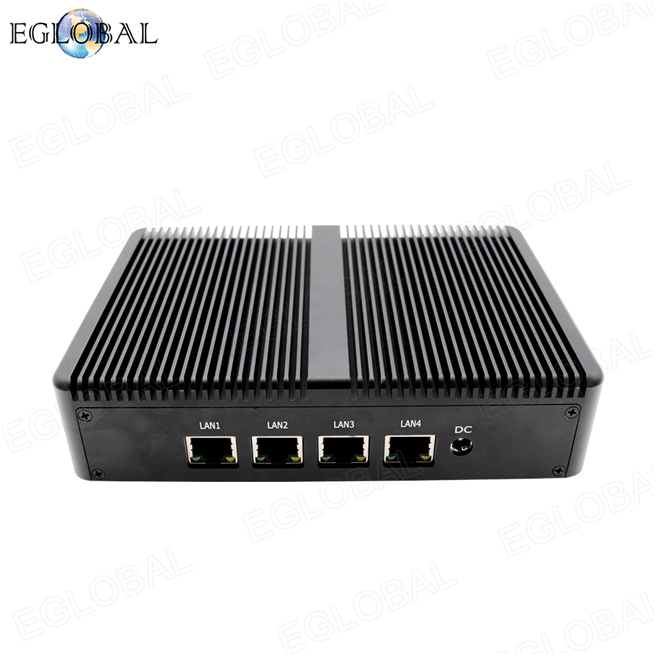
and 2 HDMI ports, mini pc M3-N3150L can satisfy your needs. New arrival fanless
mini computer M3-J1900L4 with 4 RJ45 Gigabit LAN ports, VGA, RJ45 COM, USB
ports can work as a router.
The M3 series mini pc with
two Kensington Lock holes on the case can protect the portable device with a
Kensington lock. The lock is inserted through the hole with a cable that can be
attached around a table leg or another secure location, so no one can take away
with the mini pc while you are away, make the computer is safe in school,
office, hotel or other applications.
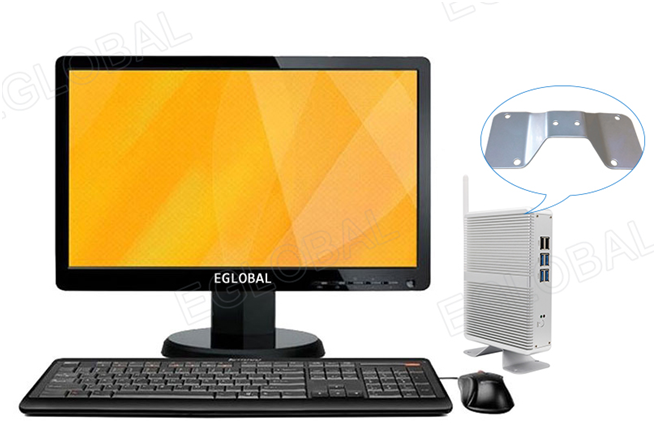
A metal bracket comes with
the mini pc as default accessories into the each package box that fix the
bracket using two screws to let the computer stand vertically near your
monitor. You also can mount the mini pc back of monitor using the metal bracket
to keep your desk more tidy and save much space on your desk. The mini pc M3 also
can support standard VESA mount fixed back of monitor or TV if needed.
Lots of customers like to
market our mini pc with their own logo. It is easy to make your own logo into
the booting interface of the mini pc , and its case is fit for laser-printing
because there are 3 pieces laser printing machines in Eglobal factory. And the
bottom of the mini pc M3 also can stick your own label. Eglobal can provide
drop shipping service for free if you are willing to sell ” EGLOBAL”
brand at local.
The mini pc M3 is priced from $65 to $175 depending on the configuration. Each month sales volume of M3 serial up to 3K mainly export to the area Africa, India, Chile, America, etc.
Not every EGLOBAL Mini PC Computer support AWAL function, please check with our sales person to confirm before placing the order. Some customers will use AWAL function of EGLOBAL Mini PC Computer, how to setup? Please kindly refer to the following steps and the video link on YouTube: https://youtu.be/ZwVLJQ_BFtQ
1. Press ” Delete ” to enter BIOS
when starting the PC;
2. Select “ Chipset ” and Press “ Enter ” into
“PCH-IO Configuration” ;
3. Select “ Restore AC Power Loss ” and setup
“ Power on ”;
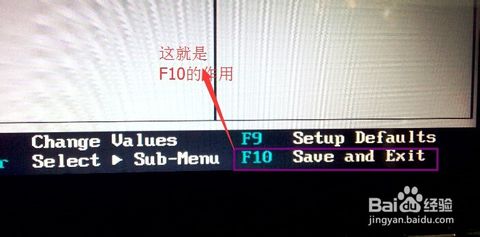
4. Press “ F10 ” and Select “ YES ” to save
the setting and re-start the machine.
Welcome to subscribe to ” Eglobal Technology Co., Limited ” on YouTube or Facebook.
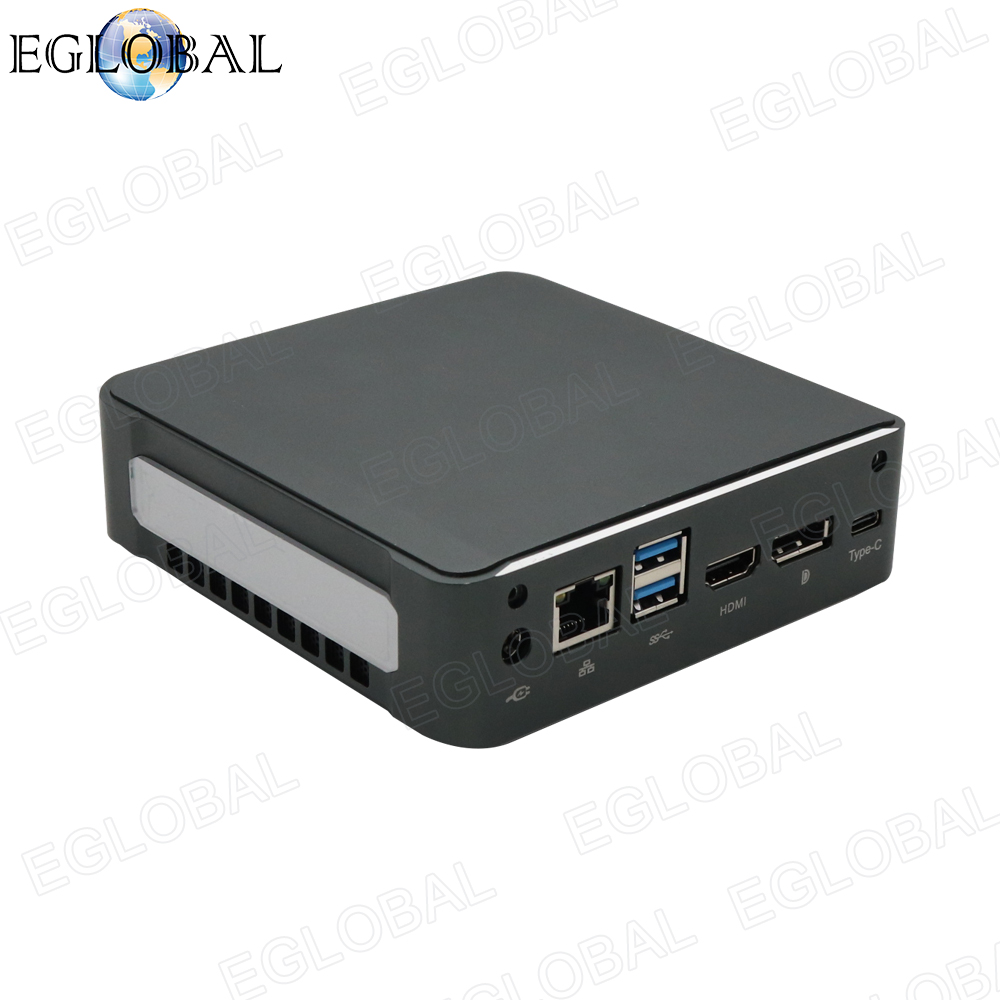
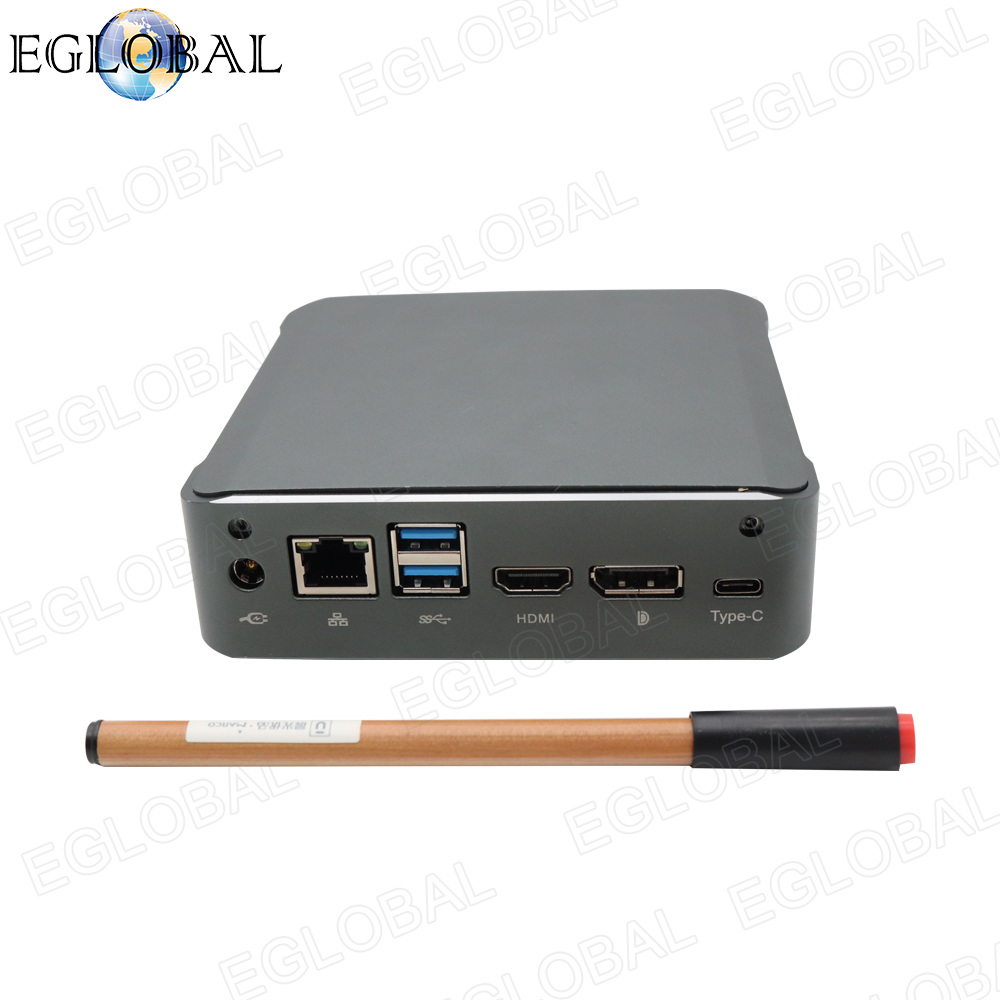
What’s this? Is it a TV box, a Router, a Radio, a DVD, a Gaming box? Oh, no, the product is manufactured by a domestic mini pc computer supplier EGLOBAL called Mini Computer, model number is MU01. Its size is rather smaller than a hand, similar with the common Intel NUC, product dimension of the mini pc is only 128x128x38mm and net weight is only 0.8kg. You can take it here and there in your pocket so that we usually call it as ” Pocket PC”.
MU01 is a powerful mini PC although its size is so tiny with entertainment, gaming, and productivity features, including a 100x100mm customizable board that is ready to accept the memory, storage, and operating systems that you want. Ready to use coming with Windows 10 OS as a complete Mini PC.
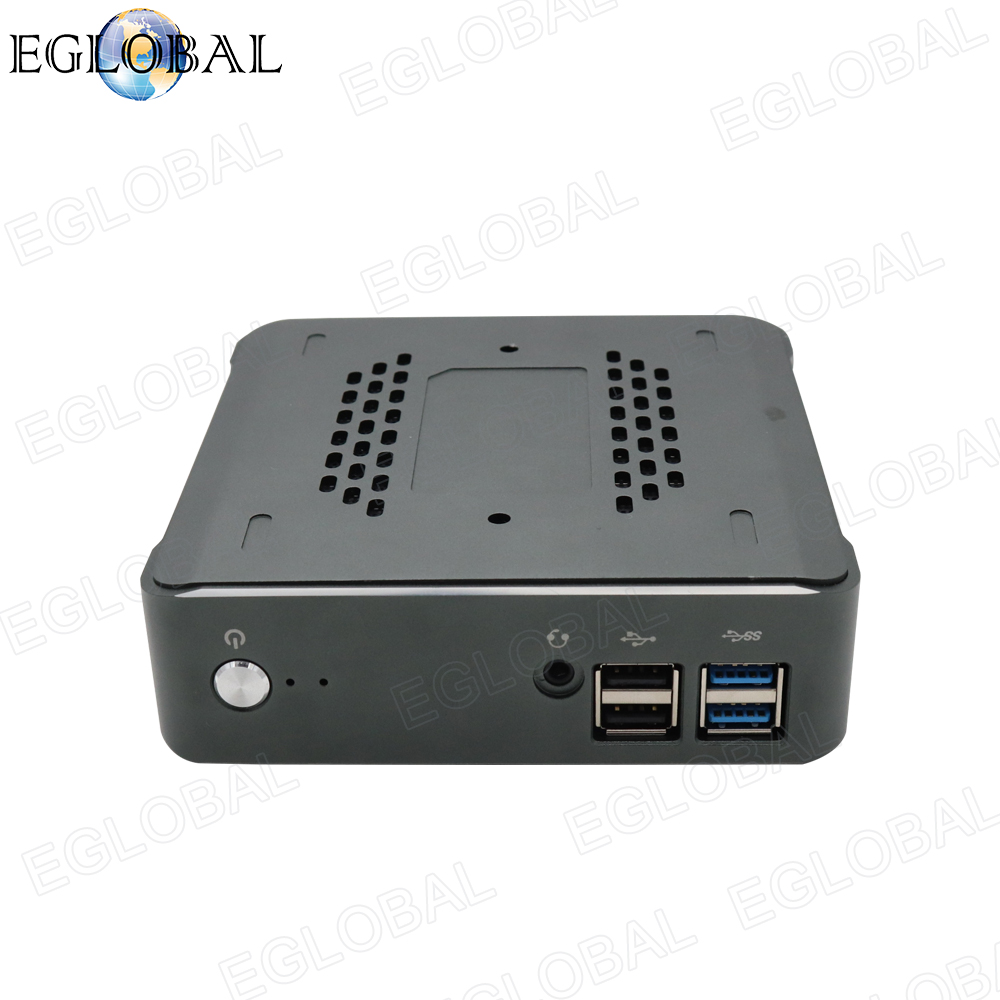
The system MU01 is covered by 95% Aluminum Alloy material for cooling, also assembled with a silent copper fan as heat-sink for 7×24 hours stable performance. There are 4 types of CPUs onboard for your options: Intel core i7-8565u, Intel core i5-8265u, Intel core i3-8145u and Intel Pentium Gold 5405u, using Intel Whiskey Lake chipset and Intel® UHD Graphics, but low consumption TDP only 15W save much energy and more eco-friendly. Meanwhile the mini pc MU01 supports 2xDDR4-2400 1.2V Non-ECC laptop ram slots up to 64GB and 1xM.2 PCIE*4/SATA3.0 SSD(22×80)+1×2.5” 7.0mm SATA HDD/SSD.
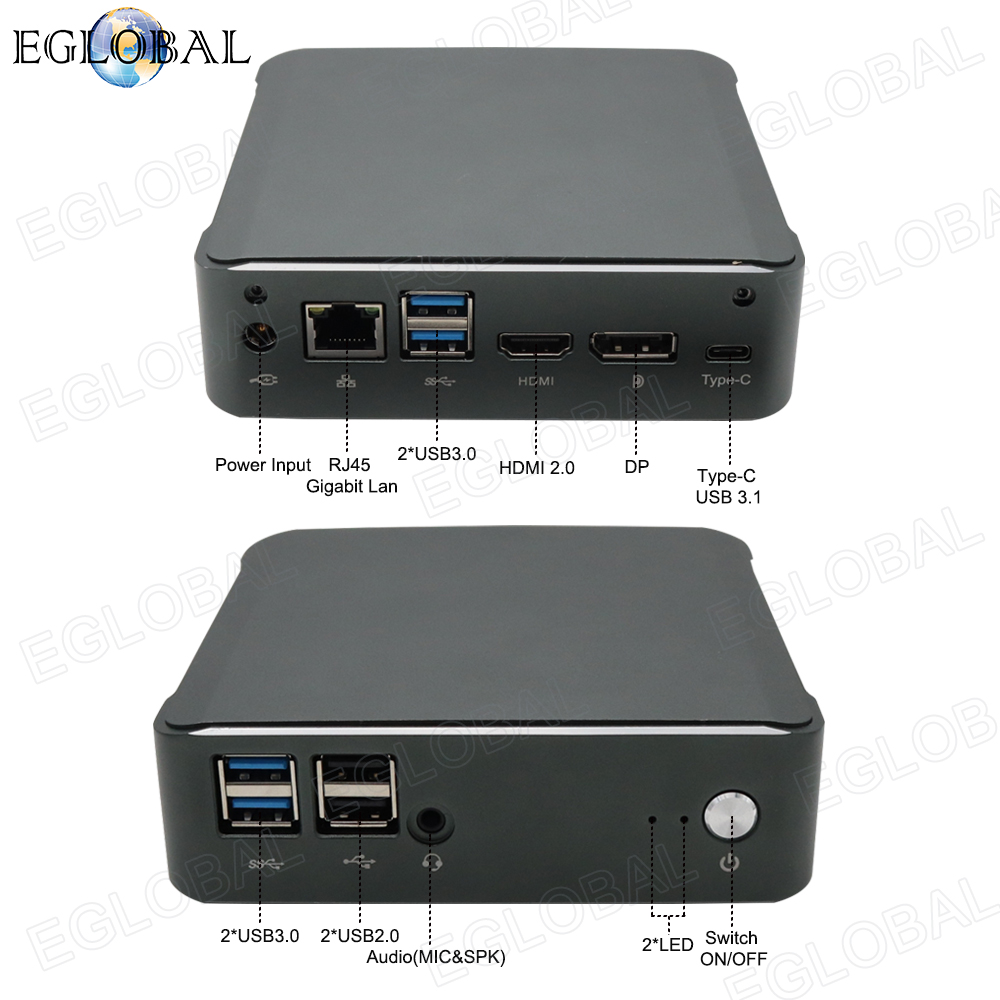
How to connect the monitor or TV? The mini pc MU01 is with HDMI2.0+DP 4K@60Hz dual display ports which can let you enjoy movies more smoothly. When you use it at home, if there is no network cable although the system with a gigabit LAN port, don’t worry, the mini pc is with one M.2 NGFF slot for Wi-Fi & Bluetooth module to connect network through wireless signal. The Pocket PC MU01 has one Type-C USB3.1, 4 USB3.0 and 2 USB2.0 to use more equipments.
In order to keep your desk
more tidy and save much space, the mini pc MU01 can be mounted back of monitor
or TV by free VESA bracket coming with the computer as this set into the each
package box.
Lots of customers like
marketing by their own logo. It is easy to make your own logo into the booting
interface of the system MU01, and its surface is fit for laser-printing. By the
way, the bottom of the mini pc MU01 also can stick your own label.
The Eglobal Mini PC Computer MU01 is newest selling, and is priced from $150 to $700 depending on the configuration.
Our mini computers are usually booted from the hard disk, but when some need, it may be set to boot on some peripherals (such as USB flash drive or mobile hard disk). In this case, the boot has a non-hard disk boot, how to going to modify the hard drive to boot?
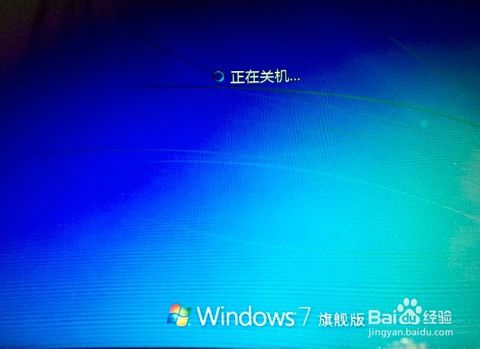
First of all, if we open a mini computer, we need to restart the mini computer at this time. If you don’t have a mini computer, just press the power button. (PS: Try to close all programs, this will minimize the damage to the mini computer)
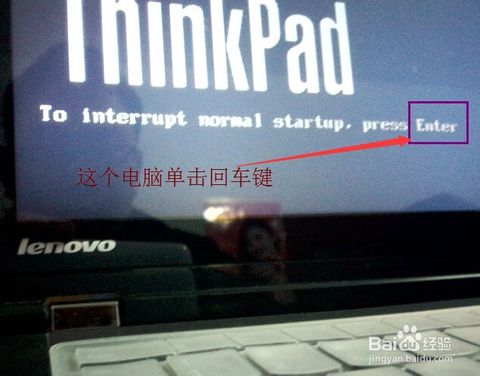
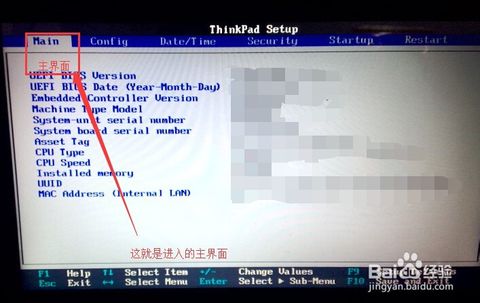
After restarting, you must pay attention to the English of the page on the boot page. At this time, you need to remember to enter the BIOS setting keyboard button (PS: Different computer’s entry BIOS settings are different, you must not press it randomly, according to the boot page to determine.)
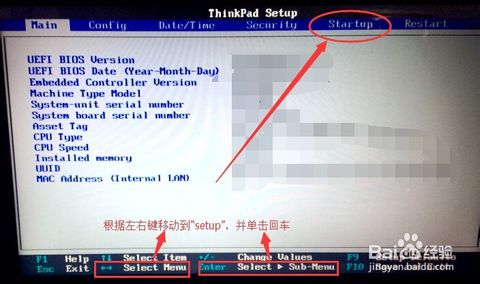
At this point, enter the BIOS setup window, we need to find him “Advanced BIOS (Advanced BIOS function) options”, look carefully, you will find, and then double-click it to enter a new page. Of course, unlike computers, you need to observe them carefully. It is best to check English at any time.
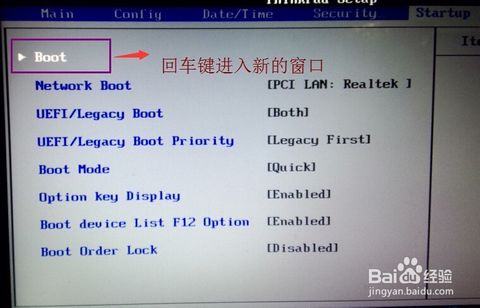
In the new pop-up window, we need to find the “Boot Devlice priorfty” carefully, this time still double-click it to enter the new page. If not, you will need to find the boot, and the Enter key will come out of the new window.
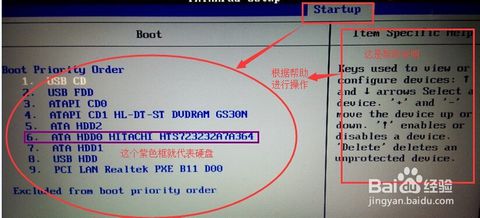
On entering the new page, we can see the three items “1, 2, 3” arranged in order (some BIOS is 1st Boot Device; 2nd Boot Device; 3th Boot Device), which means “the first start” The second item starts and the third item starts. You can look at the picture carefully. (This computer is represented by numbers.)
Once found, we need to modify according to the prompts on the page, set the order to “hard disk – HDD; mobile device is USB; CD-ROM drive is CDROM”. (PS: According to the picture, we can find that the hard disk of this computer is very hdd0, according to the prompt at the bottom of the page and the help on the left.)
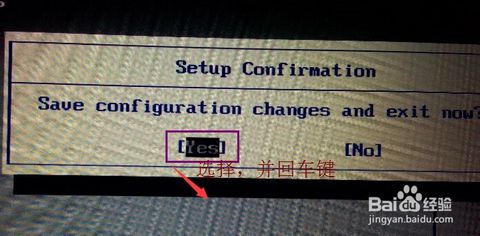
After the setup is completed, we generally use F10 to save (there is also a prompt at the bottom of the PS page). In the pop-up dialog box, we select or enter “Y” to save. At this time, the computer will restart automatically, and our settings will take effect. (This computer can hit the Enter key directly in the yes place.)
Dual Operating System at the time of installation, the two OS are installed in different partitions, and the rear installed OS doesn’t cover the previous OS. And each individual OS has its own partition format that does not cause conflicts. After installing the dual OS, there is a multi-boot selection menu at boot time, you can choose to enter that OS. In the current state, only one OS is running and cannot be switched at will. If you want to enter another one, you have to restart and re-select. Below, we will tell you how to install WIN7 under WIN10.
Key Point: When installing dual OS, it is installed from big to small, that is to install win7 on the basis of win10. If it is reversed, the win7 will be overwritten by win10.
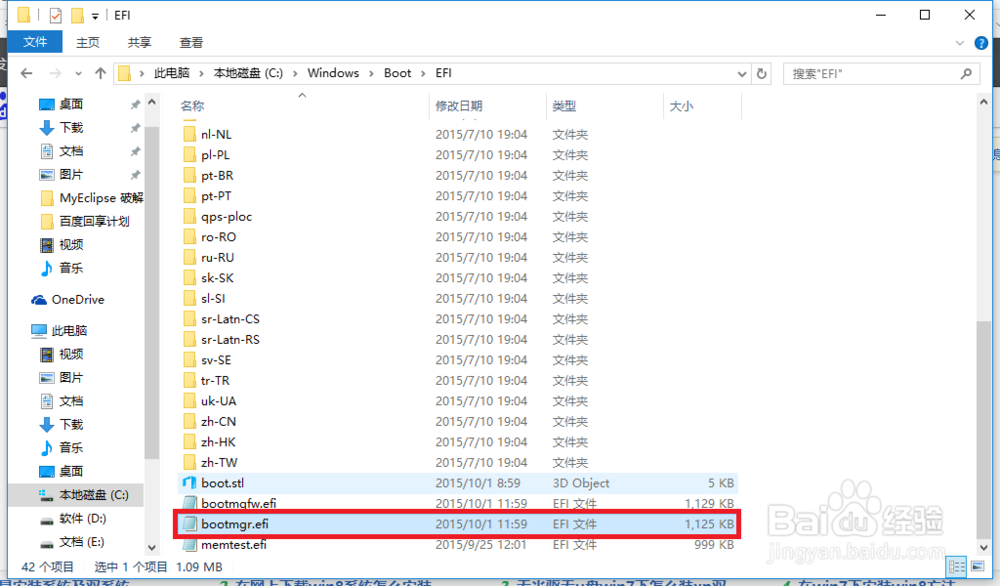
Step 1: Open your win10 OS and prepare your win7 installation package, then the system directory in win10 OS (It’s your C drive) according to: local disk C→wwindows→Boot→EFI→find bootmgr.efi Copy the file.
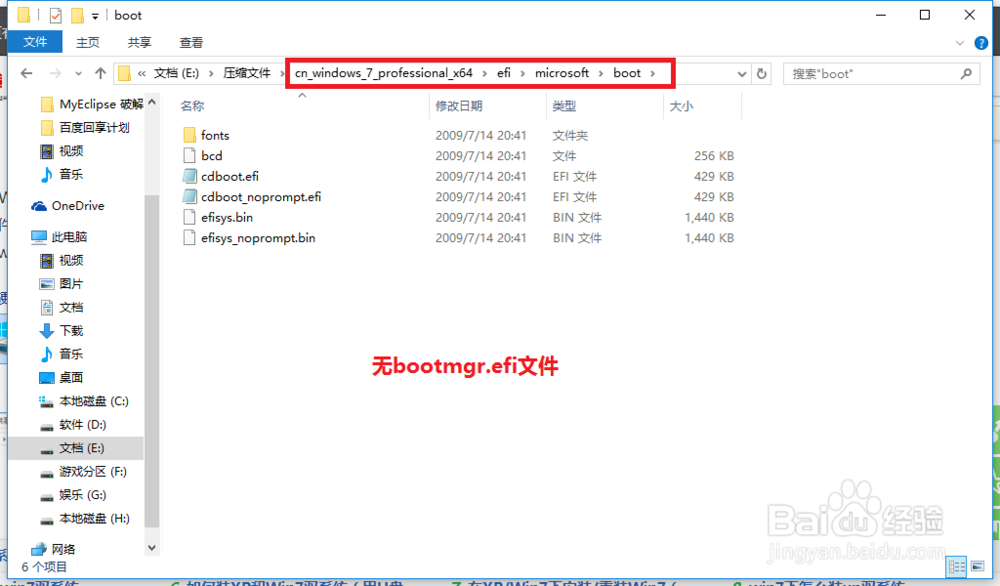
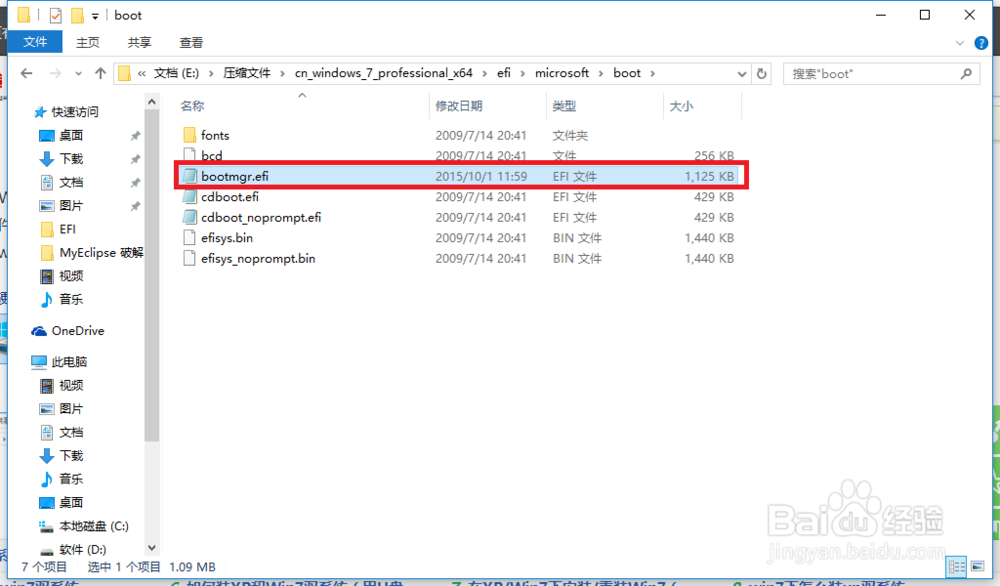
Step 2: In your win7 installation package: efi → microsoft → boot as shown below. No bootmgr.efi file in the folder.
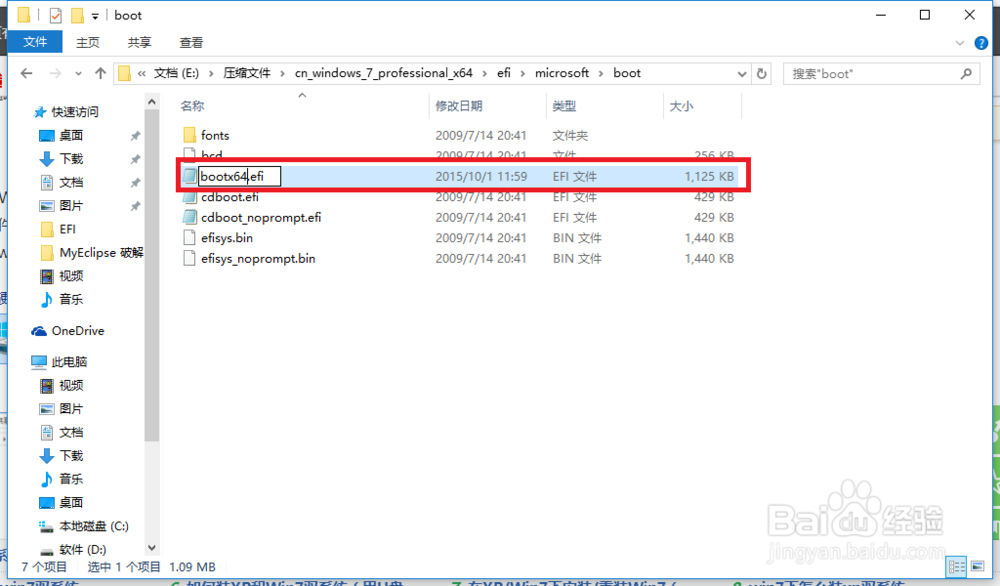
Step 3: Copy the bootmgr.efi in the second step to this directory, and then change the name to bootx64.efi, which is the pre-order step.
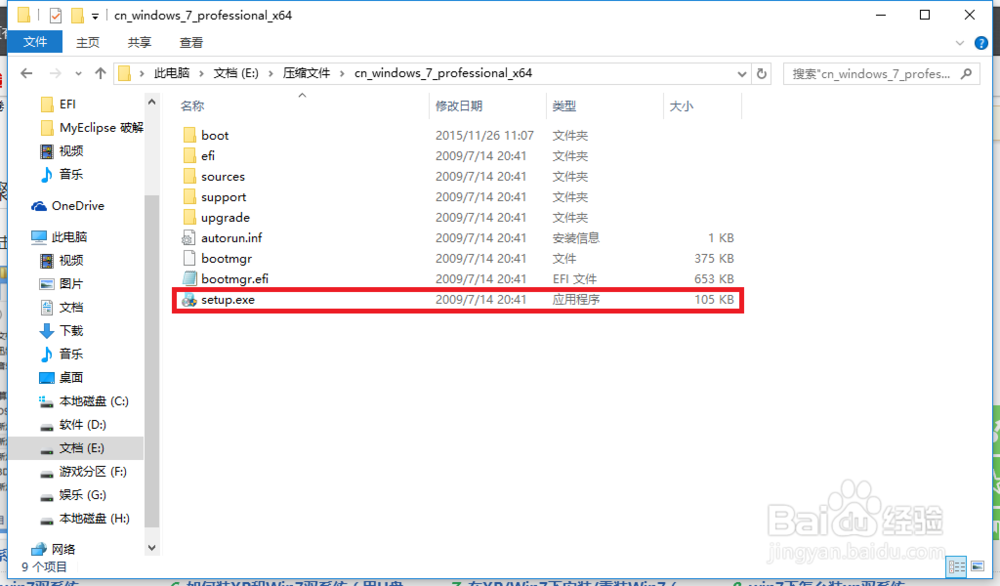
Step 4: Click setup.exe in the win7 directory to install.
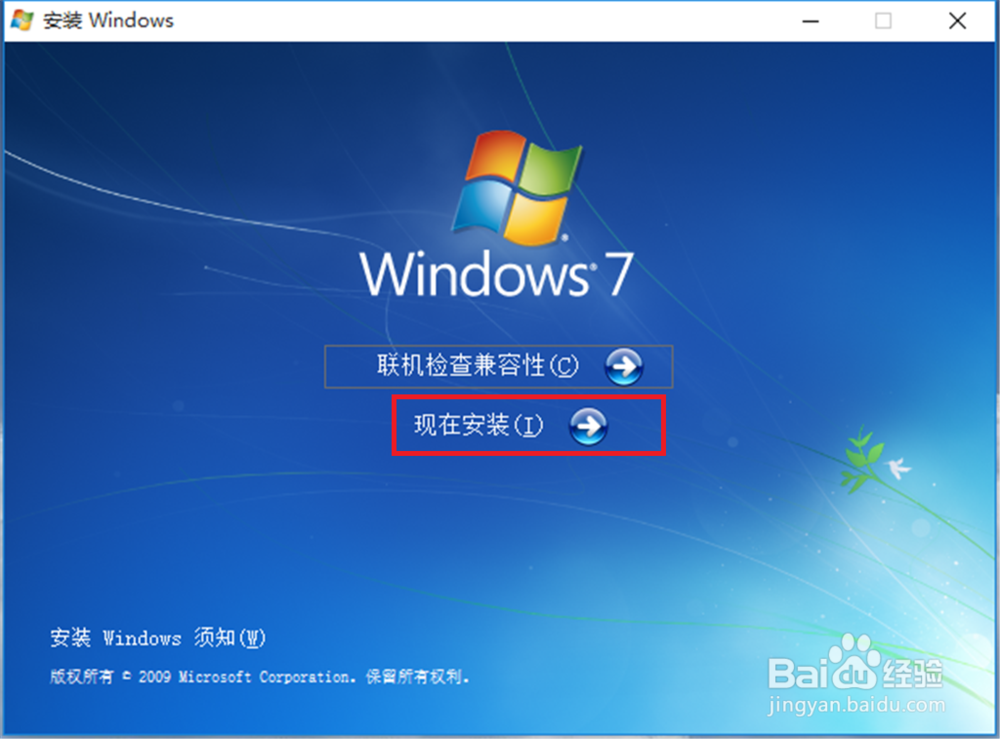
Step 5: Then pop up the following form and choose to install now.
Step 6: As shown below: enter the installation.
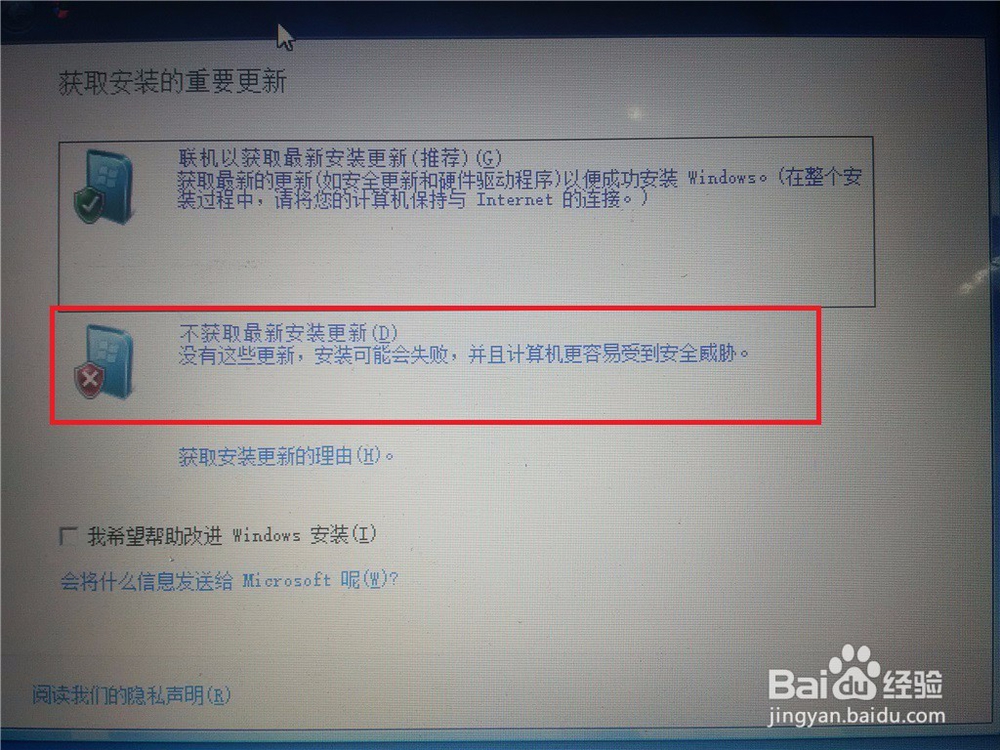
Step 7: Choose not to get the latest installation.
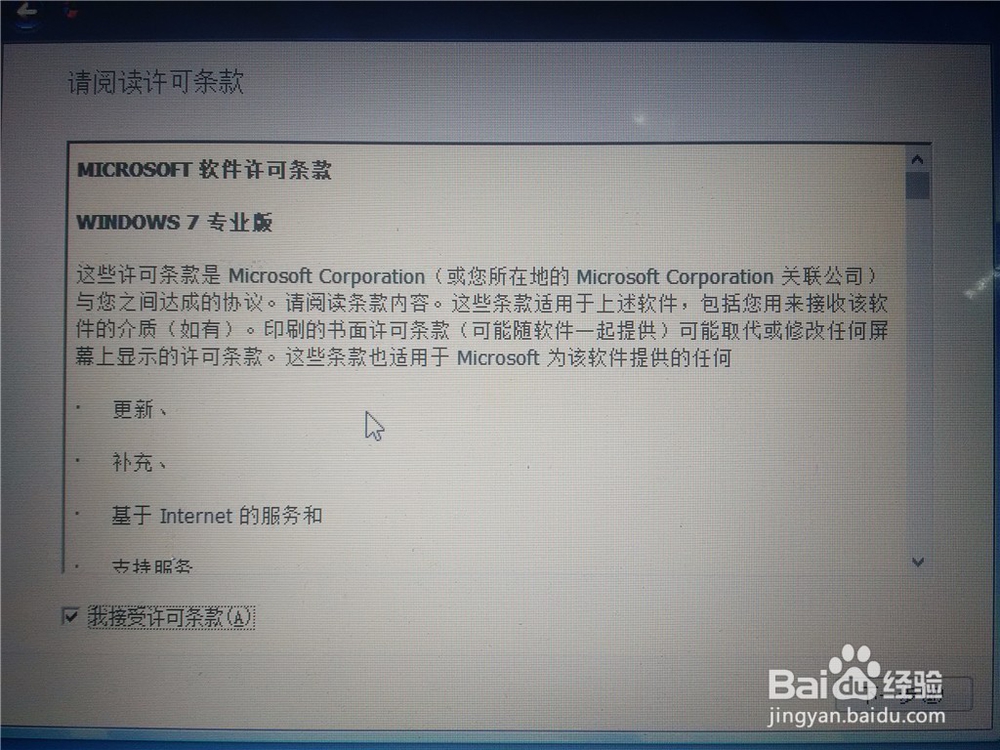
Step 8: Select Accept Terms: Click Next.
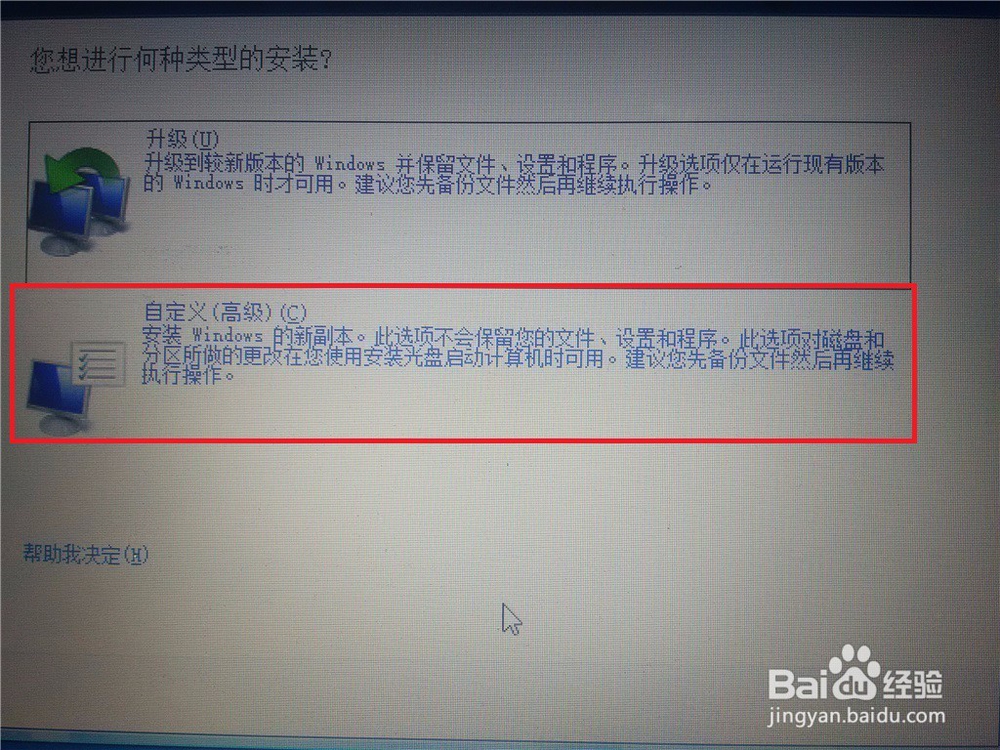
Step 9: Choose a custom installation.
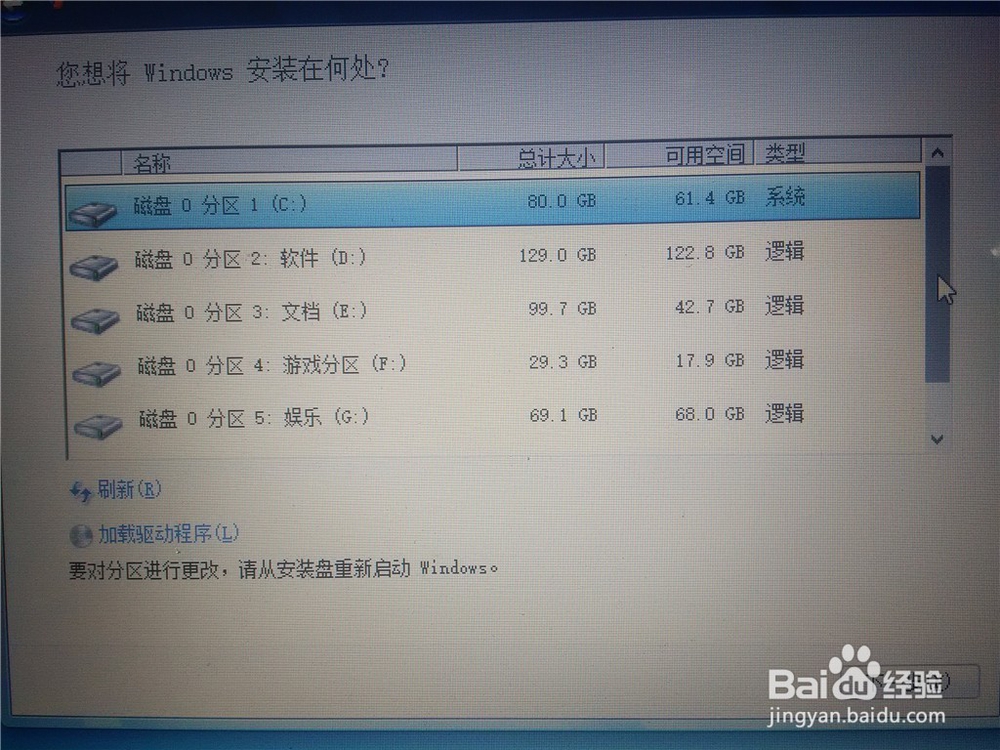
Step 10: Choose your installation directory: Click Next.
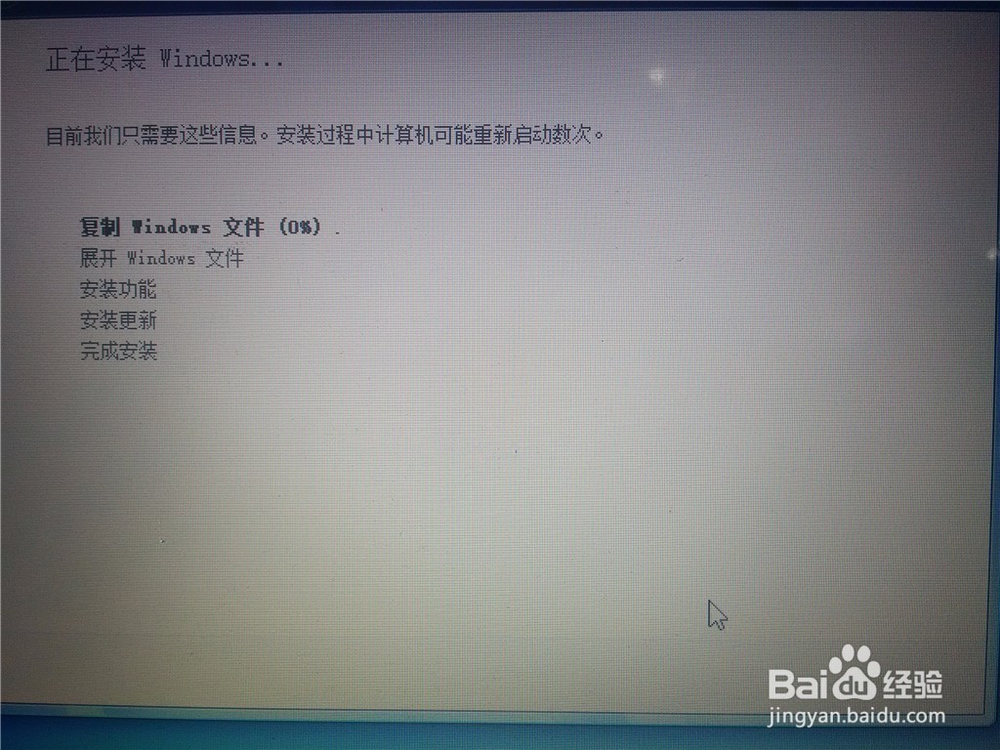
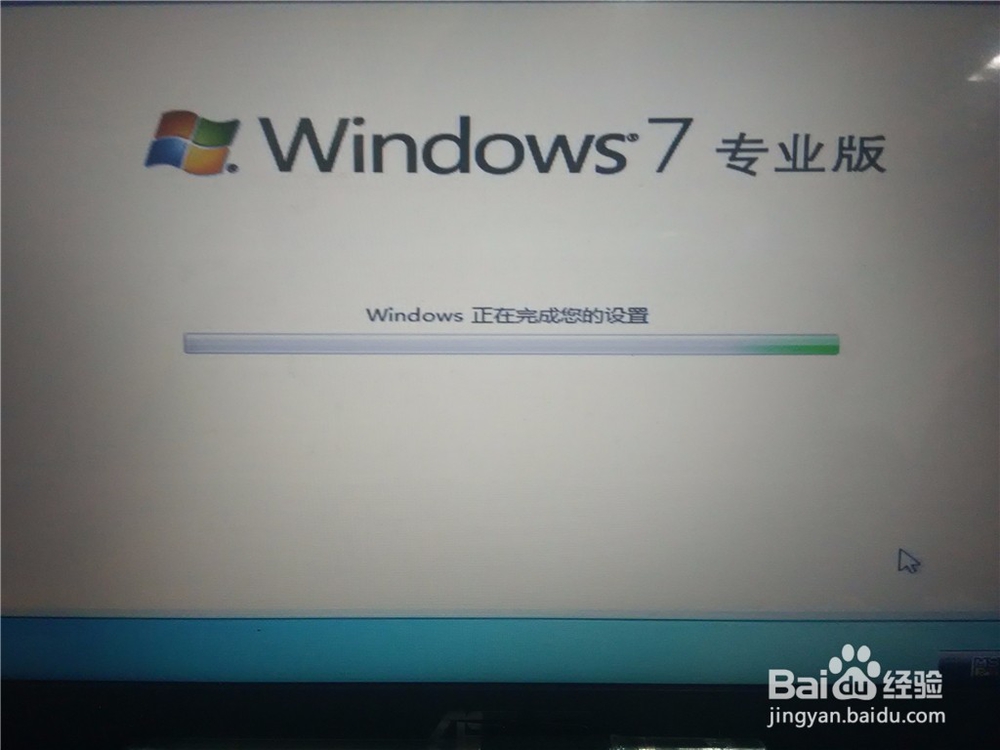
Step 11: Enter the installation, do not perform any operations on your minicomputer during this period, the system may restart several times, but it doesn’t matter.
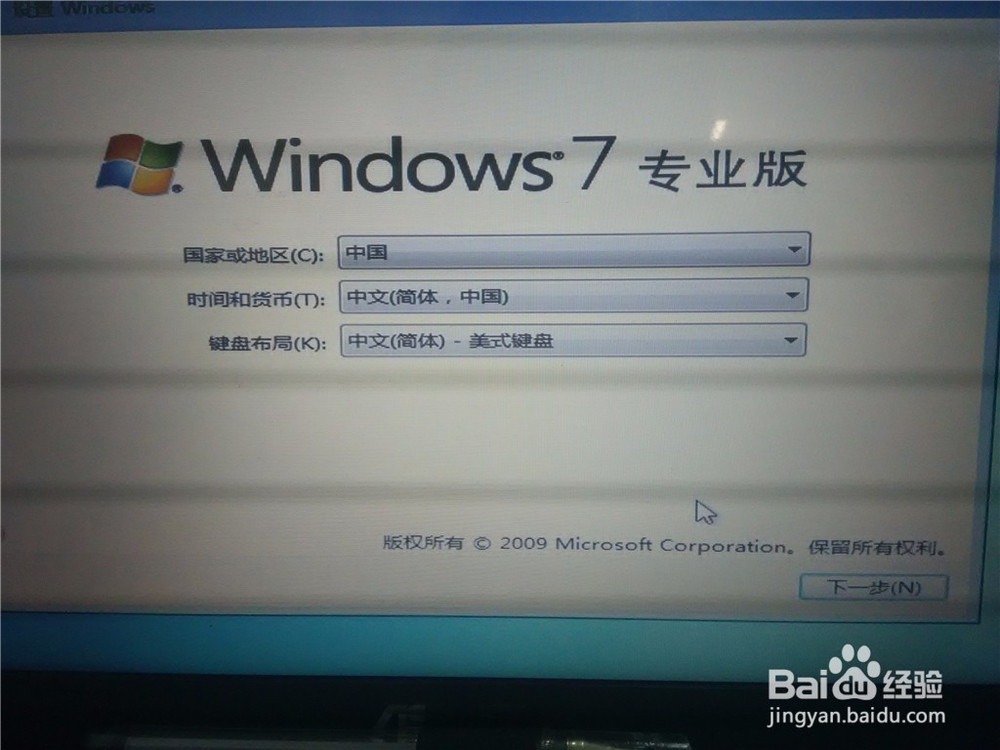
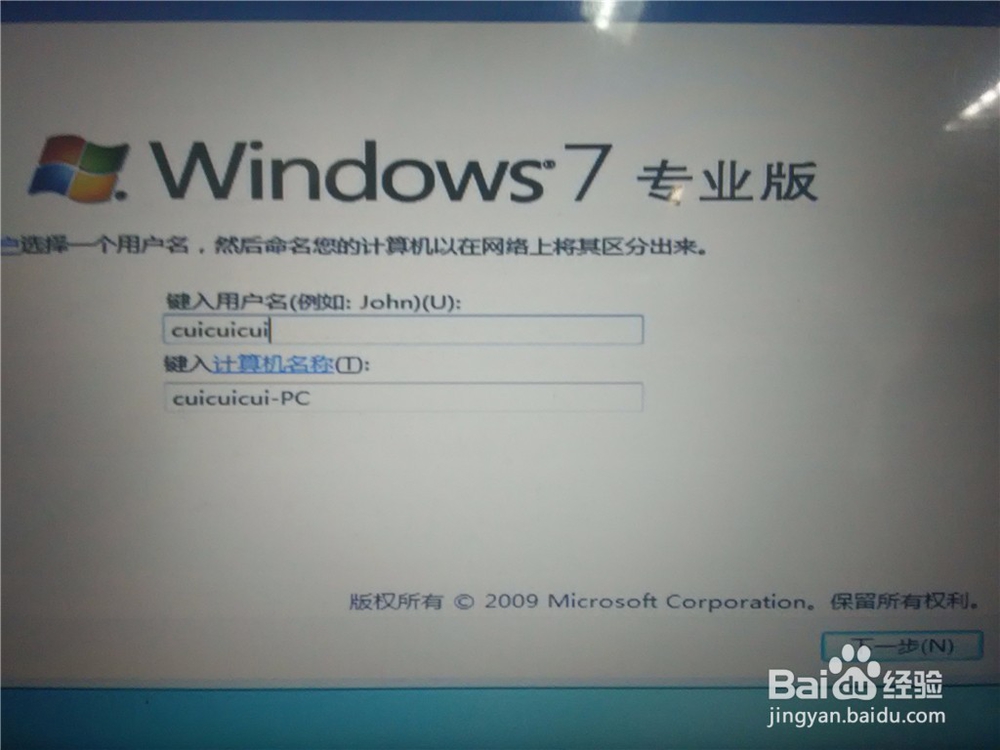
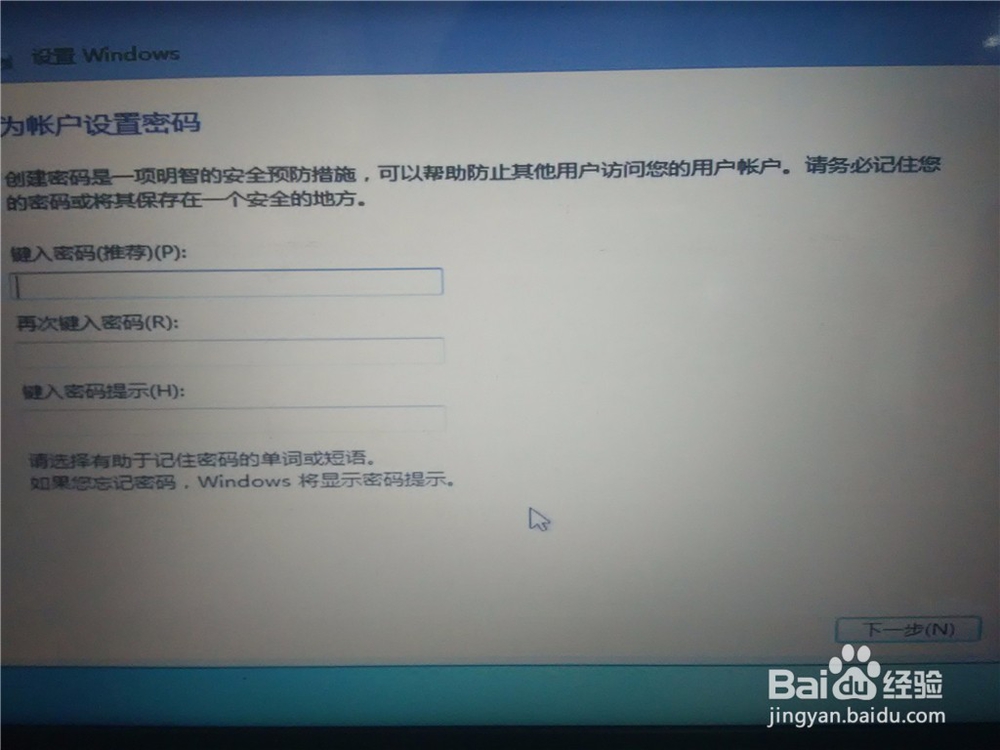
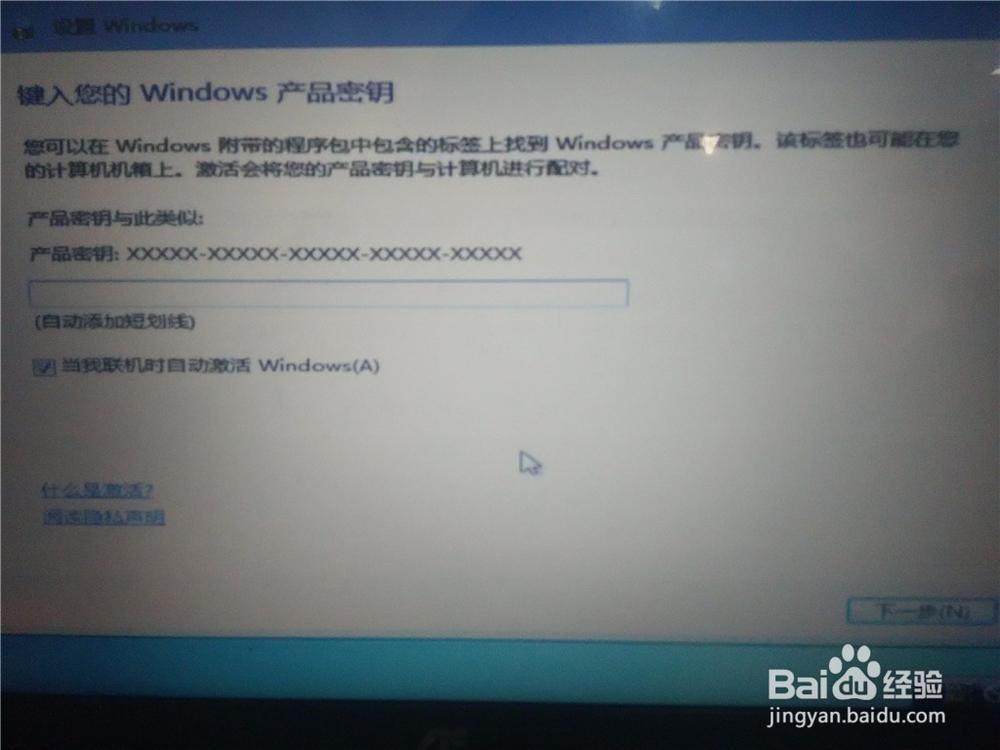
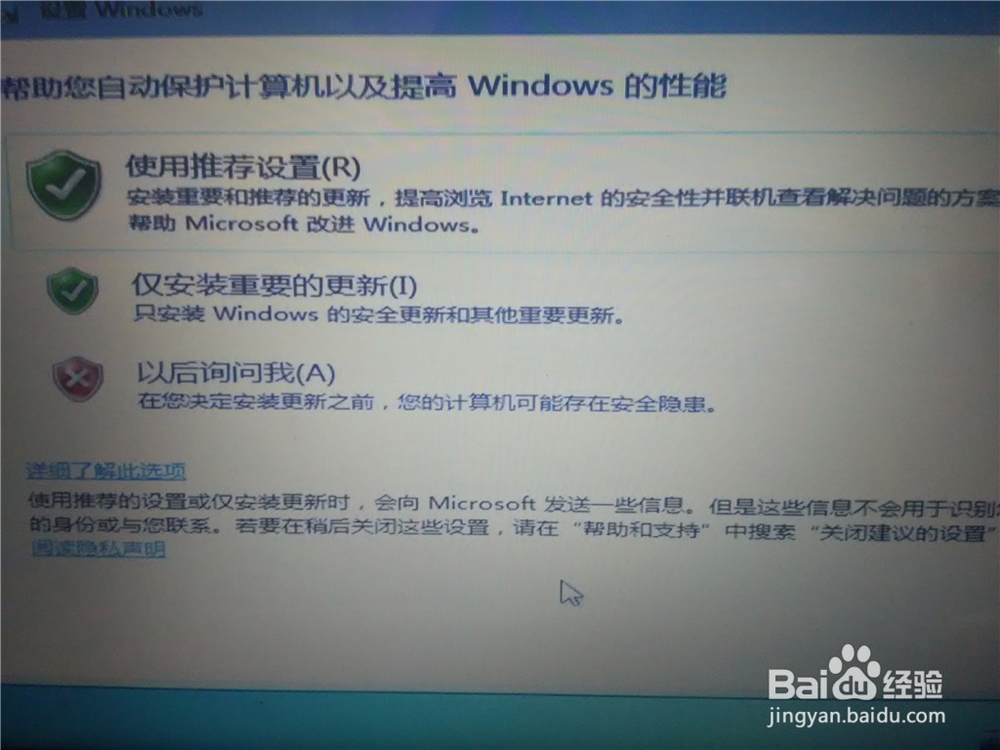
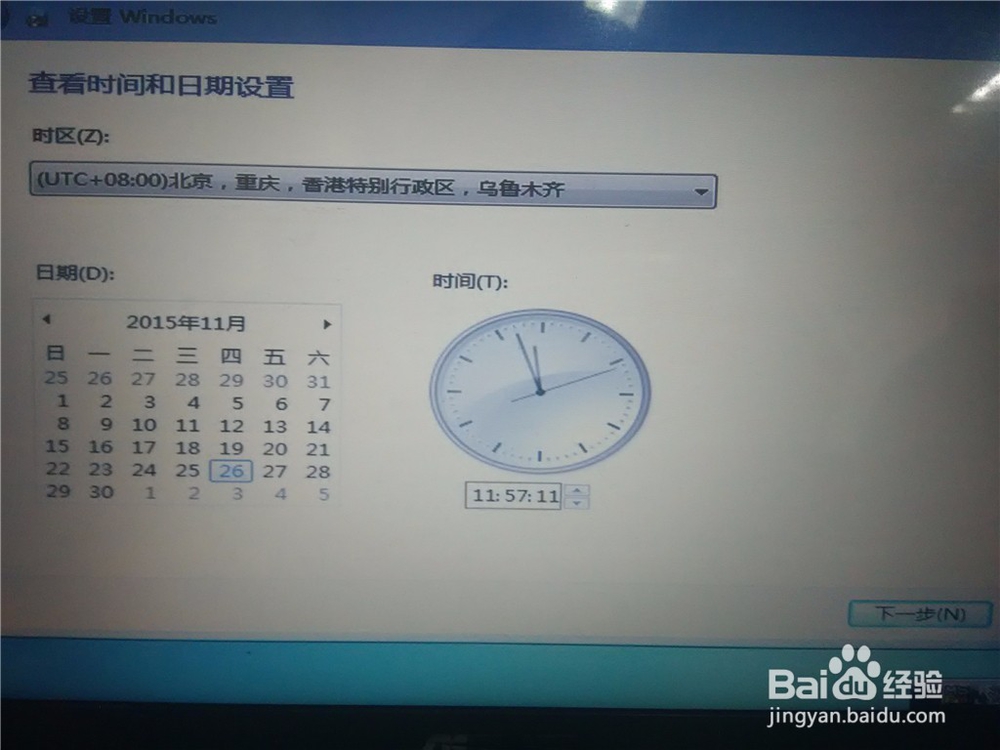
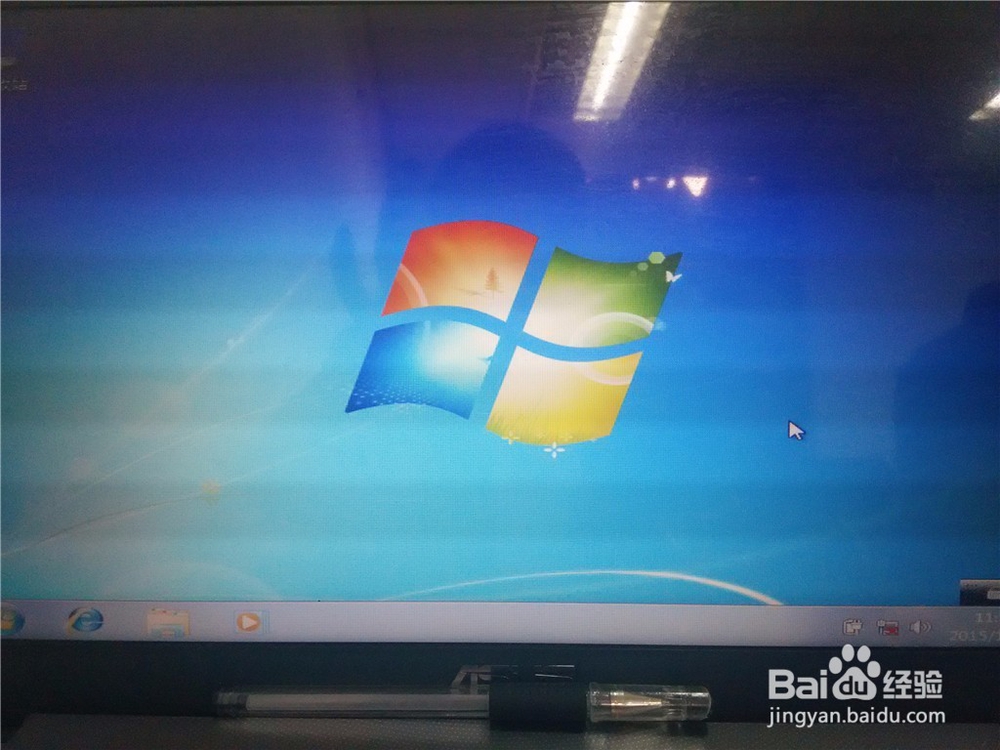
Step 12: After all the installation is completed, enter the settings of the running part of the win7 OS as shown below.
Step 13: After setting, enter win7.
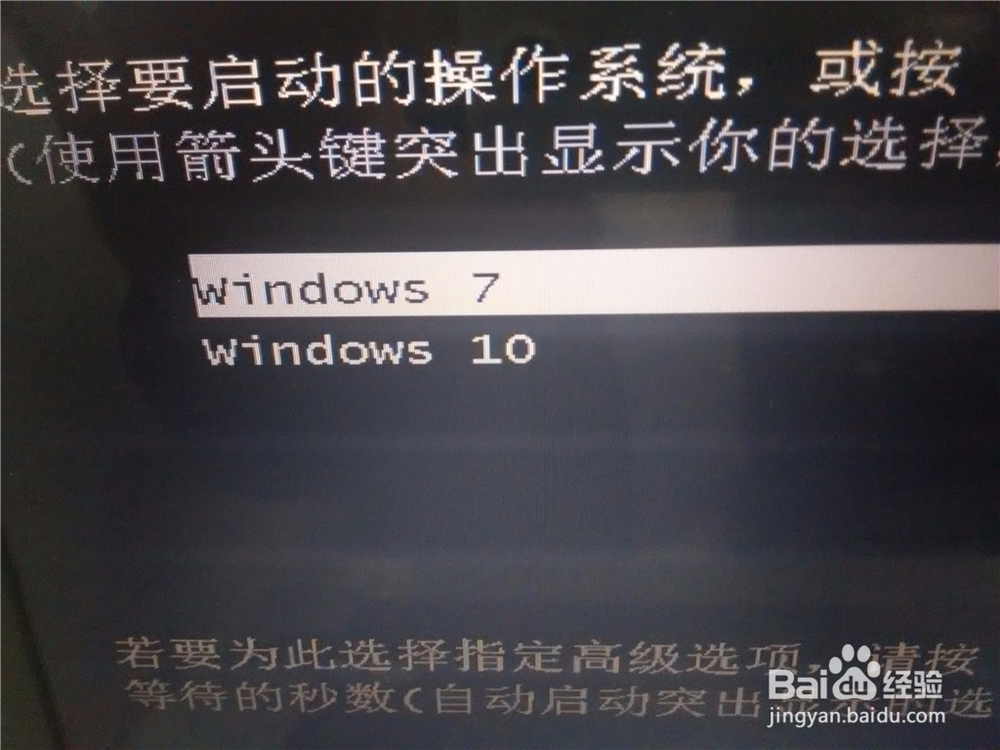
Step 14: Then when your computer restarts, there will be two systems to choose to start.
The above is how to install win7 dual OS operation under win10.