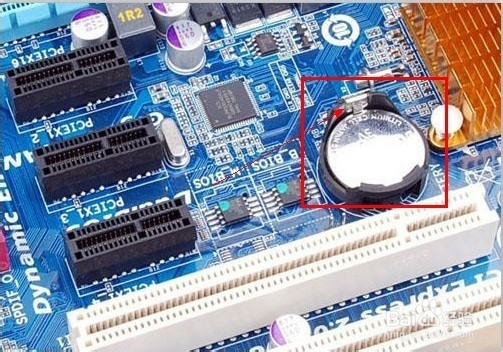
Method 1: Unplug
the main unit power cord, then remove the chassis and remove the BIOS battery
for a few minutes before installing it.
Note: The miniPC power cord must be unplugged, otherwise there is a big chance that it will not be removed.
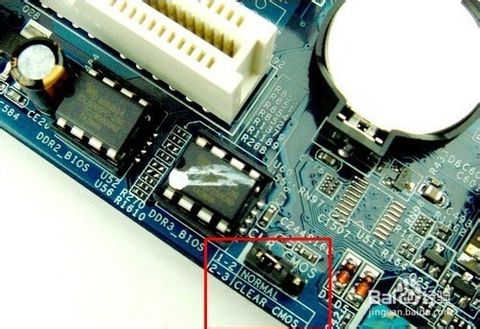
Method 2: Pull the
miniPC power cord and then remove the chassis to find a three-pin jumper near
the BIOS battery. It should be inserted above 1, 2 and jump to 2, 3 for 10
seconds.
Note: The miniPC power cord must be unplugged, otherwise the current loop will destroy the BIOS. The jumper was originally a short circuit.
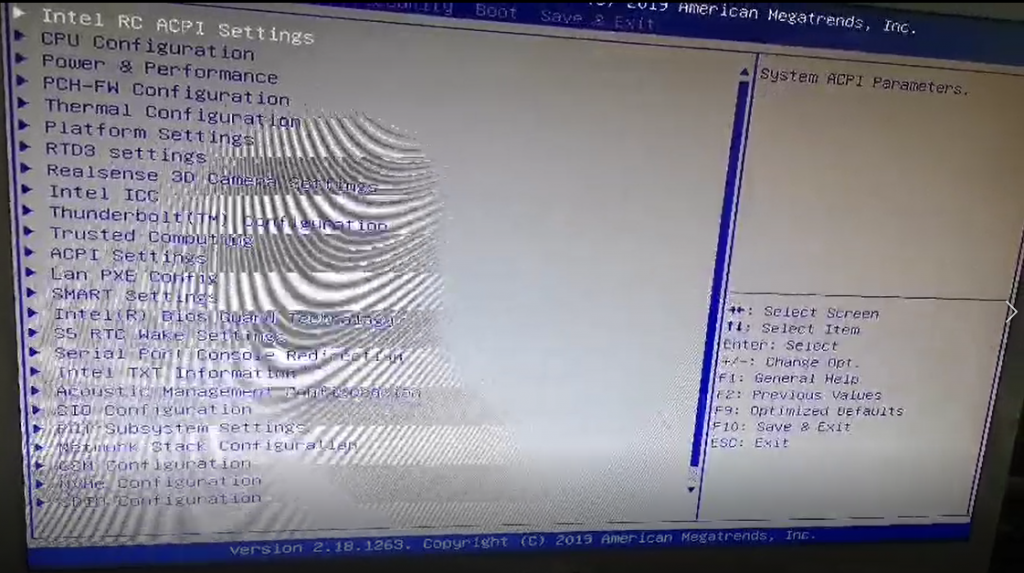
DELL brand host BIOS crack method: Pull the host power cord and then remove the chassis to find the jumper near the BIOS battery. The jumper below writes the password label to pull out the jumper, wait for more than ten seconds and then plug it back. . You can clear the BIOS password.
Note: This method is not only suitable for DELL hosts, because there are many motherboards with the same settings. Only DELL is more commonly used in this method. Previous IBM also liked it, and now like the fourth step.
Lenovo and other brand
host BIOS crack method: pull the host power cord and then remove the chassis to
find a jumper near the BIOS battery. The jumper below writes the COMS label and
pulls out the jumper. Wait for more than ten seconds. go back. You can clear
the BIOS password.
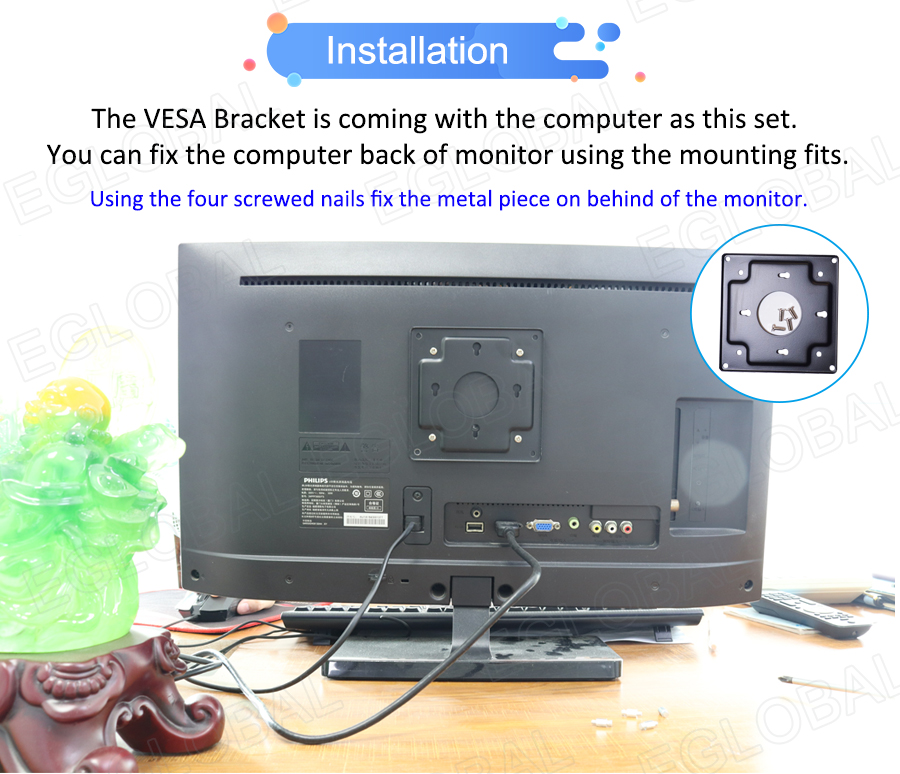
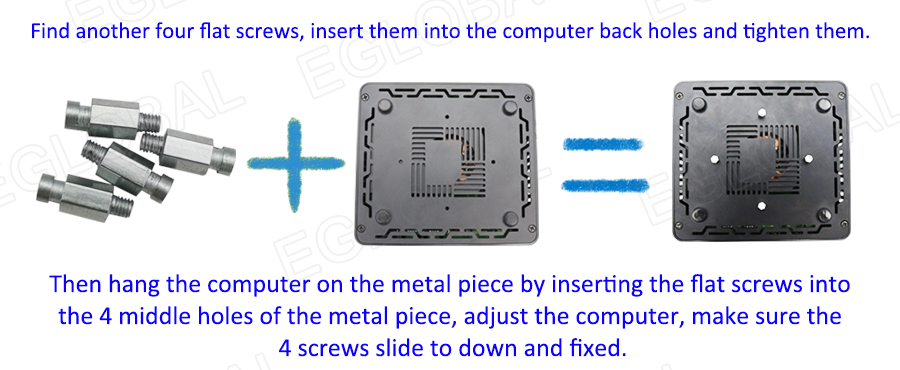
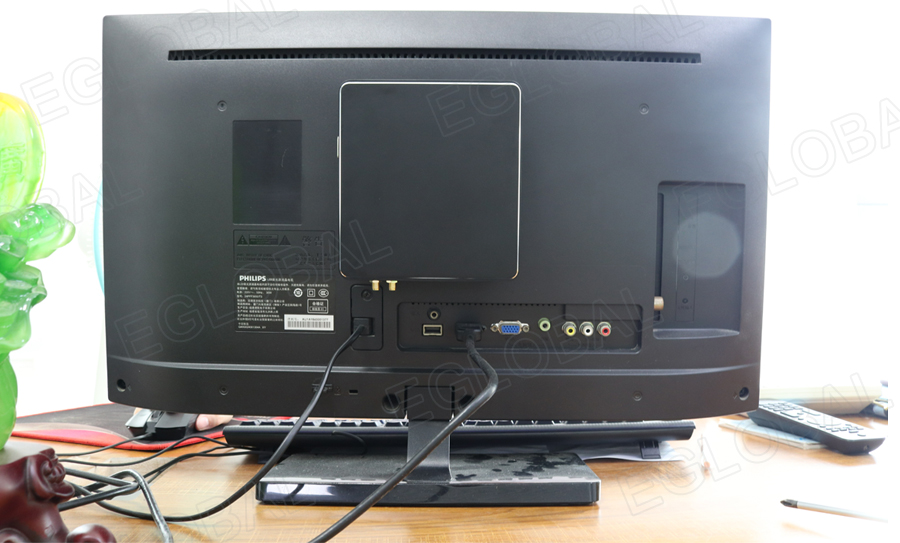
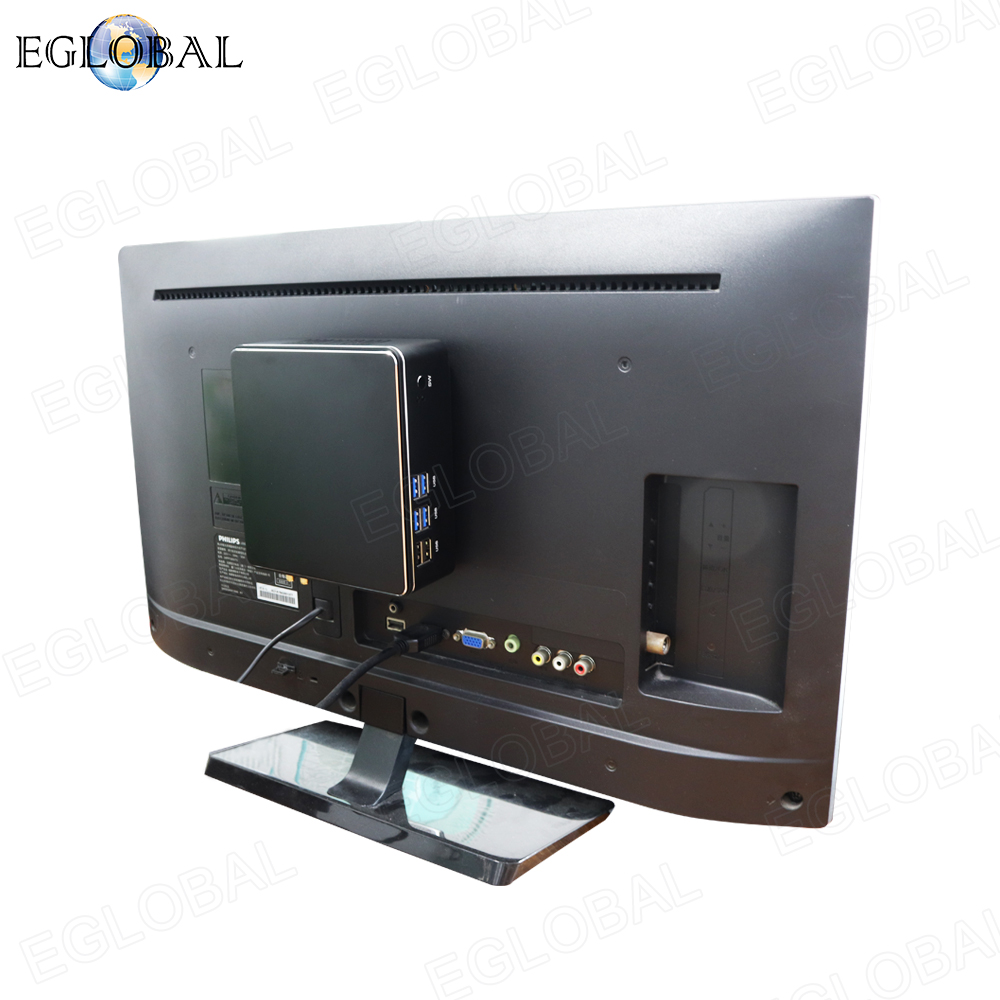
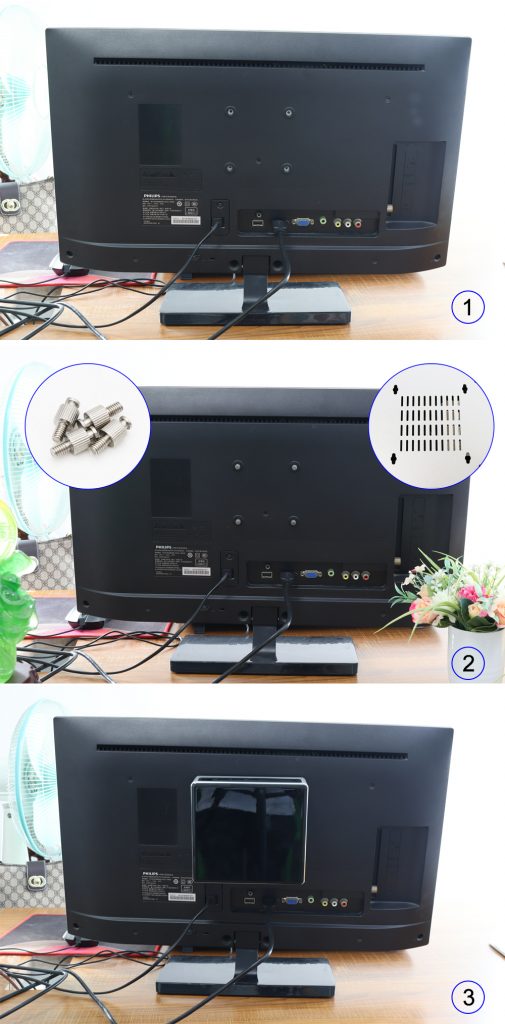
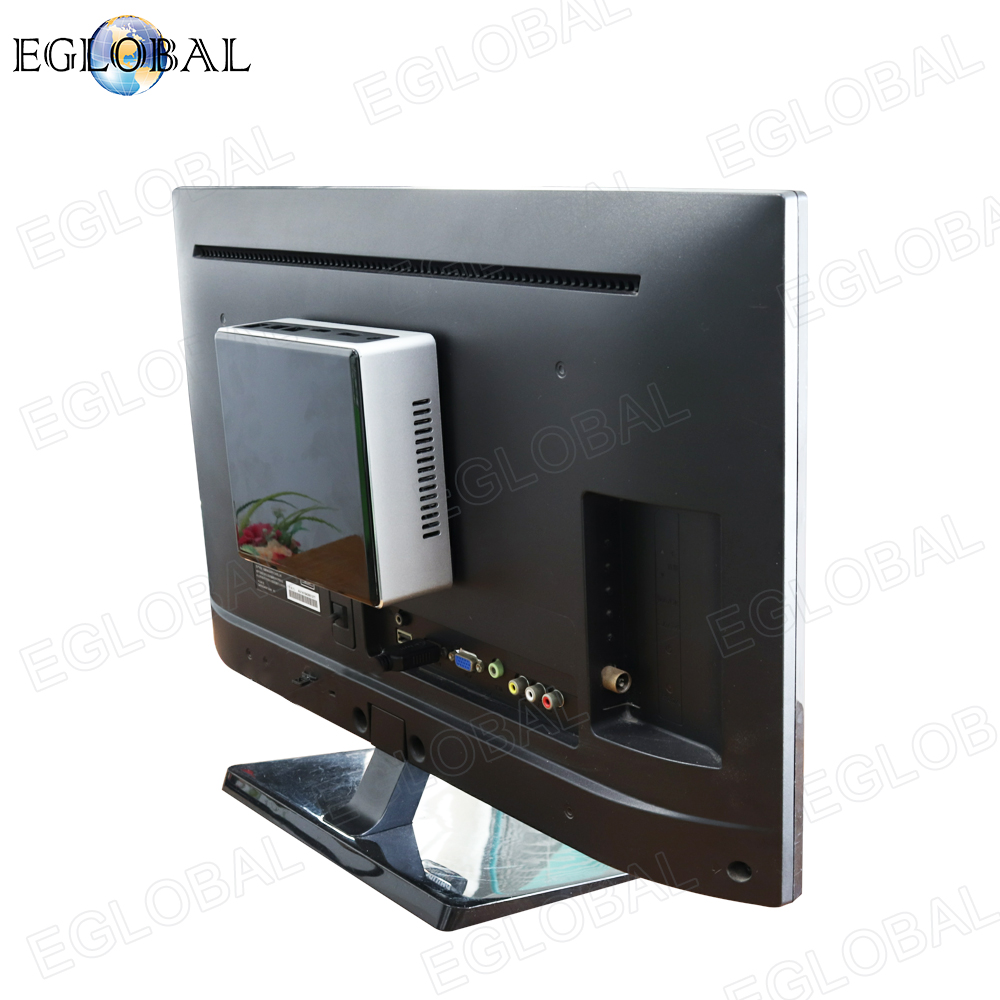
Step1: Have a monitor, a V310 mini pc and four screws ready. Previously, our computer needed a VESA after hanging it on the monitor. Now we can hang it directly behind the monitor without the VESA.
Step2: Screw the screw into the bolt behind the monitor.
Step3: Select the appropriate hanger according to the distance of the bolt.
If you don’t know how to do, please refer to the video.
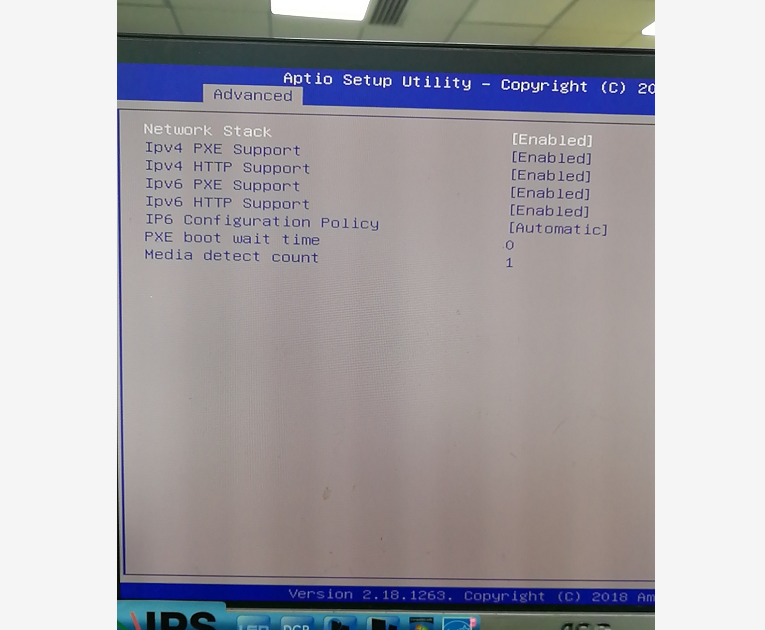
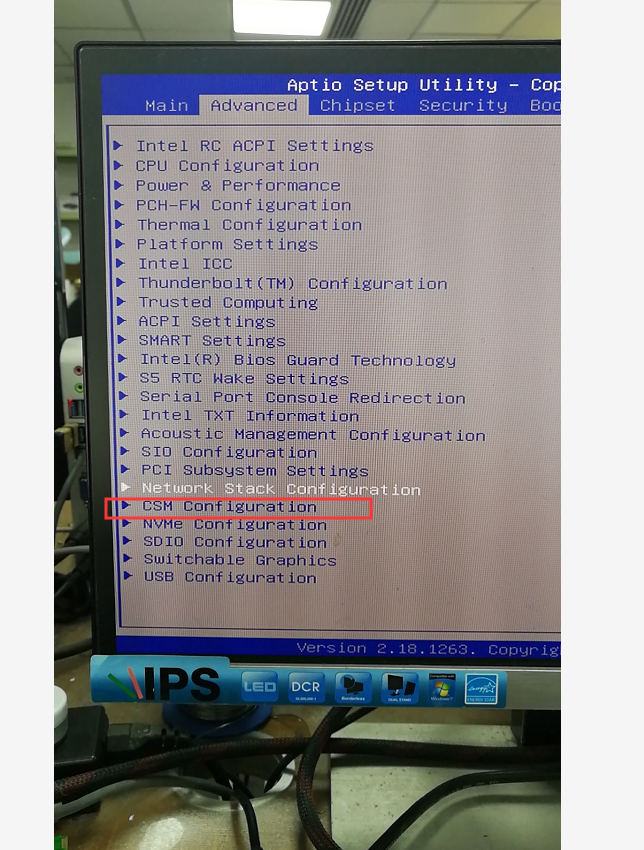
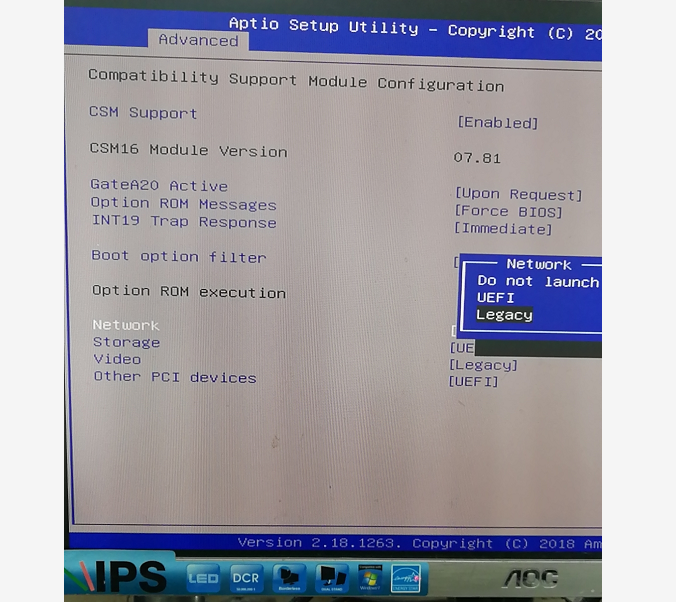
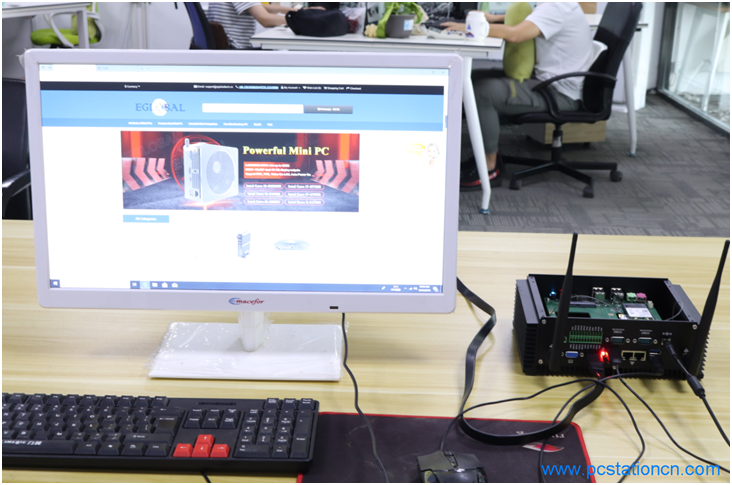
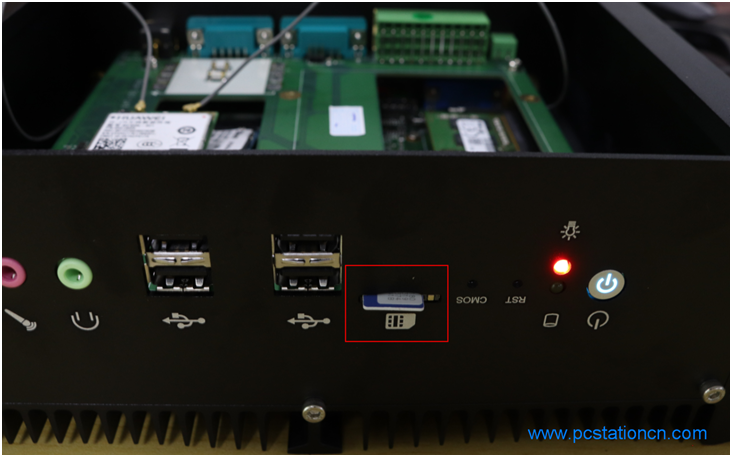
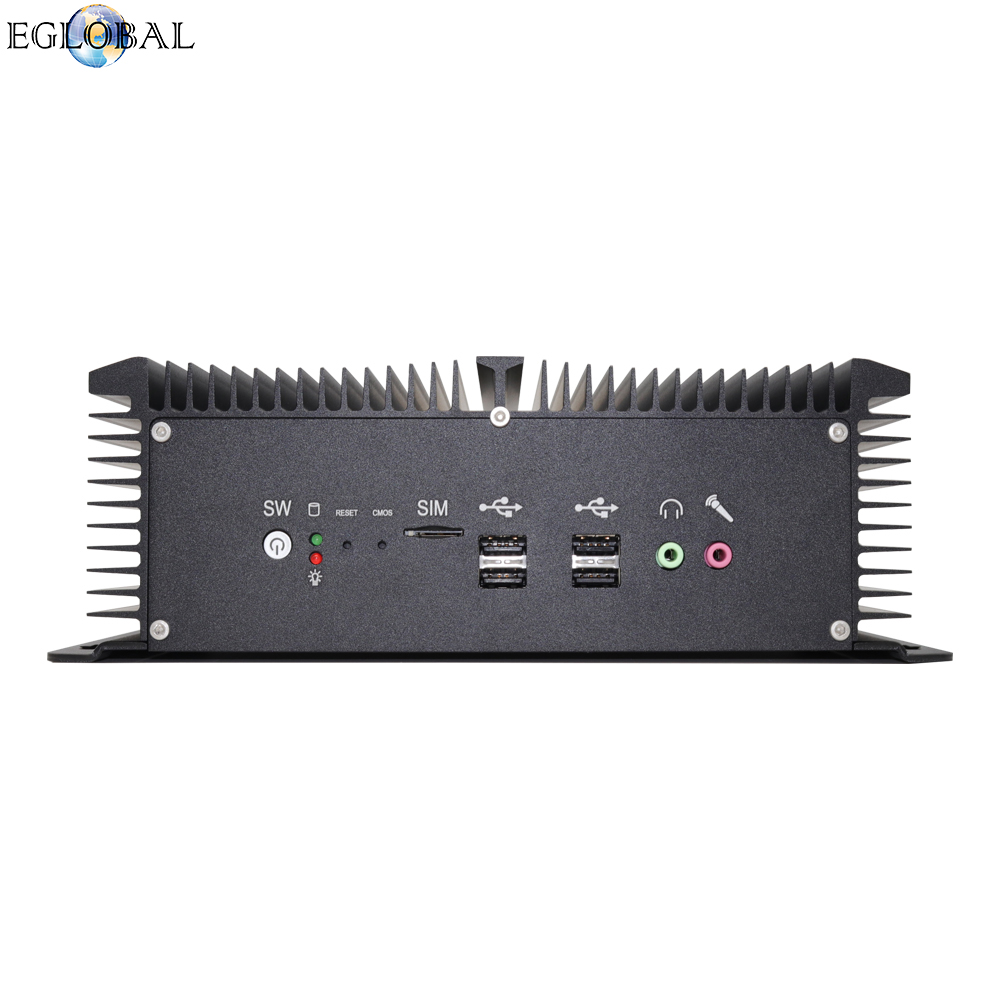
If you have Eglobal Mini PC with one SIM card slot on the motherboard and would like to use 4G WiFi, welcome to read this article about how to install 4G module taking Eglobal Industrial Mini PC G4 for example.
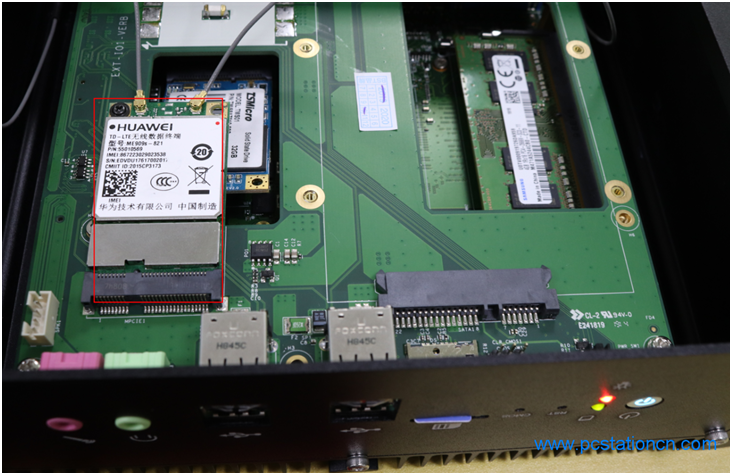
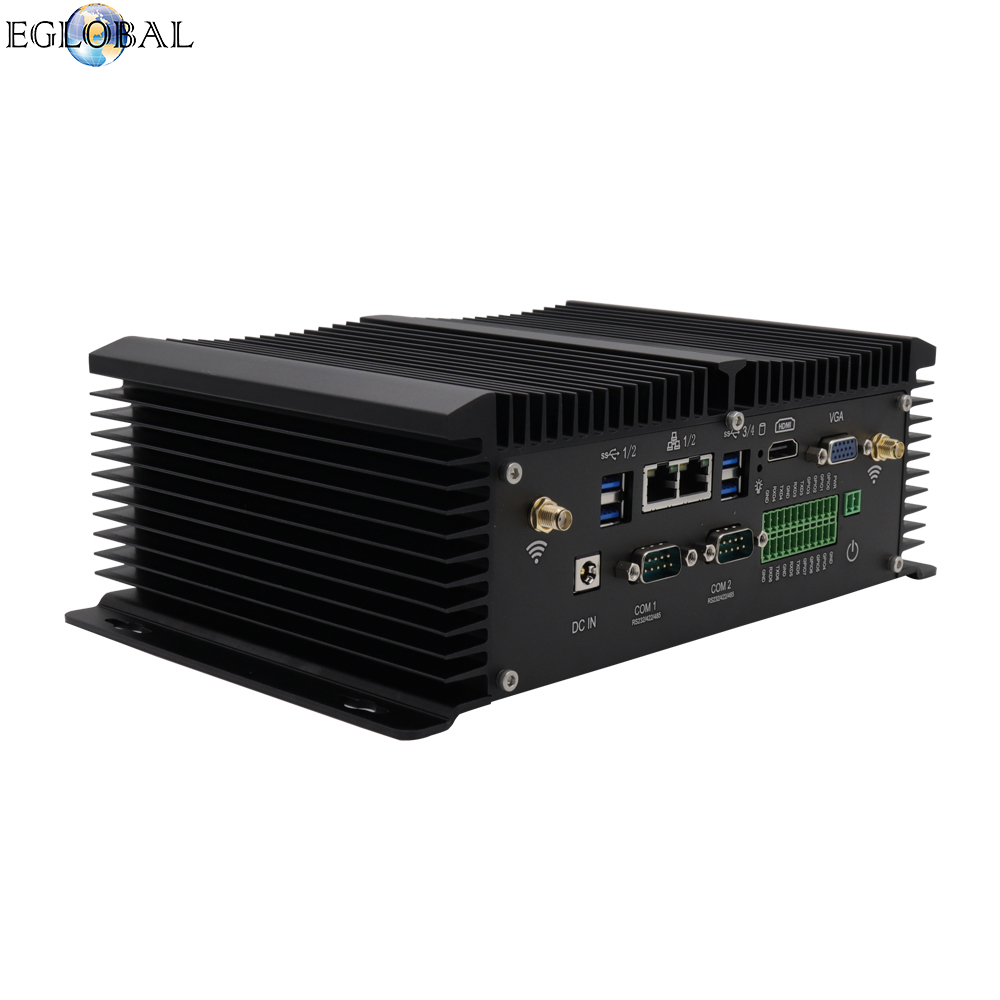
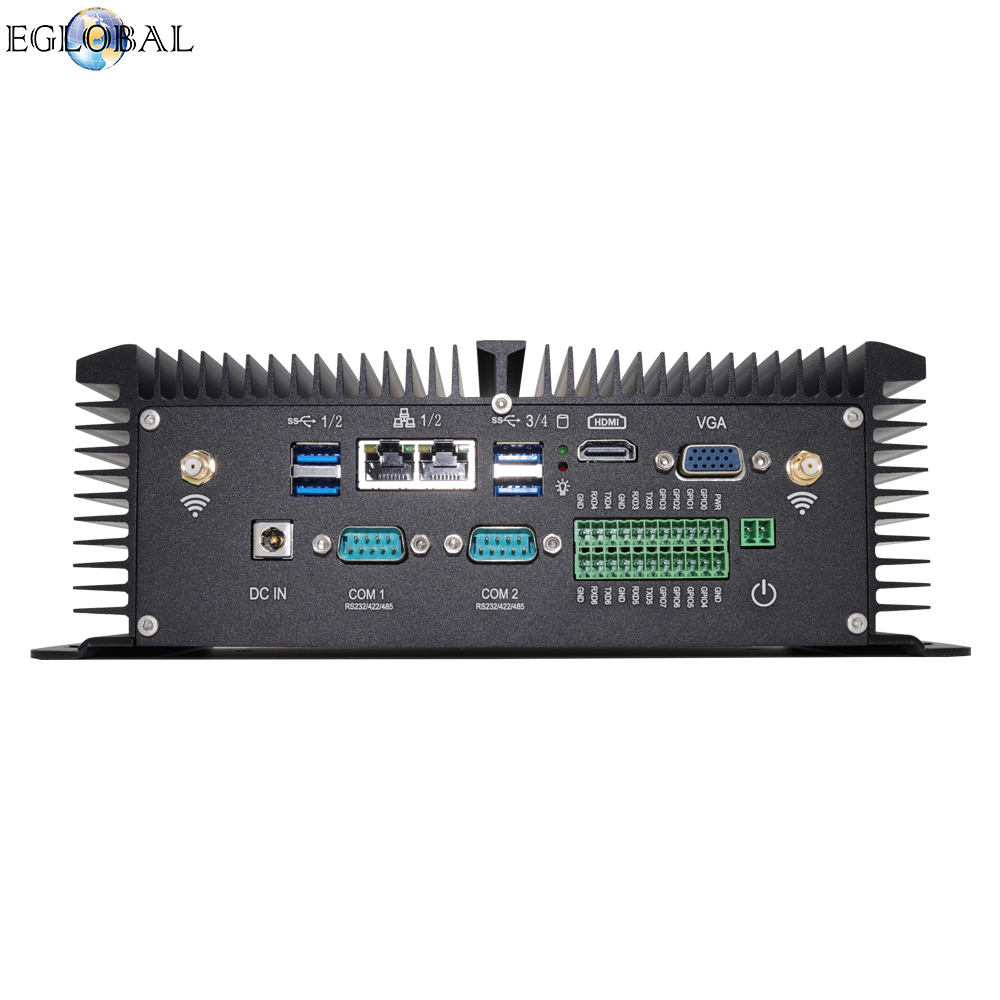
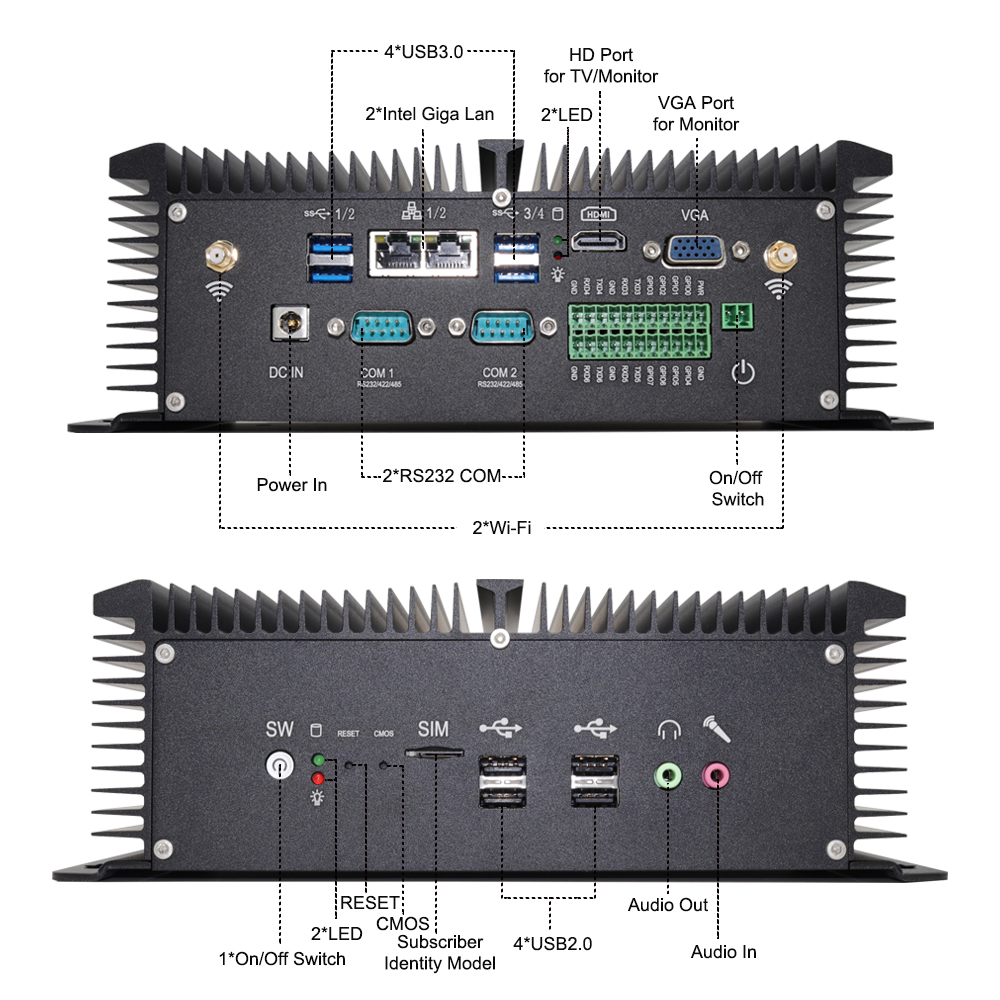
The Eglobal Industrial Mini Computer G4 with Intel Core i5-8250u processor onboard, Intel UHD Graphics 620, Rich interfaces: dual Intel Gigabit LAN, 2 x COM ports, can change to RS232/422/485 from BIOS, 1 x VGA, 1 x HDMI, 4 x USB2.0, 4 x USB3.0, 1 x GPIO, 1 x MIC, 1 x SPK, 1 x Reset, 1 x CMOS clear button, 1 x 2Pin Phoenix terminal power supply input, 1 x SIM card slot. The Industrial Mini PC outside has one SIM card slot with push function and there is one Mini-PCIE slot supporting 4G module on the motherboard. How to install 4G module on the Eglobal Industrial Mini PC G4?
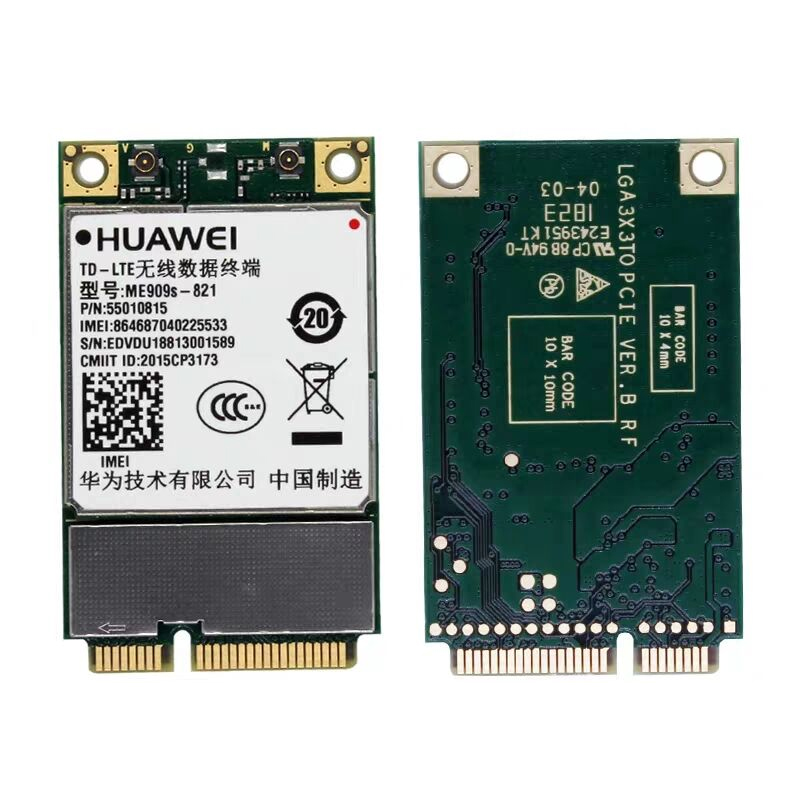
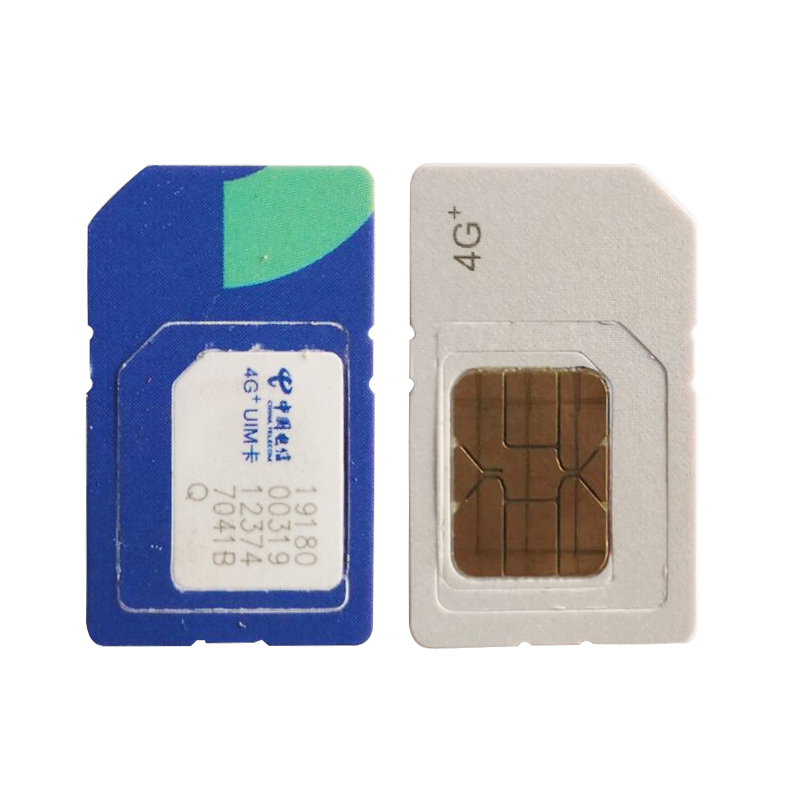
Step 1, you shall preprare these things: one SIM card, one 4G module for your local 4G communication, one Eglobal Mini PC like G4 model.
Step 2, push the SIM card into the SIM card slot.
Step 3, open the baseplate of Mini PC G4, find the Mini-PCIE slot for 4G module, then install it and fix by one screw using screwdriver.
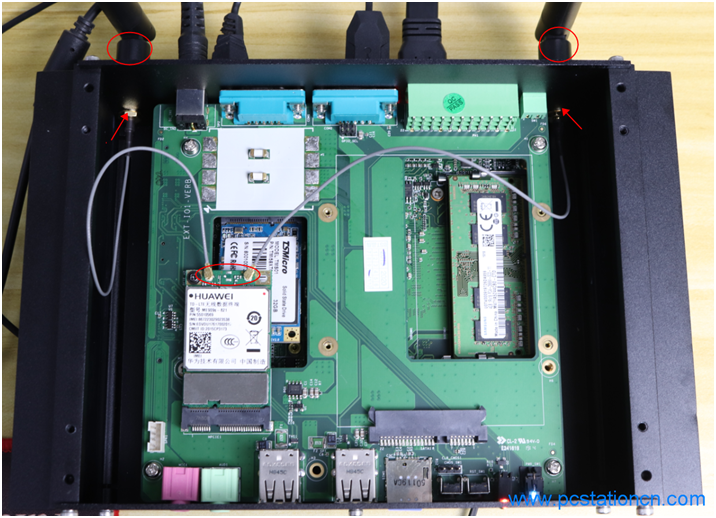
Step 4, connect two small RF cables with 4G module, and install dual external wireless antennas into the two WiFi holes.
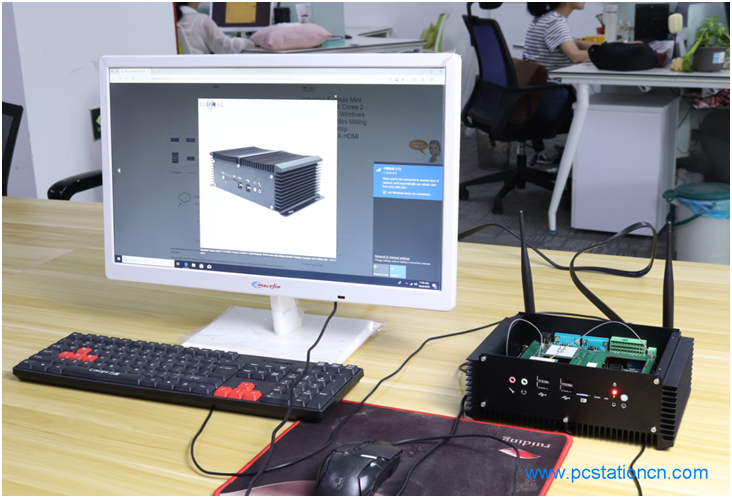
Step 5, cover the backside of the mini pc, connect to power supply, mouse, keyboard and monitor, turn on the mini pc.
Step 6, the mini pc will connect the local 4G WiFi automatically shown in the video.
If disconnection it shows message and require us adding an APN network, click the wifi button on the bottom right corner, you can see “Network&Internet settings” and go to “Settings”, click “Cellular”, click “Add an APN”, go to APN window, and input the information(anything ok), click ” Save”, then the APN wifi available, click it to connect to 4G wifi.