How To Create And Format A Hard Disk Partition On Eglobal Mini PC Computers

To create a partition or volume (the two terms are often used interchangeably) on a hard disk, you must be logged in as an administrator, and there must be either unallocated disk space or free space within an extended partition on the hard disk.

If there is no unallocated disk space, you can create some by shrinking an existing partition, deleting a partition, or by using a third-party partitioning program.

To create and format a new partition (volume)

  1. Open Computer Management by selecting the Start  button. The select Control Panel > System and Security Administrative Tools, and then double-click Computer Management.
  2. In the left pane, under Storage, select Disk Management.
  3. Right-click an unallocated region on your hard disk, and then select New Simple Volume.
  4. In the New Simple Volume Wizard, select Next.
  5. Enter the size of the volume you want to create in megabytes (MB) or accept the maximum default size, and then select Next.
  6. Accept the default drive letter or choose a different drive letter to identify the partition, and then select Next.
  7. In the Format Partition dialog box, do one of the following:
    1. If you don’t want to format the volume right now, select Do not format this volume, and then select Next.
    1. To format the volume with the default settings, select Next.
  8. Review your choices, and then select Finish.

Notes: When you create new partitions on a basic disk, the first three will be formatted as primary partitions. Beginning with the fourth, each one will be configured as a logical drive within an extended partition.

To format an existing partition (volume)

Warning: Formatting a volume will destroy any data on the partition. Be sure to back up any data you want to save before you begin.

  1. Open Computer Management by selecting the Start  button. The select Control Panel > System and Security Administrative Tools, and then double-click Computer Management.
  2. In the left pane, under Storage, select Disk Management.
  3. Right-click the volume that you want to format, and then select Format.
  4. To format the volume with the default settings, in the Format dialog box, select OK, and then select OK again.

Notes

Notes: You cannot format a disk or partition that is currently in use, including the partition that contains Windows.
The Perform a quick format option will create a new file table, but will not fully overwrite or erase the volume. A quick format is much faster than a normal format, which fully erases any existing data on the volume.

How To Make Auto-Power-On function of Eglobal Mini PC?

Eglobal mini pc can stand up by desk bracket but also can be mounted back of monitor by VESA bracket we supply. When you fix the computer back of monitor, it is inconvenient for you to press the On/Off Switch button each time, so it would be good if Eglobal mini pc could start automatically when connecting to the mains power.

Here let’s see the BIOS setting for your reference(different models of Eglobal Mini PC have different BIOS interface):

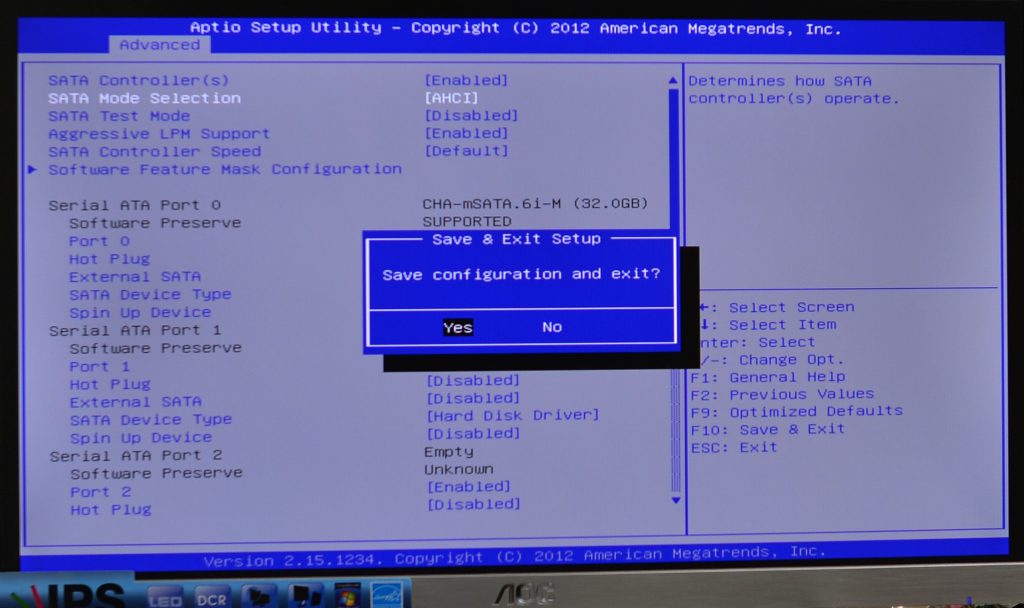
Step 1: Press On/Off Switch on the mini pc and then keep press “Esc” on the keyboard until goes into BIOS;
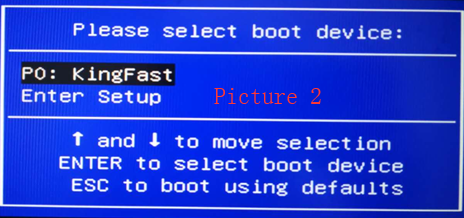
Or Press “ F11 ” after booting, select “ Enter Setup ”  into BIOS interface as the picture shown:

2. Select “ Chipset ” and Press “ Enter ” into “PCH-IO Configuration” .

3. Select “ Restore AC Power Loss ” and setup “ Power on ”.

4. Press “ F10 ” and Select “ Yes ” to save the setting and re-start the machine. Now you can test the function “Auto-Power-On”.

How To Disable External USB Port If I Don’t Want My Office Work To Use Extra USB On The Eglobal Mini PC?

Here let’s configure the USB port from the BIOS for your reference(different models of Eglobal Mini PC have different BIOS interface):

Configure the USB port from BIOS as per the following picture step by step:

Step 1: Press On/Off Switch on the mini pc and then keep press “Esc” on the keyboard until goes into BIOS like Picture 1;

Or

Press “ F11 ” after booting, select “ Enter Setup ” into BIOS interface like Picture 2.

Step 2:Find “Integrated Peripherals”

Step 3: Choose the “Onboard Device Function”

Step 4: Choose the “USB Configuration”

Step 5: Choose the “ Legacy USB Support”

Step 6: The last, it will show Legacy USB Support become “Disabled”

Step 7: Press “F10″ on the keyboard to save the above setting and finish it.

Will It Be Very Hot Since The Eglobal Mini PC CPU Has No Fan ?

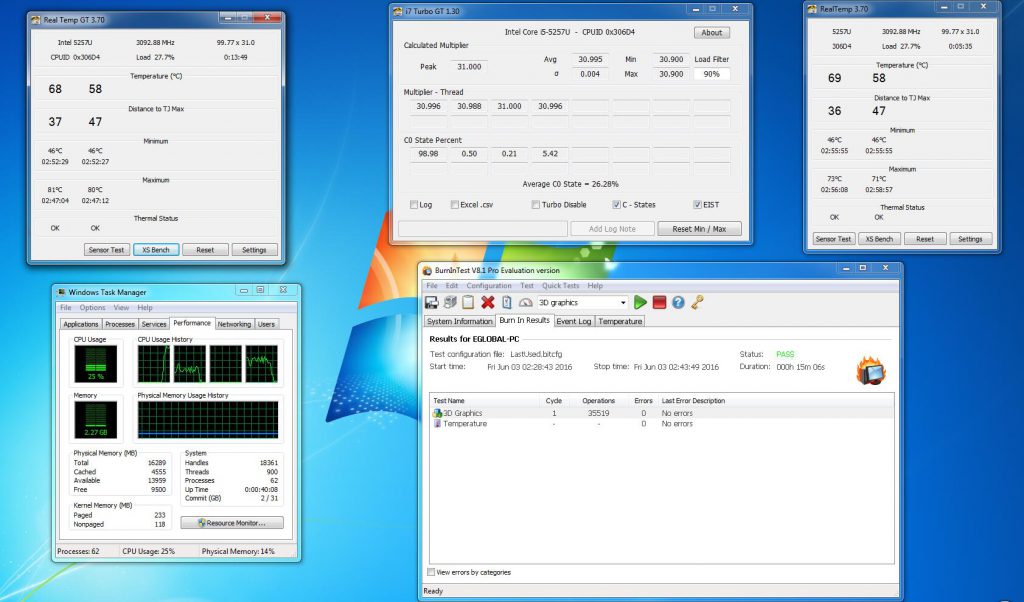
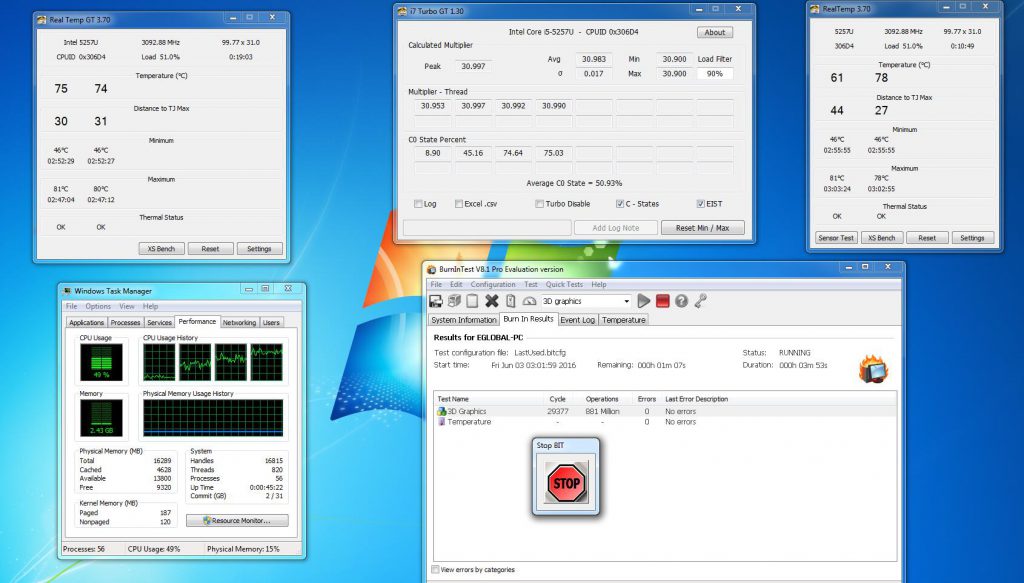
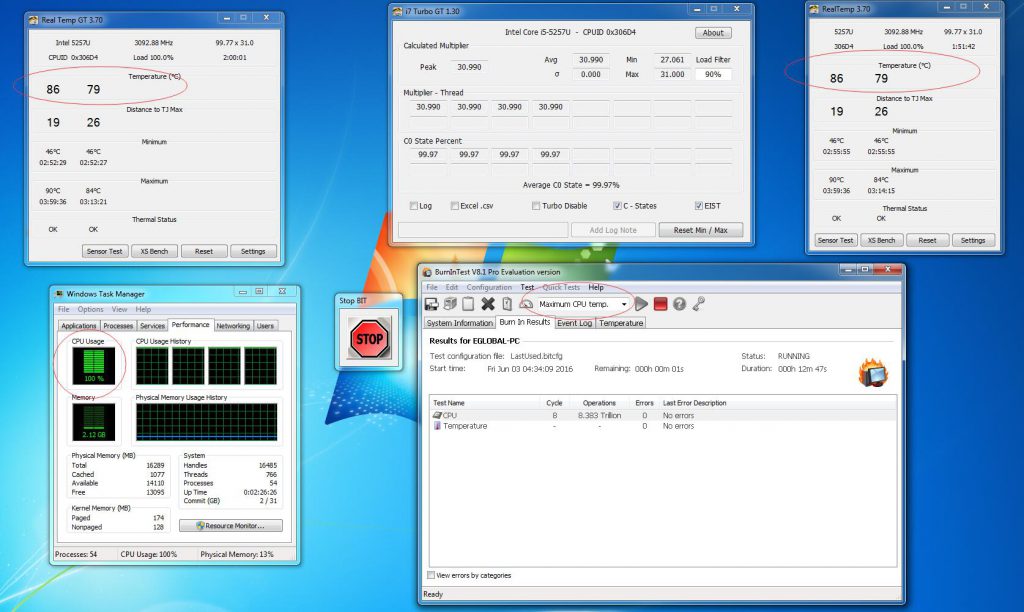
Eglobal fanless mini pc using aluminum alloy case to help CPU heat releasing, so even it is fanless, it won’t be very hot, normally around 36 centigrade degree around the mini pc. Our mini PC’s normal operating temperature is around 50 °C -80 °C, and the maximum can’t exceed 100 °C. This is real testing from one of our customers, tested model: V2-C1037U and 5257E

When normal web browsing, office work and online chatting, temperature surround the CPU part alloy case from 36°C to 39°C; When the CPU load maintained at 60% ~ 60%, temperature surround the CPU part alloy case from 40°C to 43°C, when touching won’t feel thorny hot;

Testing summary: this fanless mini computer is quiet with no noise, the thick aluminum alloy case is good for heat dissipation, very suitable for using in living room and bedroom at home.
Suggestion: Let the mini computer stand by the plastic holder we supply freely or mounted back of monitor if the package include VESA Bracket you bought.

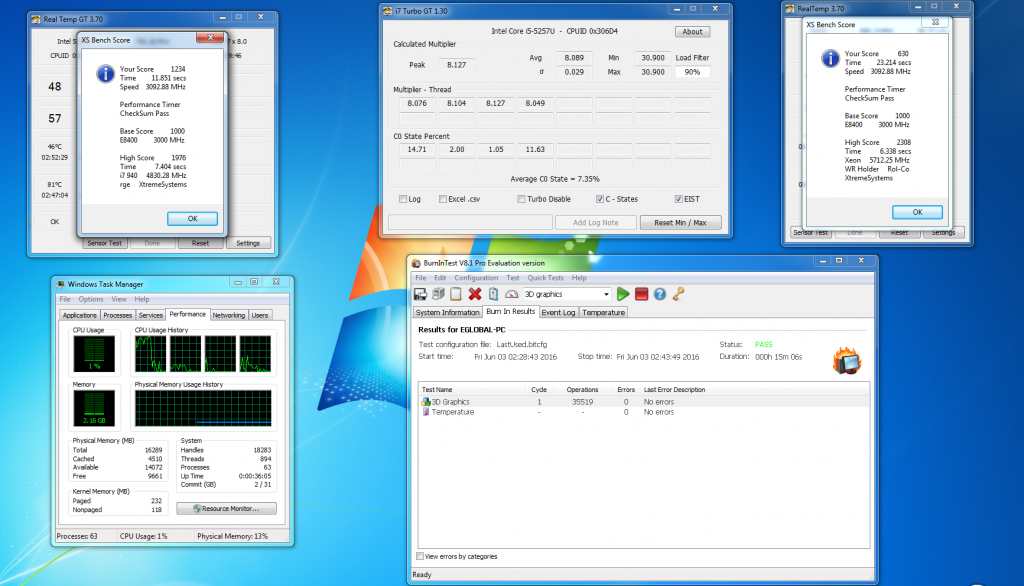
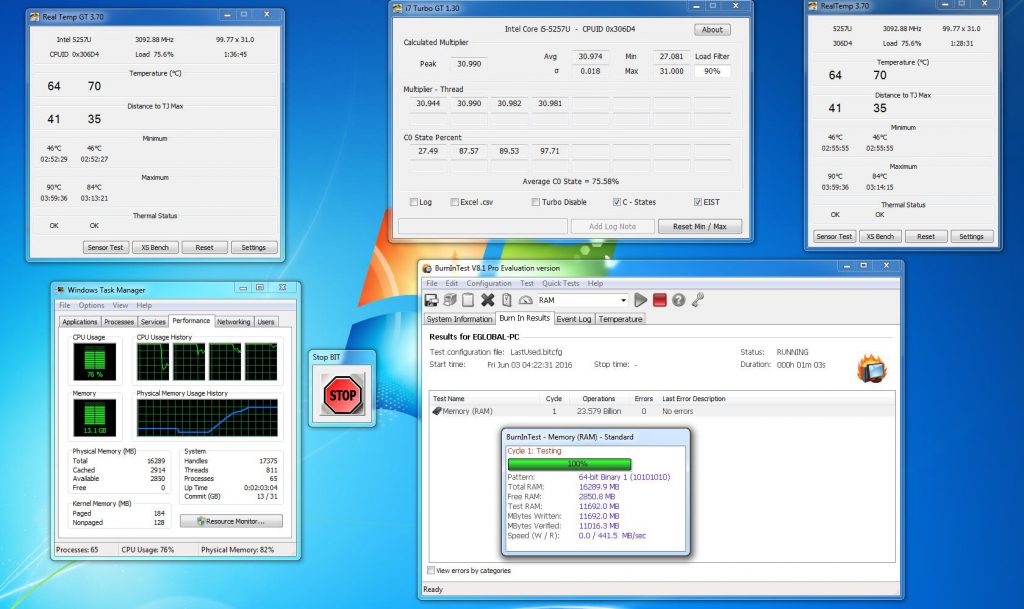
The following is our mini pc 5257U cpu temperature in different environment.

5257U RAM TEST

Temperature under free

Temperature under busy

Max Temperature

A customer who bought a miniPC from our company was very enthusiastic to help us pass back a video of the temperature of the CPU display of our products after playing various games. From the video we can see that the customer played. After several different games, the temperature displayed by our minipc is still within a normal range of use: https://youtu.be/IoPUH39oeNo

How to add RAM, Storage and WiFi Module If I have Barebone Fanless Mini PC only

Before installing RAM for Eglobal mini pc, make sure you clearly know the RAM style the mini pc required. Firstly welcome to visit the following link to learn how to select the proper memory: https://www.pcstationcn.com/blog/ddr3-vs-ddr3l-vs-ddr4-of-eglobal-mini-pc/

Then users buy barebone pc must to use its own memory, storage and wireless module to DIY the computer, and install operating system to make it a full ready to go computer. Here is the videos to add ram, storage and wireless card to EGLOBAL barebone computer:

1) https://youtu.be/tyf12_XIFg8 :
Installing the WiFi RF cables, you shall use the WiFi washer and WiFi screws to fix the two WiFi antennas.

2) https://youtu.be/PO3F9W68klU :
Installing the WiFi module, RAM and Storage on the motherboard. Here is our model V2-C1037U picture guide, others can refer to this guide directly:

The mini computer support 1pc 2.5″ HDD and 1pc Msata SSD together.

Step 1, open the mini itx alloy case, find the SATA and mSATA port on the computer motherboard as below:

Step 2. Add 2.5 inch SATA HDD or SSD and its power cable

Step 3. Input mSATA SSD, use one screw to fix it (one 1)

Step 4. Plug the WiFi module into Mini PCI-E slot, use the screw inside the bag to fix it.

After fix the antenna, external antennas just fix to the screws, like picture here:

Step 5. Use 4 screws to fix the 2.5 inch SATA HDD or SSD onto the computer bottom case, and then fix the mini computer ally case, now its over and you will find SATA and mSATA placed as shows in below picture:

Finally,  check if your mini pc is working properly.

Collect Driver Utilities To take Care Of Your Drivers on Eglobal Mini PC Computer

Drivers are an essential element on your system. If you don’t have them properly installed of if they’re outdated, you’re more likely to suffer continuous computer crashes. If you lost your drivers on your mini pc, what should you do? How do you reinstall the drivers on your mini pc. There are some ways to help you with your mini pc.

Perhaps you receive a CD Drivers for the mini pc you bought from us. Or you can find the drivers from our company website:
https://www.pcstationcn.com/index.php?route=information/information&information_id=8
If you don’t find the drivers for your mini pc, just feel free to contact us.

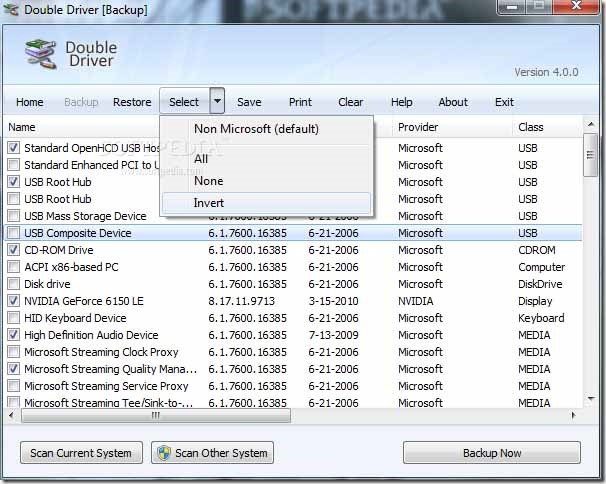
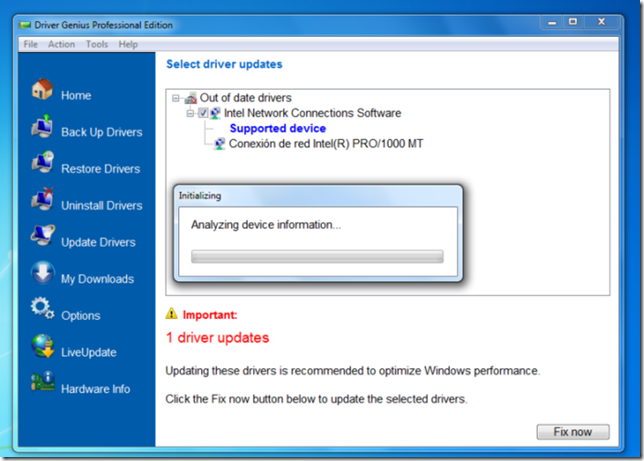
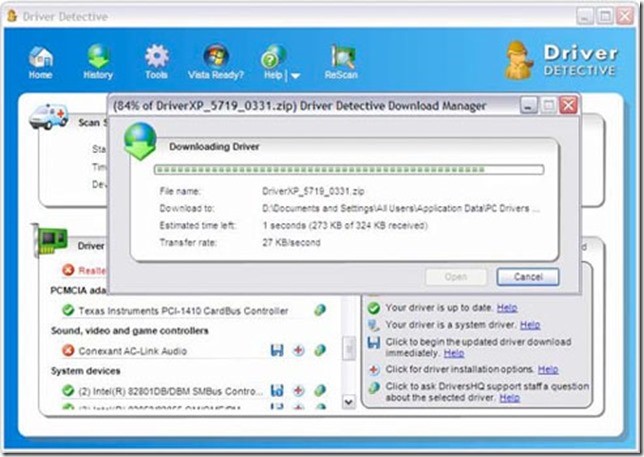
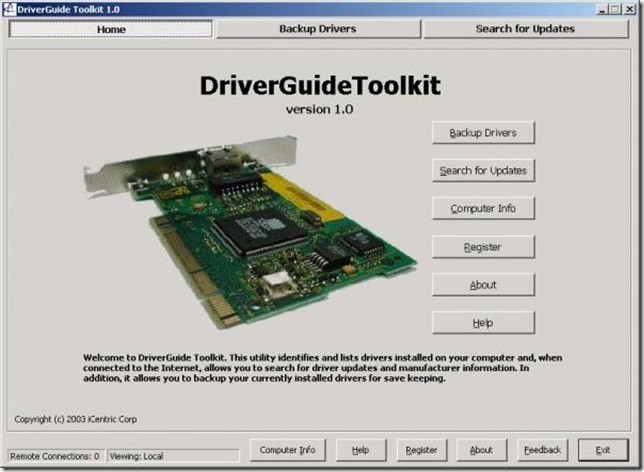
Here are these driver analysis and backup tools for your selection:

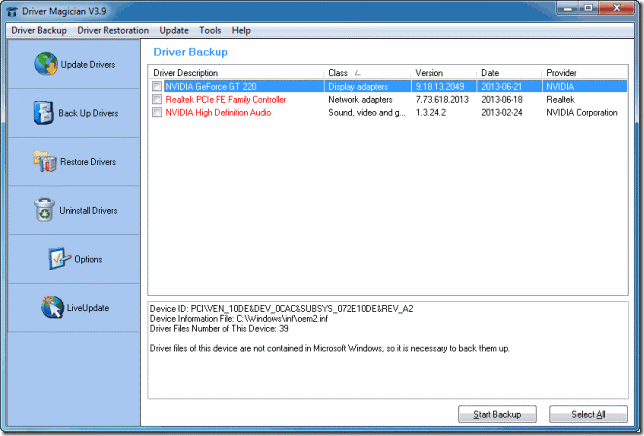
Double Driver – Analyzes your system and creates a list with all the drivers currently installed. You can also create a backup copy of selected drivers.

Driver Magician Lite – A simple tool to backup your currently installed drivers. Restoration only works in the paid version though. 

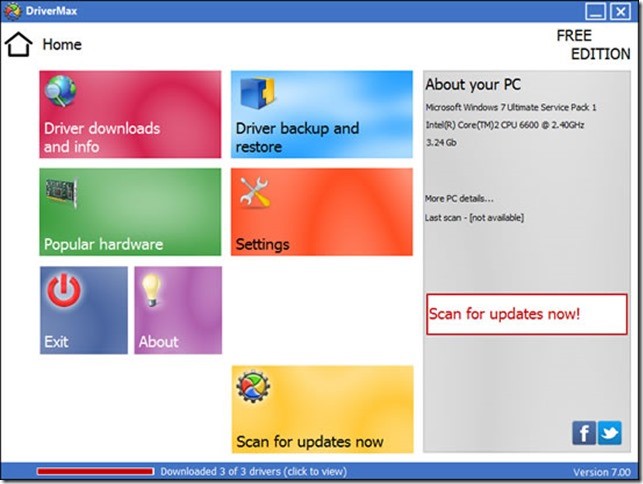
DriverMax – A powerful tool to backup and restore drivers with a very user-friendly interface, simple enough for beginners.

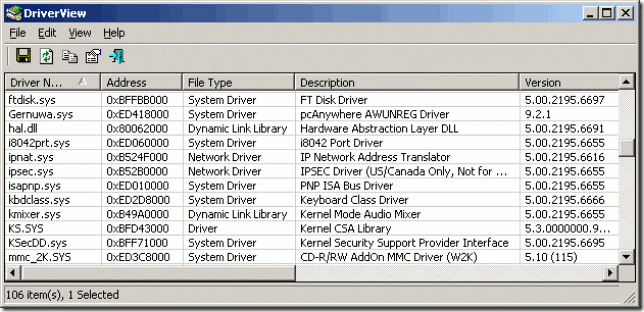
DriverView – The easiest, fastest way to obtain a list with all the drivers installed on your system.

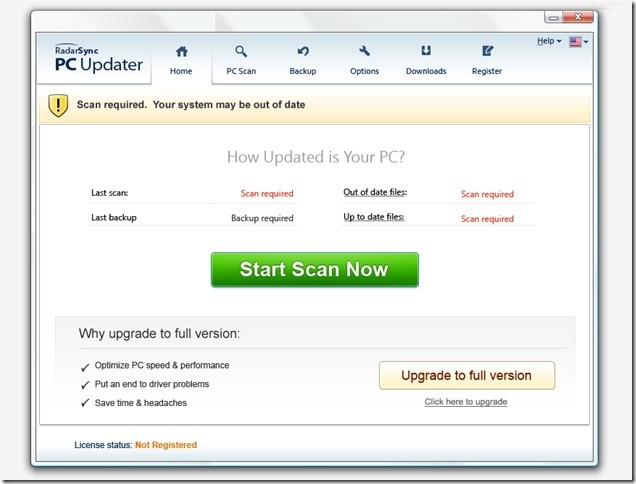
RadarSync Free Edition – Find out if the drivers on your system need to be updated. You’ll need to upgrade to the paid version though if you want to download the updated drivers.

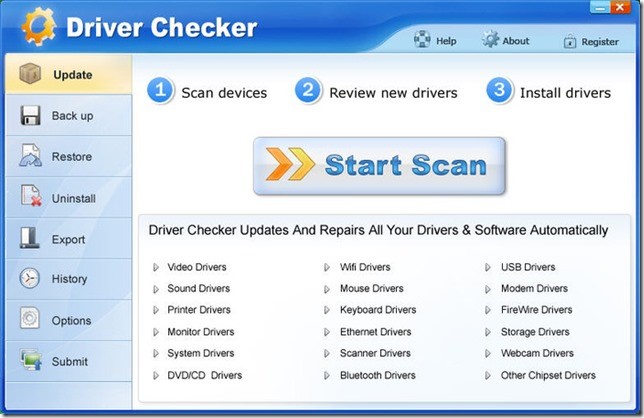
Driver Checker  – keeps all the drivers on your Windows PC up to date and backed up, so you don’t have problems with compatibility and devices.

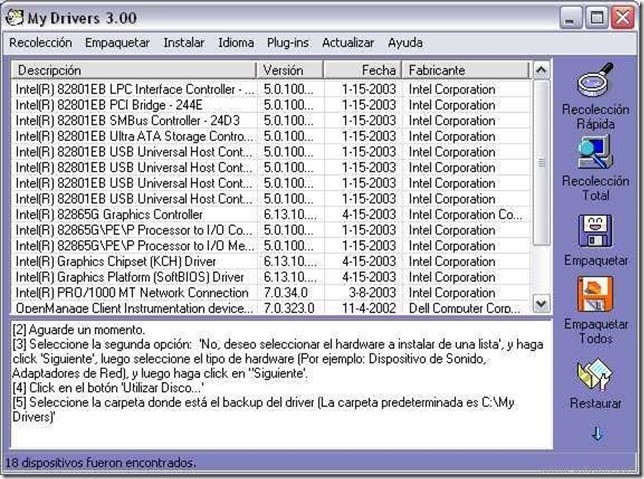
My Drivers – Detects, backups and restores all drivers on your system

  • Driver Genius – Super fast program that backups all your drivers

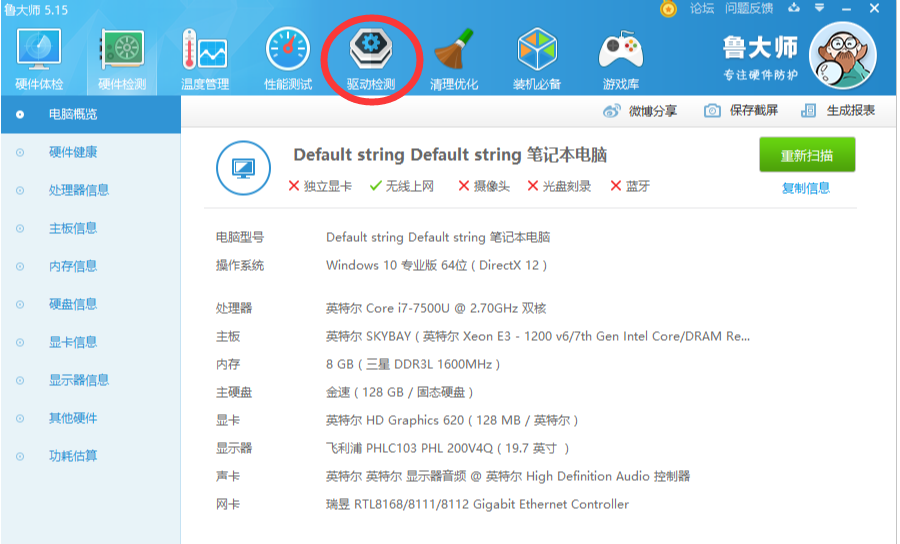
Master Lu software is very popular in China which easy to install and operate. After installing it can detect whether your mini pc install all proper drivers and also can update the drivers. This link is the software for Master Lu:
https://drive.google.com/file/d/1cGUaGvMJHlpk9fot_xaORllhxdGb-uM7/view?usp=sharing. If you don’t know how to install the Chinese software, please refer to the YouTube video: https://youtu.be/JYwgvZjH1_M.

How To Distinguish Between USB2.0 And USB3.0 on Eglobal Mini PC Computer

Some of our customer always have a question, “Why my internet get not stable when I plug the USB flash or external USB DVD to the USB 2.0 Port on the mini pc, but internet stable when plug the same usb products to the USB 3.0 port in the same mini pc, what happen?”

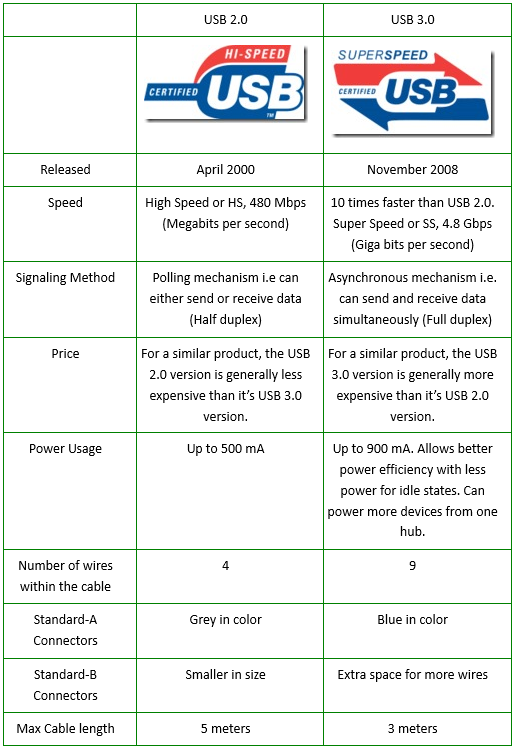
This problem most due to USB power supply different, USB 2.0 port can supply max 500ma but usb 3.0 can supply up to 900ma, so if your usb products require more than 500ma and less than 900ma, it will not be stable on the USB 2.0 port but stable on the USB 3.0 port. And USB problem on the motherboard will hurt the Lan chip power supply, that’s why the internet get not stable if you plug usb products to USB 2.0.

USB 2.0 vs USB 3.0

USB 3.0, the latest version of USB (Universal Serial Bus), provides better speed and more efficient power management than USB 2.0. USB 3.0 is backward compatible with USB 2.0 devices; however, data transfer speeds are limited to USB 2.0 levels when these devices inter-operate.

Comparison chart

How To Distinguish Between USB2.0 And USB3.0 on Eglobal Mini PC Computer

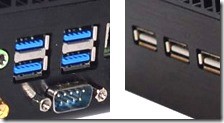
Observing the color method, in order to distinguish it from USB 2.0, the USB 3.0 Primoter Group recommends that the blue base be used in the USB 3.0 interface, so we can distinguish it by color.

Observe the contact method, which is more cautious. USB 2.0 only has 4pin metal contacts, while USB 3.0 is 9pin contacts. The front 4pin and USB 2.0 are one-to-one, and the rear 5pin is USB 3.0 exclusive.

As for the USB 3.0 B-type interface, it is better to distinguish. The USB 3.0 standard B-type interface is larger than the USB 2.0, and the upper part is more prominent, and it accommodates the new 5-pin contact. Observe the logo method. The USB 3.0 logo is shown below. “SS” stands for “SuperSpeed” and will be available in the USB 3.0 interface section. In addition, the USB 3.0 cable is slightly thicker than the USB 2.0 cable due to the increased route.

DDR3 VS DDR3L VS DDR4 of Eglobal Mini PC

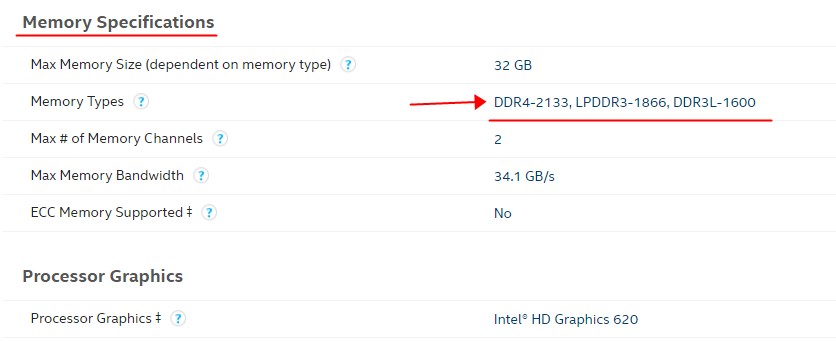
Before installing RAM for the Eglobal mini pc, make sure you know clearly the RAM style the Eglobal mini pc required. You can use the link: http://ark.intel.com/ to search CPU details and learn the Eglobal mini pc’s RAM style(DDR3, DDR3L, LPDDR3, DDR4), you can find the memory types it supports directly as this picture shown:

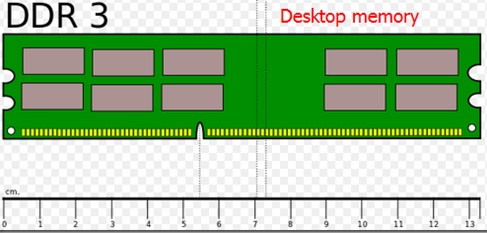
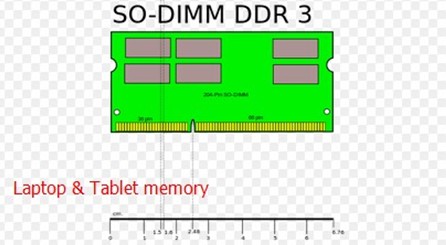
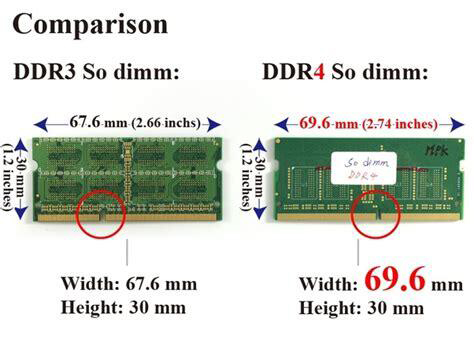
Difference of DDR3, DDR3L, LPDDR3 and DDR4. Laptop memory is 204pin(SO-DIMM DDR3) and desktop memory is 240 pin(DDR3).

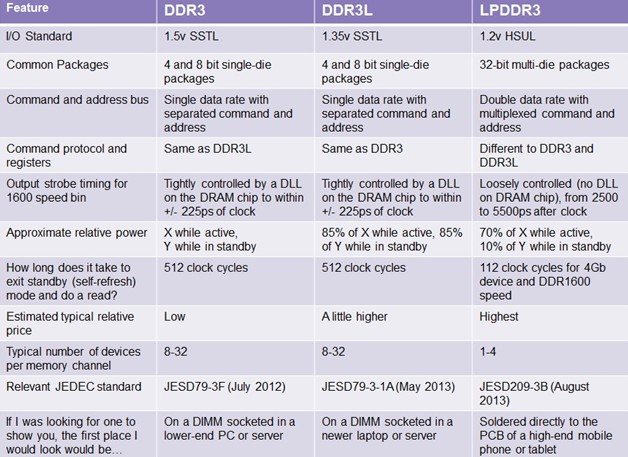
Here is summarization of the key differences of DDR3, DDR3L, LPDDR3:

DDR3 VS DDR4 of Eglobal Mini PC

  1. Different specifications
    The starting frequency of DDR3 memory is only 800MHz, and the highest frequency can reach 2133MHz. The starting frequency of DDR4 memory is 2133MHz, and the highest frequency can reach 3000MHz. The performance of higher frequency DDR4 memory is significantly improved compared with DDR3 memory. Each pin of DDR4 memory can provide 2Gbps bandwidth, then DDR4-3200 is 51.2GB/s, which is better than DDR3-1866. Bandwidth increased by 70%.
  2. Different appearance
    As an upgraded version of DDR3, DDR4 has undergone some changes in appearance. The gold fingers of DDR4 memory have become curved, which means that DDR4 is no longer compatible with DDR3. If you want to replace DDR4 memory, you need to replace the motherboard with a new platform that supports DDR4 memory.
  3. Different memory capacities
    The largest single DDR3 can reach 64GB, but only 16GB and 32GB are available on the market. And DDR4 has a maximum single capacity of 128GB, and larger capacity means DDR4 can support more applications.
  4. Power consumption is different
    Under normal circumstances, the working voltage of DDR3 memory is 1.5V, which consumes more power, and the memory stick is easy to generate heat and frequency, which affects performance. The working voltage of DDR4 memory is mostly 1.2V or lower. The lower power consumption brings less power consumption and less heat, which improves the stability of the memory stick and basically does not cause the drop caused by heat. Frequency phenomenon.

Cost of DDR4 is more expensive than others. When you buy new memory,we should consider all the parameters and compatibility, not necessarily the higher specification parameters that means better performance. It is better to inquire our Sales before buy.

What’s meaning of Barebone Mini PC Computers

Barebone system of Eglobal Mini PC Computers means the Mini PC you bought doesn’t include the memory/ram, storage/msata ssd/2.5″ sata hdd and wireless card/module, but the package box also includes the accessories like power adapter, stand holder, VESA mount or others.

When you have the barebone system of Eglobal Mini PC Computers, you shall select the correct type of memory among DDR3, DDR3L or DDR4, then you shall know how to install the hard disk and operating system by USB flash disk.

Please pay attention to buy barebone system of Eglobal Mini PC Computers if you seldom know the structure of Eglobal Mini PC Computers. Welcome to contact our Sales to select the proper configuration including memory, storage, wireless card and pre-installed oem cracked Windows 7/8/10 or Linux OS. Thank you so much!