In general, standard industrial mini pc computers have a rich IO interface. We often see the word “COM” on the side of the industrial computer. What does the COM serial port of the industrial computers mean? What kind of effect? We come to you to understand the knowledge and function of the COM serial port of the industrial computers.
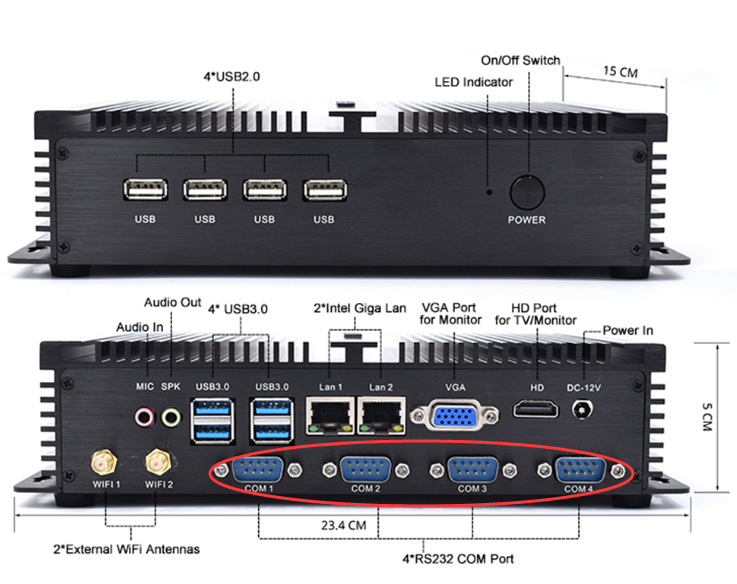
First of all, let’s understand the definition of COM interface: COM port (cluster communication port) is the serial communication port, referred to as serial port. The COM serial products commonly used in IPCs generally have RS-232 and RS-485 interfaces. In appearance, both serial ports use a 9-pin type. It’s just that they have different definitions of the two pins, which are not mentioned here.
The RS-232 serial port used by the COM serial port of the industrial computer is relatively more. RS-232 (ANSI/EIA-232 standard) is the standard for serial connection on IBM-PC and its compatible machines.
The COM port is a communication port that can be used in a wide variety of communication devices.
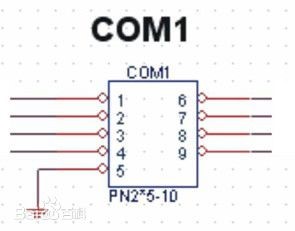
Pin function of the 9-pin serial port:
1 Carrier Detection (CD)
2 Accepted Data (RXD)
3 Send Data (TXD)
4 Data Terminal Ready (DTR)
5 Signal Ground (SG)
6 Data Ready (DSR)
7 Request to Send (RTS)
8 Clear Send (CTS)
9 Ringing Indication (RI)
The COM port is a communication port that can be used in a wide variety of communication devices.
1. Hospital medical equipment control: hospital gastro scope, CT, chest X-ray instrument, etc.
2. Supermarket charging related equipment: small ticket printers, credit card machines, barcode grabs, etc. for supermarkets.
3. Engineering production design control: PLC programmer
4. Computer extended peripheral equipment: such as printer, serial mouse, serial keyboard, etc.!
5. Printing device: printer
6. Weighing equipment: electronic pounds
7. The industrial control COM serial port also has a connection card module, a sensor, a mouse, a modem, etc., and can also be connected to industrial instruments and meters.