The Windows mini pc operating system is usually installed in the C drive of the disk drive. Once it runs, it will generate a lot of junk files, and the C drive space will be smaller and smaller to some extent. The longer the mini pc works, the more often the C drive will indicate that its memory is insufficient. So what is the impact of insufficient C drive capacity on our mini pc?
The space of the C drive is too small, which will greatly affect the running speed of the system. Your mini pc will naturally become stuck and crash!
So, how to properly clean the C drive? Next, pour everyone three ways to quickly clean the C drive.
Method 1: Disk Cleanup
By freeing up disk space, you can improve your mini pc’s performance. The Disk Cleanup Tool is a utility tool included with Windows that helps you free up space on a disk. The tool first identifies files that can be safely deleted and then allows you to choose which files you want to delete partially or all.
Cleaning method:
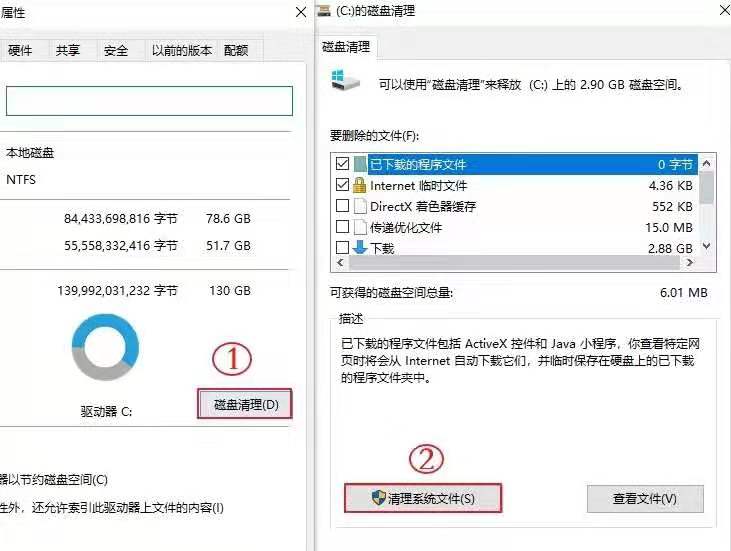
1. Click “This Mini pc” on the desktop of the mini pc, right click on the “C drive” and select “Properties”

2. Click on “Disk Cleanup” and click on “Clean System Files”
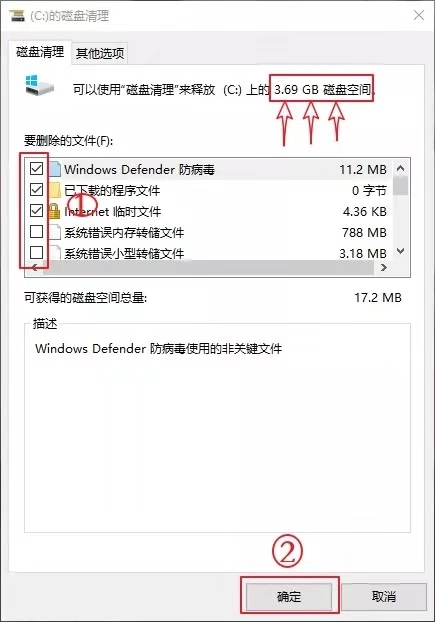
3. Check the files you want to delete, click “OK” and then click “Delete Files” to immediately release 3.69G disk space for the C drive.
Method 2: Turn off hibernation (for Win10 systems)
Close method:
1. Right click on the icon in the lower left corner of the mini pc and select “Windows Power Sell A”
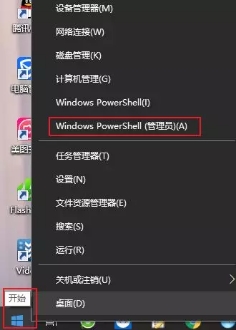
2. Enter “powercfg –h off” (note the space) directly in the page that appears, then press “enter” on the keyboard.
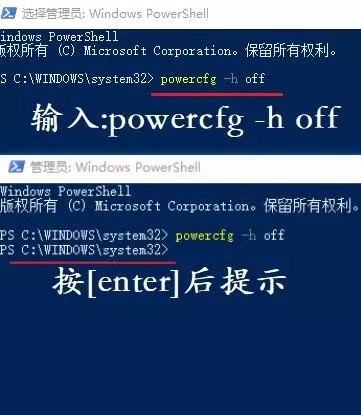
3. Now there is no “hiberfil.sys” file in the C drive, and immediately released 3G disk space for the C drive.
Method 3: Turn on automatic cleaning (for Win10 system)
Opening method
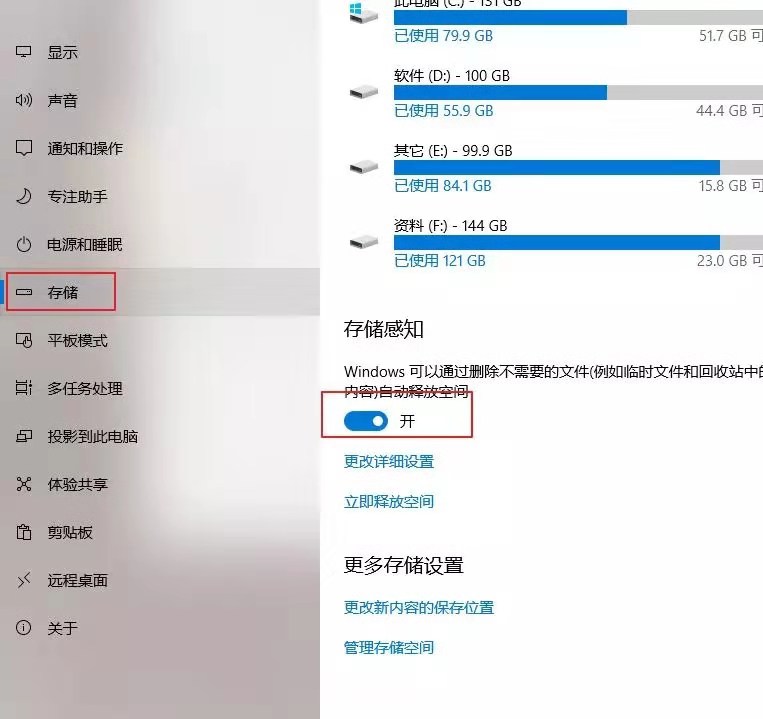
1. Click “Start”—–“Settings”—–“System”
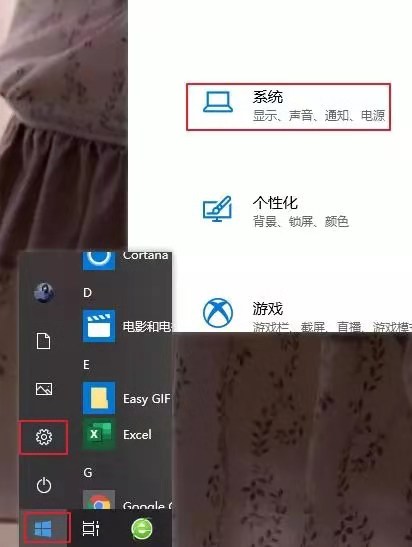
2. Select “Storage” and set “Storage Awareness” to “On”. The mini pc will automatically clean up and no longer need to manually clean it every time!