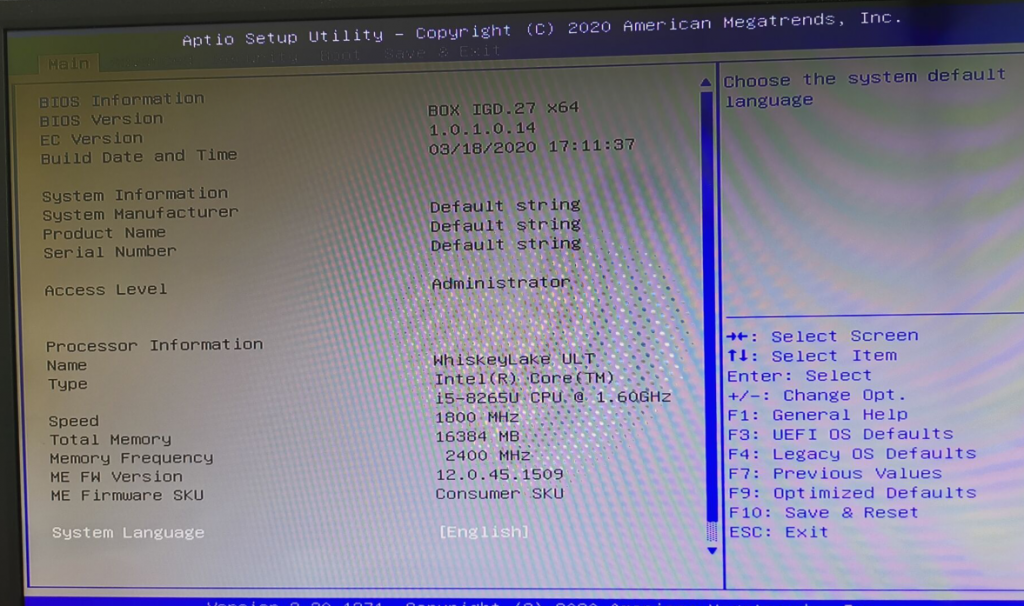
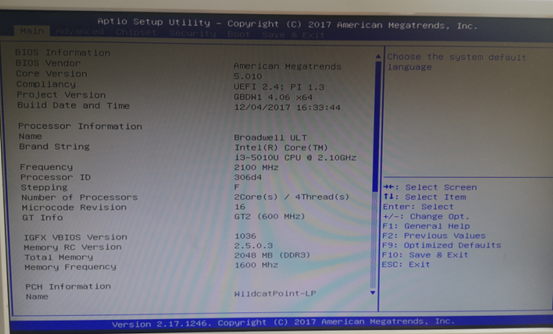
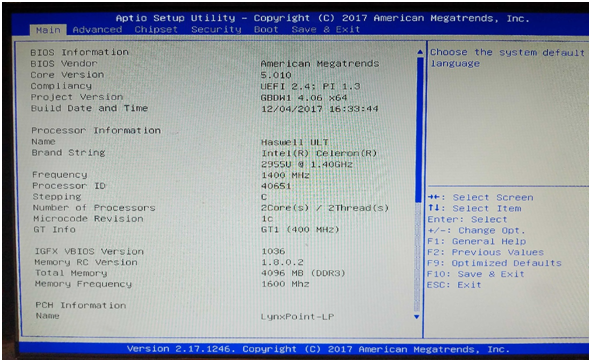
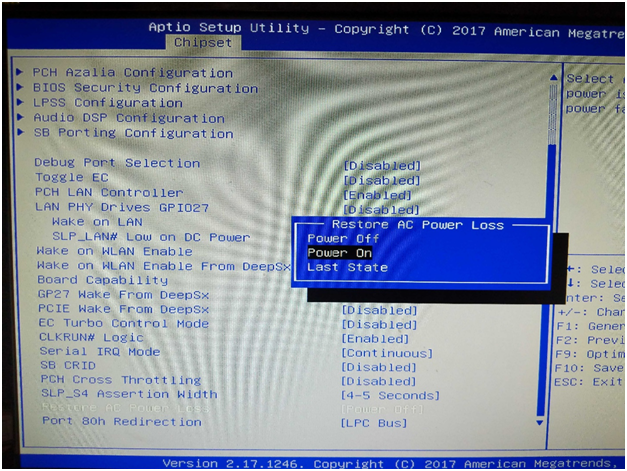
power on PC, and press F2 into bios setup display
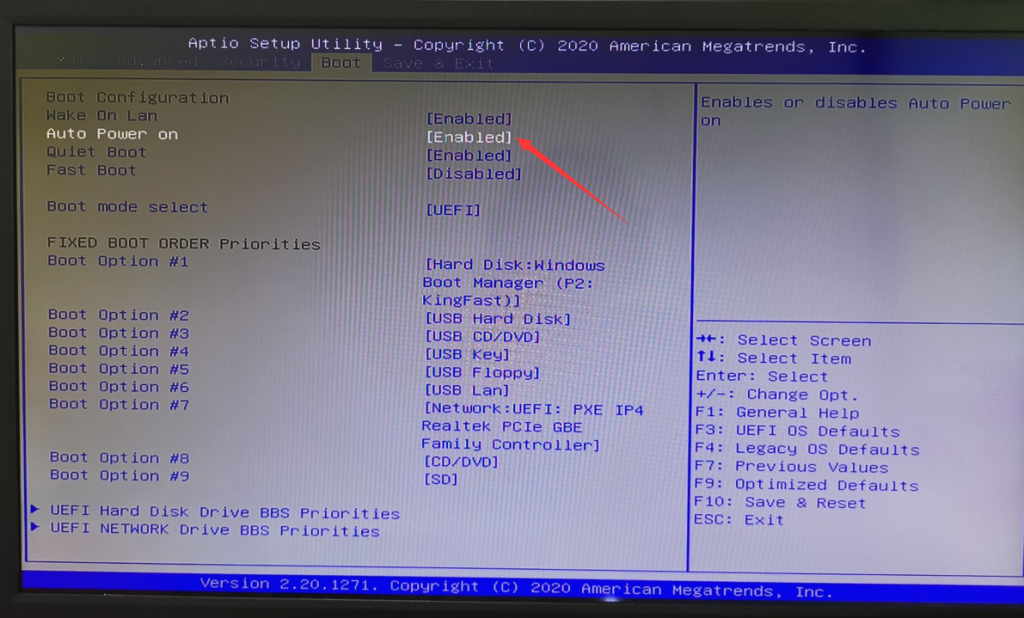
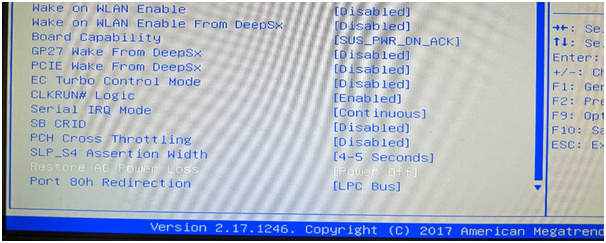
Go to “boot” option , make sure “auto power on” is enabled
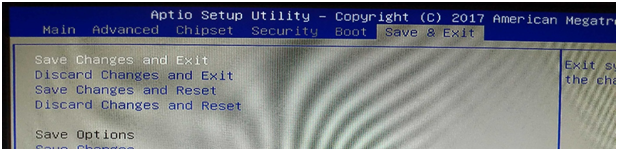
Finished setup, press F10 to save configuration
EGLOBAL Mini PC
power on PC, and press F2 into bios setup display
Go to “boot” option , make sure “auto power on” is enabled
Finished setup, press F10 to save configuration
Our employees use our own mini pc for office, Photoshop, and edit videos every day. It runs more than 8 hours a day and works well. We speak for our mini PC.
We’ve been waiting for Intel 10th Generation Comet Lake Mini PC for a long time, In 2020, finally it launched. Eglobal Mini PC CPU always follows the latest Intel processors and meet the latest market requirement
We have made two different series mini pc for this latest CPU, one is our V7 series Fanless mini pc. Another one is our V310 series Mini PC with Cooling fan, the size only 150*137*48mm
U can see the following picture for the two different series :

For the performance, The new launched 10th i7 10510U is performed better more than the 8th i7 8565U, u can see the difference from the below pictures:

The two series Mini PC both support big memory capacity, dual DDR4 memory slot up to 64GB RAM, and there is m.2 NVME SSD storage up to 1TB, and also one 2.5 inch HDD storage up to 5TB available, building windows 7 or windows 10 or Linux system on the SSD, and use HDD for file saving, get fast speed and huge capacity meantime.
Welcome u to inquiry about this NEW CPU Mini PC.
First, a quick note about SSDs – they’re fast. So fast in fact, their limiting factor is not their own hardware, but rather the SATA III connection that hard drives have traditionally used. Enter NVMe. Standing for “Non-Volatile Memory Express,” NVMe is an open standard developed to allow modern SSDs to operate at the read/write speeds their flash memory is capable of. Essentially, it allows flash memory to operate as an SSD directly through the PCIe interface rather than going through SATA and being limited by the slower SATA speeds. Put another way, it’s a description of the bus the component uses to communicate with the PC, not a new type of flash memory. It is also unrelated to the form factor, which is why NVMe drives can come in both M.2 or PCIe card form factors. With both form factors, the component is connecting electrically to the PC via PCIe rather than SATA. Yes, it’s confusing, but stick with us.
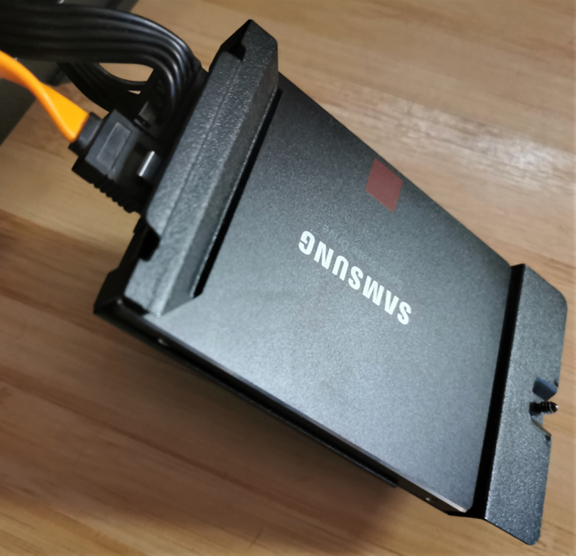
When you buy a new SSD, it uses either the SATA or NVMe interface to connect to your computer. Traditional SATA SSDs use the 2.5″ form factor, as seen in the picture below.
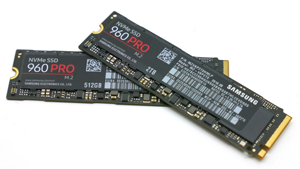
M.2 is a form factor that spells out the physical size and shape of the card that can be plugged into an M.2 slot. This form factor has been designed to maximize space while minimizing the footprint. The M.2 slot is rectangular, with possible widths of 12, 16, 22, or 30 millimeters. Most M.2 solid-state drives are 22 millimeters wide. Lengths can also vary: 16, 26, 30, 38, 42, 60, 80, or 110 millimeters.
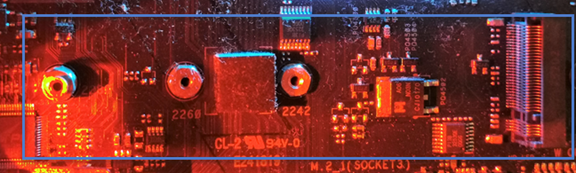
Most computer motherboards accommodate a variety of lengths for M.2 slots. At the same time, the width tends to be fixed on each motherboard, usually 22 millimeters wide. The M.2 slots on a motherboard can communicate with the rest of the PC using different interfaces/standards, including PCI Express (used by NVMe) or SATA, used by traditional SSDs.
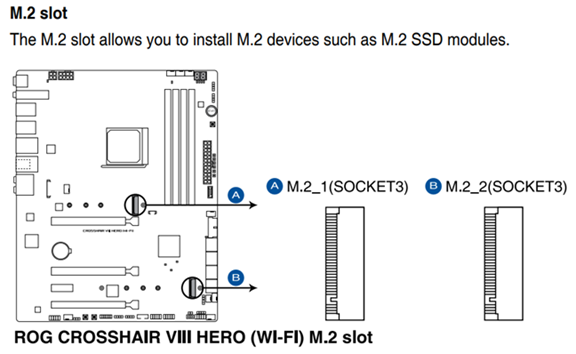
Each motherboard has a different number of M.2 slots with different specifications.
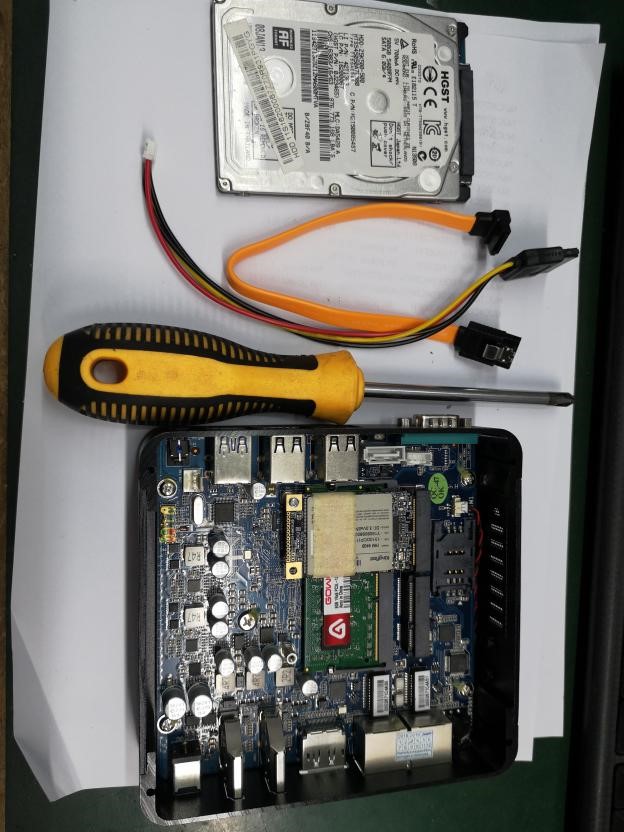
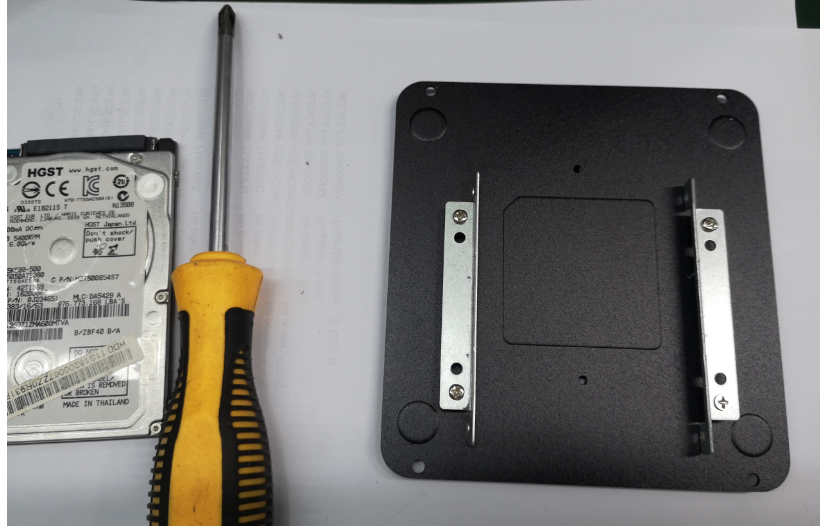
Step 1: Prepare the 2.5” SATA HDD/SSD, SATA cable, power supply cable, screwdriver(M3) and the mini pc M8-N3160.
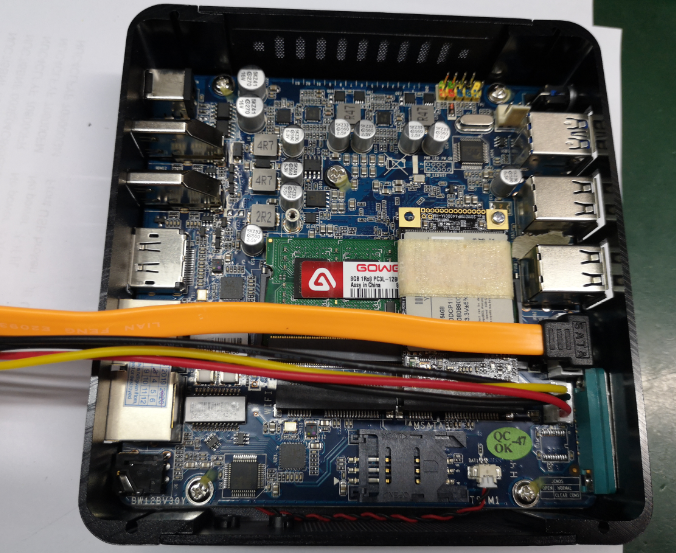
Step 2: Connect the SATA cable and power suplly cable to the motherboard for stand-by.
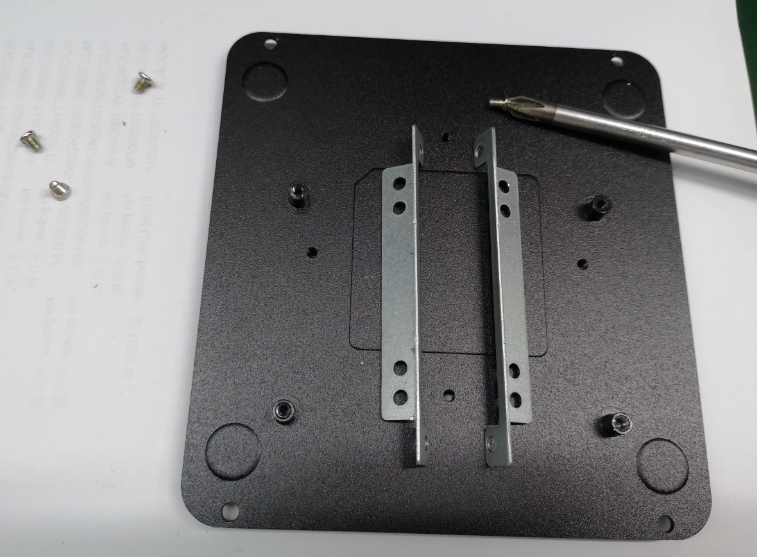
Step 3: Remove the bracket for installing the HDD/SSD for stand-by.
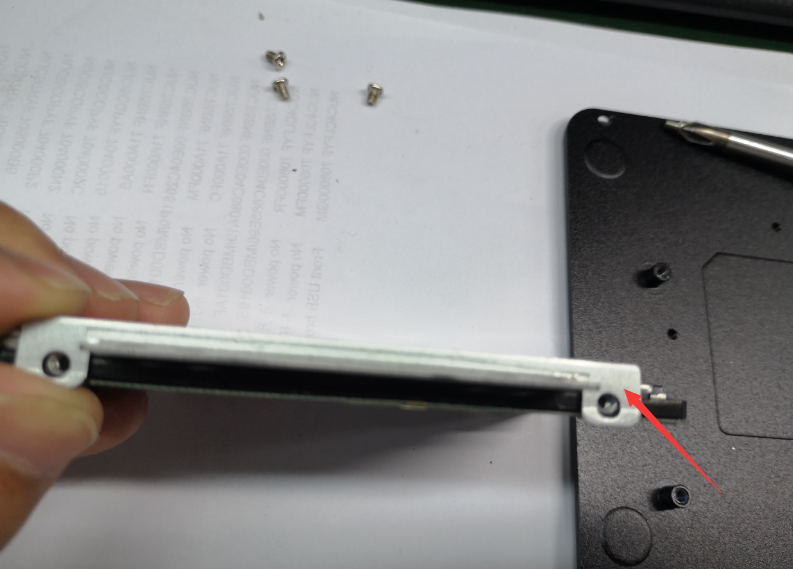
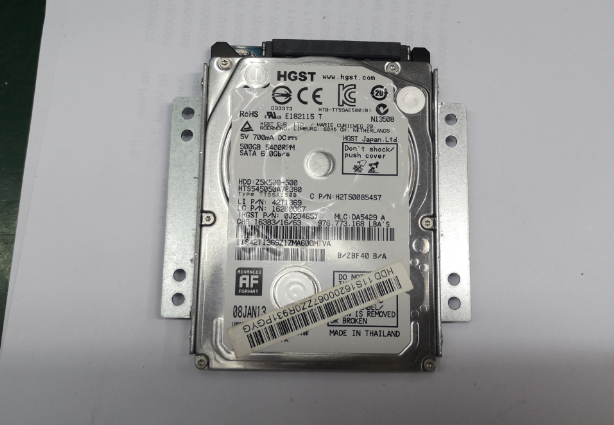
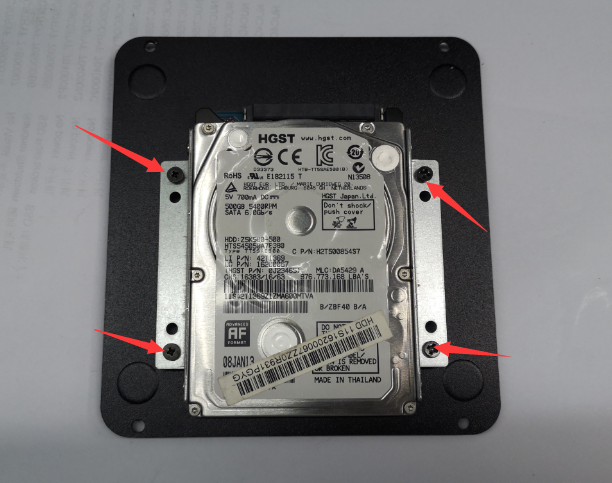
Step 4: Install the HDD/SSD to the bracket and fix the HDD/SSD to the bottom cover of the chassis.
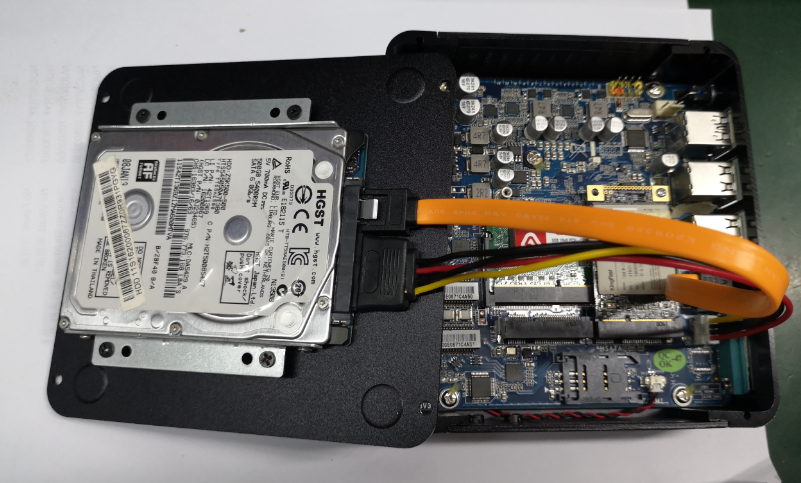
Step 5: Connect the HDD/SSD to the motherboard by the SATA cable.
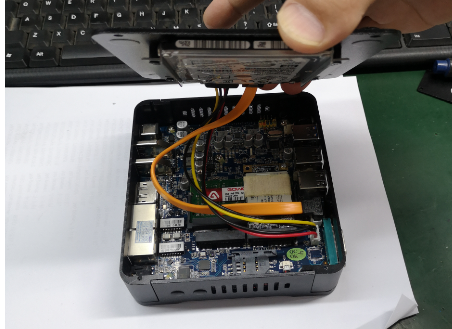
Step 6: Fix the bottom cover to the case.

1.On boot up of the computer. Tap the ESC button repeatedly until you see this screen pop up.
2. Hit the right arrow key one time to end up here at the “Advanced” screen
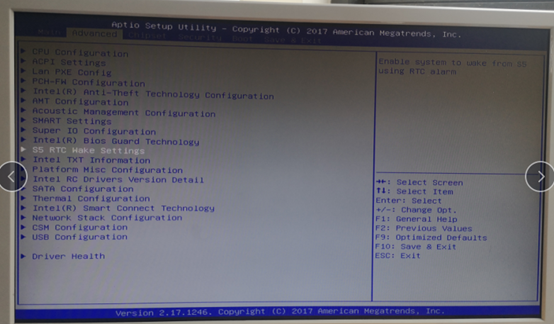
3. On the screen you can see the S5 RTC wake settings , Press “Enter”,you will see the screen pop up
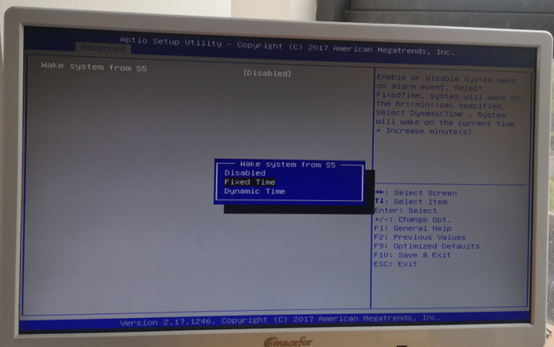
4. You can set the time you want the pc start boot
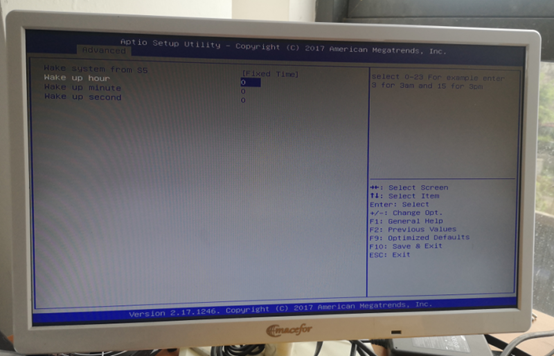
5. When you finshed the setting, pls press F10 to save the settings.
Simplified instructions:
Are you getting into a dual or triple-monitor setup? Here are the best tips to configure all the displays without third-party software on Windows 10.
Before diving into this guide, make sure that all the necessary cables are connected to the monitors and computer. This includes connecting power and video signal using VGA, DVI, HDMI, or DisplayPort (recommended) cables.
If you’re not sure, you can always note the make and model of the monitor, and search online for the manufacturer manual to get a better idea on how to connect the display.
Although you can connect a monitor to any of the available video ports on the graphics card, when setting up a dual-monitor or triple-monitor setup, it’s easy to plug them in the wrong order. While they will still work, you may run into issues using the mouse and running applications until you rearrange them correctly.
To rearrange monitors on Windows 10, use these steps:

Quick tip: When rearranging monitors in the Display settings page, make sure that all monitors align at the top perfectly. Otherwise, you’ll have problems moving the mouse cursor between monitors from the corners.
5. Click the Apply button.
Once you complete the steps, Windows 10 will understand the physical layout of the screens, and you’ll be able to work across each display and run apps without issues.
If you’re not sure which monitor you’re selecting, click the Identify button to figure out. If one of the monitors isn’t showing up, make sure it’s receiving power and connected correctly, and click the Detect button. In the case that you’re still having problems, reset their connections (or restart your computer), and try the Detect button again.
Because most versions of Windows do not include a method of password protecting your files and folders, this page provides steps for encrypting files and folders instead. To password protect your files and folders in Windows, you need to use a third-party program.
TIP: Before password protecting any document, you may want to create a backup of the non-password protected files and folder in case you forget the password in the future.
Unfortunately, Windows Vista, Windows 7, Windows 8, and Windows 10 do not provide any features for password protecting files or folders. You need to use a third-party software program to accomplish this.
If you want to encrypt a file or folder, this can be done by following these steps:

Note : If the “Encrypt contents to secure data” option is not selectable and grayed out or you do not see the option at all, you likely have a Home edition of Windows, which does not support this feature. It is also possible that the hard drive where the files are located is not formatted as NTFS, as this is a requirement for the encryption feature.
The steps below for encrypting the files on Windows XP Professional apply to users who are using a computer that has two or more accounts. If you are using a single account, see the other security solutions section.
Note : You will not be prompted to enter a password when encrypting a folder in Windows XP Professional. However, other user accounts on your computer will not have access to files contained in the encrypted folder.
If you are using the Home edition of Microsoft Windows XP, see the Windows XP Home steps.
The newest version of TweakUI also enables you to show the Encrypt option in the context menu. To do this, follow the steps below.
For this option to work on Microsoft Windows XP Home edition, you must meet the below requirements.
File and folders not frequently used – An easy way to password protect files is to create an archive of the files using a compression tool. When the archive is created, you can encrypt the contents by specifying a password.
Windows ME and Windows XP users – Windows ME and Windows XP come with their own compression utility. This utility can also be used to compress and password protect files.
Windows Vista and Windows 7 users – Windows Vista and Windows 7 also include a compression utility. However, password protection for the compressed files is not possible without the use of a third-party software program.
TIP: When a file is compressed, users can still view a listing of the files in the compressed file. If you want both your file names and the contents to be hidden, move all the files into a single folder and password protect that folder.
If you need to password protect or encrypt data you frequently use, you need to install a third-party program that allows you to protect your files and folders. Below are some free and commercial solutions.