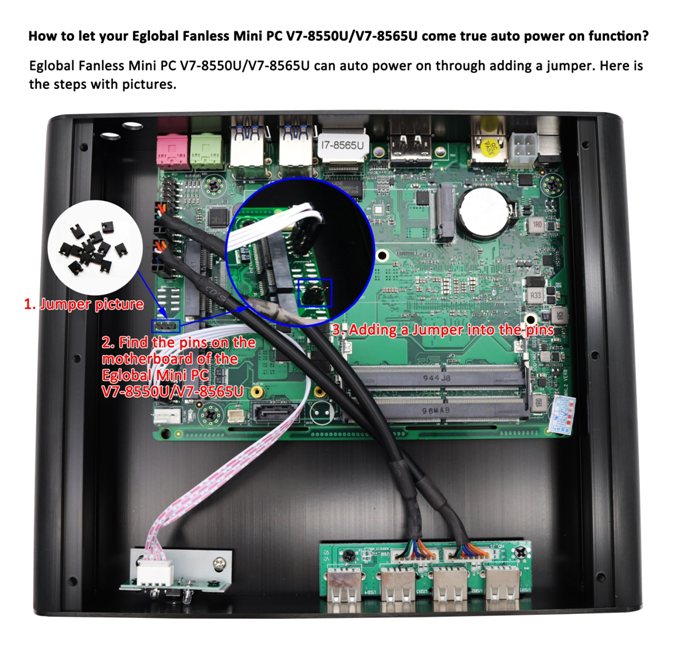
How to let your Eglobal Fanless Mini PC V7-8550U/V7-8565U come true auto power on function?
FAQs of EGLOBAL Mini PC
Simplified instructions:
Are you getting into a dual or triple-monitor setup? Here are the best tips to configure all the displays without third-party software on Windows 10.
Before diving into this guide, make sure that all the necessary cables are connected to the monitors and computer. This includes connecting power and video signal using VGA, DVI, HDMI, or DisplayPort (recommended) cables.
If you’re not sure, you can always note the make and model of the monitor, and search online for the manufacturer manual to get a better idea on how to connect the display.
Although you can connect a monitor to any of the available video ports on the graphics card, when setting up a dual-monitor or triple-monitor setup, it’s easy to plug them in the wrong order. While they will still work, you may run into issues using the mouse and running applications until you rearrange them correctly.
To rearrange monitors on Windows 10, use these steps:

Quick tip: When rearranging monitors in the Display settings page, make sure that all monitors align at the top perfectly. Otherwise, you’ll have problems moving the mouse cursor between monitors from the corners.
5. Click the Apply button.
Once you complete the steps, Windows 10 will understand the physical layout of the screens, and you’ll be able to work across each display and run apps without issues.
If you’re not sure which monitor you’re selecting, click the Identify button to figure out. If one of the monitors isn’t showing up, make sure it’s receiving power and connected correctly, and click the Detect button. In the case that you’re still having problems, reset their connections (or restart your computer), and try the Detect button again.
Because most versions of Windows do not include a method of password protecting your files and folders, this page provides steps for encrypting files and folders instead. To password protect your files and folders in Windows, you need to use a third-party program.
TIP: Before password protecting any document, you may want to create a backup of the non-password protected files and folder in case you forget the password in the future.
Unfortunately, Windows Vista, Windows 7, Windows 8, and Windows 10 do not provide any features for password protecting files or folders. You need to use a third-party software program to accomplish this.
If you want to encrypt a file or folder, this can be done by following these steps:

Note : If the “Encrypt contents to secure data” option is not selectable and grayed out or you do not see the option at all, you likely have a Home edition of Windows, which does not support this feature. It is also possible that the hard drive where the files are located is not formatted as NTFS, as this is a requirement for the encryption feature.
The steps below for encrypting the files on Windows XP Professional apply to users who are using a computer that has two or more accounts. If you are using a single account, see the other security solutions section.
Note : You will not be prompted to enter a password when encrypting a folder in Windows XP Professional. However, other user accounts on your computer will not have access to files contained in the encrypted folder.
If you are using the Home edition of Microsoft Windows XP, see the Windows XP Home steps.
The newest version of TweakUI also enables you to show the Encrypt option in the context menu. To do this, follow the steps below.
For this option to work on Microsoft Windows XP Home edition, you must meet the below requirements.
File and folders not frequently used – An easy way to password protect files is to create an archive of the files using a compression tool. When the archive is created, you can encrypt the contents by specifying a password.
Windows ME and Windows XP users – Windows ME and Windows XP come with their own compression utility. This utility can also be used to compress and password protect files.
Windows Vista and Windows 7 users – Windows Vista and Windows 7 also include a compression utility. However, password protection for the compressed files is not possible without the use of a third-party software program.
TIP: When a file is compressed, users can still view a listing of the files in the compressed file. If you want both your file names and the contents to be hidden, move all the files into a single folder and password protect that folder.
If you need to password protect or encrypt data you frequently use, you need to install a third-party program that allows you to protect your files and folders. Below are some free and commercial solutions.
svchost.exe is a system program belonging to the Microsoft Windows operating system. Microsoft’s official explanation for it is: svchost.exe is the universal host process name of a service running from a dynamic link library (DLL). Coming soon to grab your net, today I will share how to close svchost.
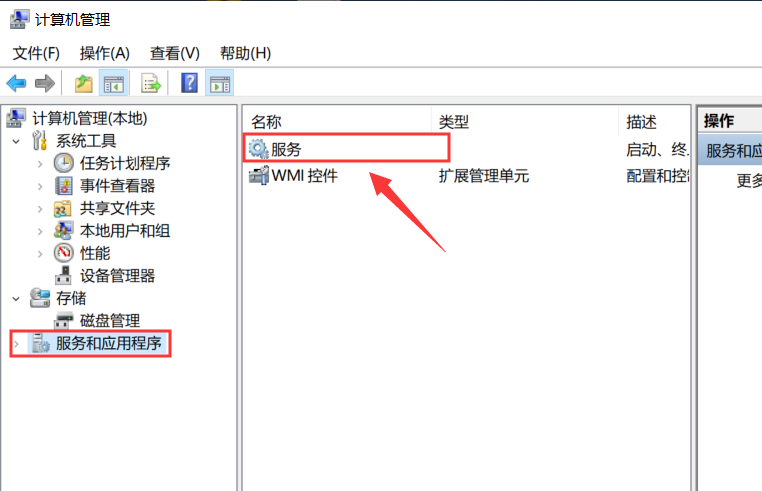
1. Right-click [this computer] and select [Manage].
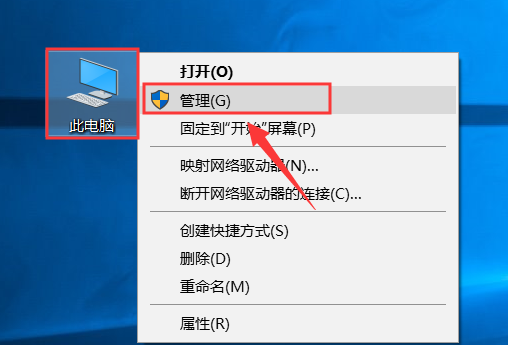
2. Double-click to open [Services] in [Services and Applications].
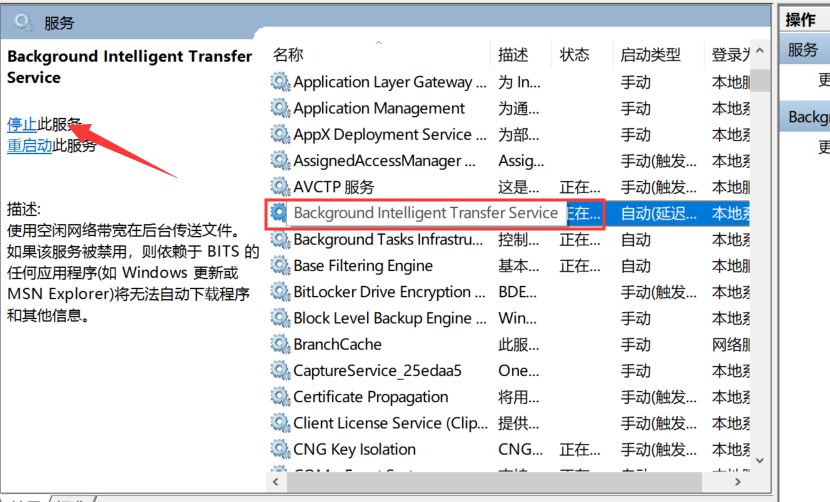
3. Find [Background Intelligent Transfer Service] and click [Stop].
4. Right-click [Background Intelligent Transfer Service] and select [Properties].
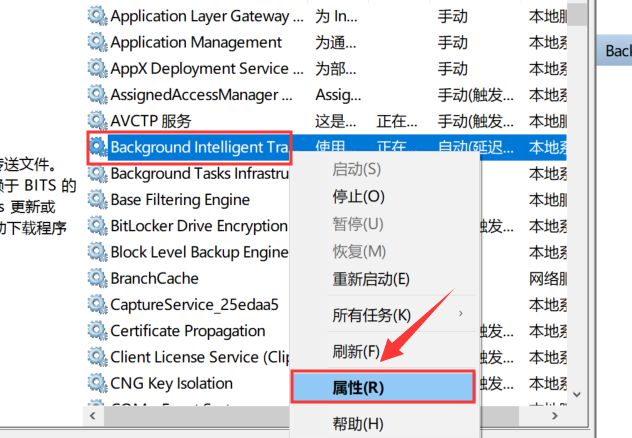
5. Select [Manual] as the startup type, and then click [OK].


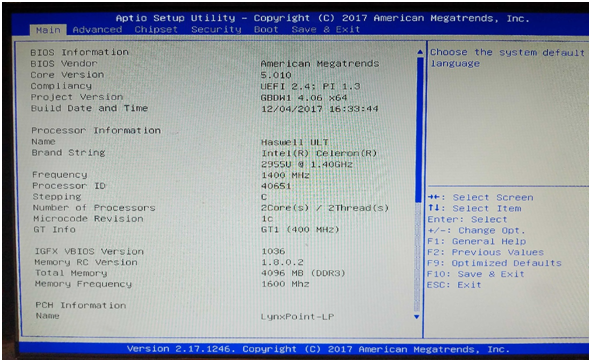
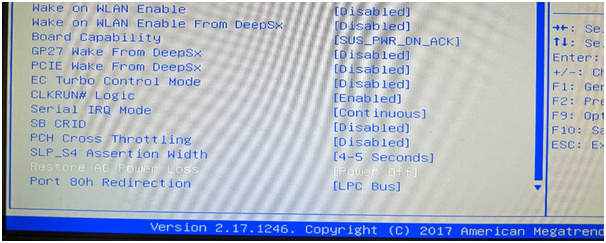
Step 1: Restart your mini pc, and then repeatedly press “DELETE”, into the BIOS.

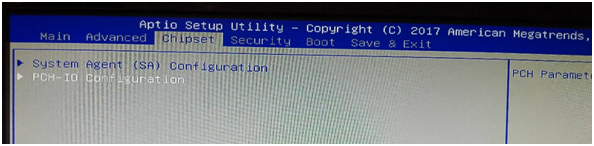
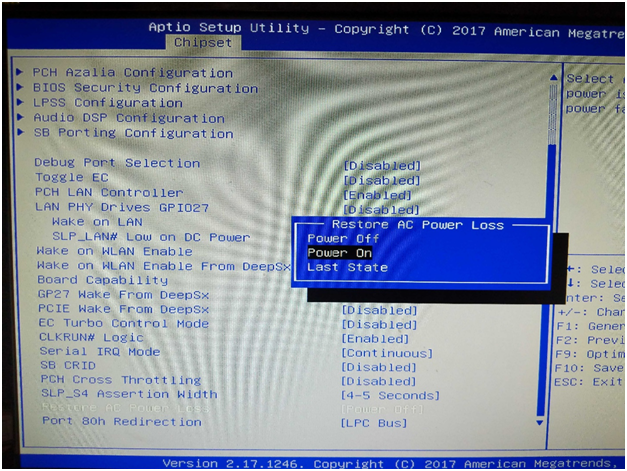
Step 2: Choose the Chipset, find the “Intel RC ACPI Settings”
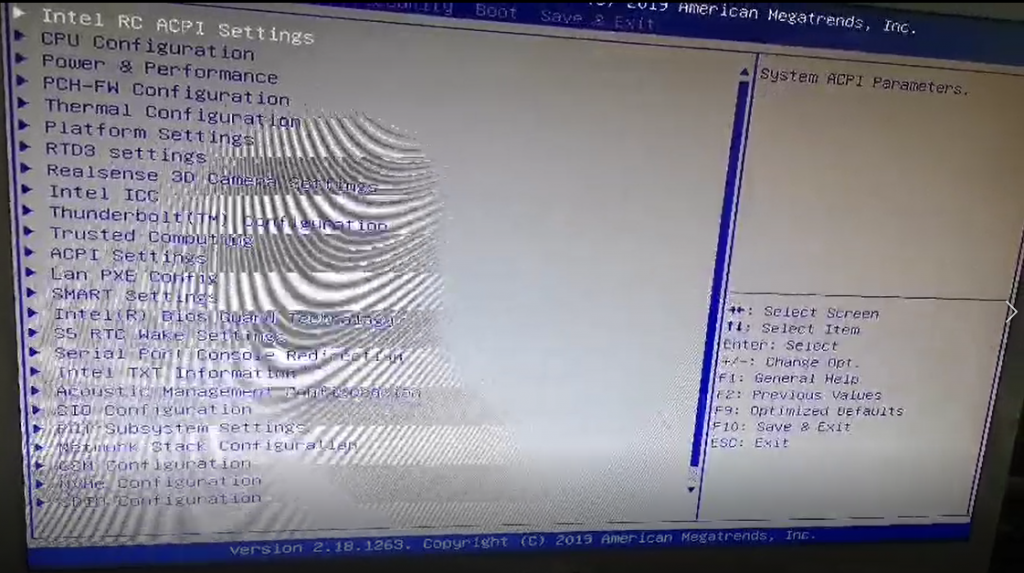
Step 3: Into the “Intel RC ACPI Settings” , choose the “PCH-IO”Configuration”
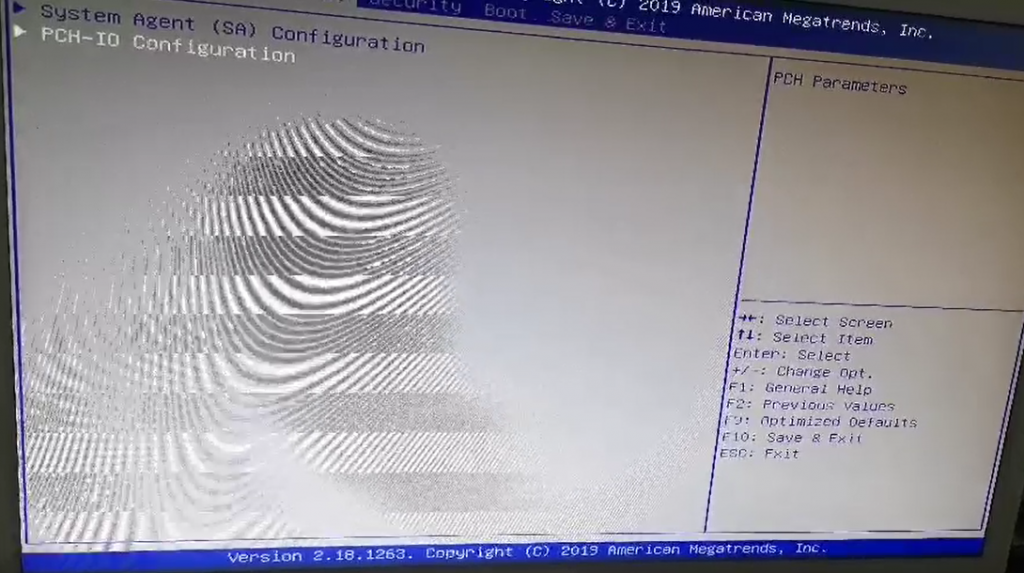
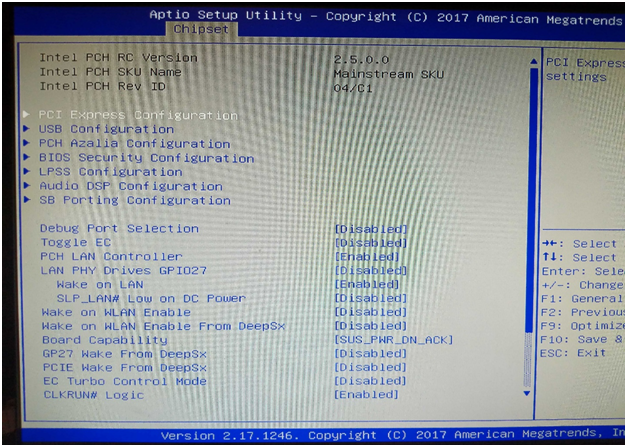
Step 4: Find the “State After G3”, choose the “SO State”.

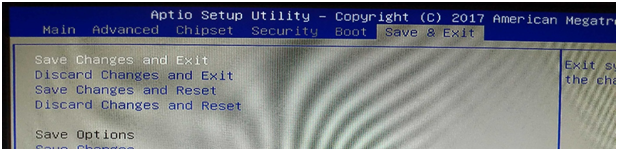
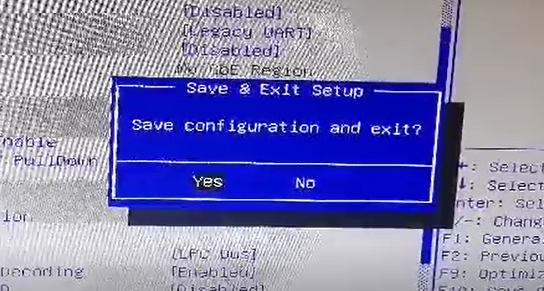
Step 5: Save your configuration and exit.
If you don’t know how to setup the RTC fuction for M9, you may refer our video:
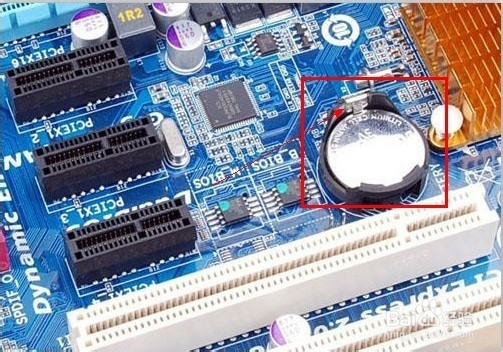
Method 1: Unplug the main unit power cord, then remove the chassis and remove the BIOS battery for a few minutes before installing it.
Note: The miniPC power cord must be unplugged, otherwise there is a big chance that it will not be removed.
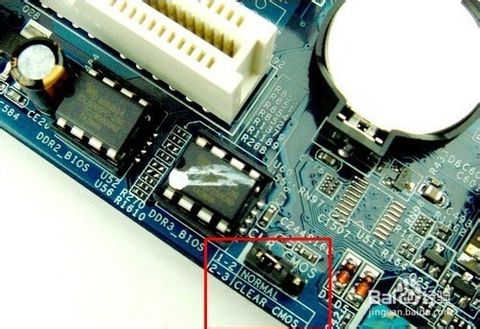
Method 2: Pull the miniPC power cord and then remove the chassis to find a three-pin jumper near the BIOS battery. It should be inserted above 1, 2 and jump to 2, 3 for 10 seconds.
Note: The miniPC power cord must be unplugged, otherwise the current loop will destroy the BIOS. The jumper was originally a short circuit.
DELL brand host BIOS crack method: Pull the host power cord and then remove the chassis to find the jumper near the BIOS battery. The jumper below writes the password label to pull out the jumper, wait for more than ten seconds and then plug it back. . You can clear the BIOS password.
Note: This method is not only suitable for DELL hosts, because there are many motherboards with the same settings. Only DELL is more commonly used in this method. Previous IBM also liked it, and now like the fourth step.
Lenovo and other brand host BIOS crack method: pull the host power cord and then remove the chassis to find a jumper near the BIOS battery. The jumper below writes the COMS label and pulls out the jumper. Wait for more than ten seconds. go back. You can clear the BIOS password.
Or you may refer to our video.
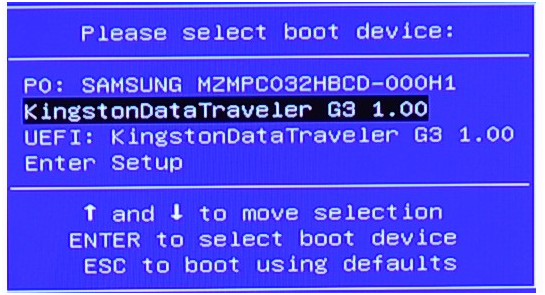
Setp 1: Step 1: Press On/Off Switch on the mini pc and then keep press “Esc” on the keyboard until goes into BIOS;
Or
Press “ F11 ” after booting, select “ Enter Setup ” into BIOS interface as the picture shown:
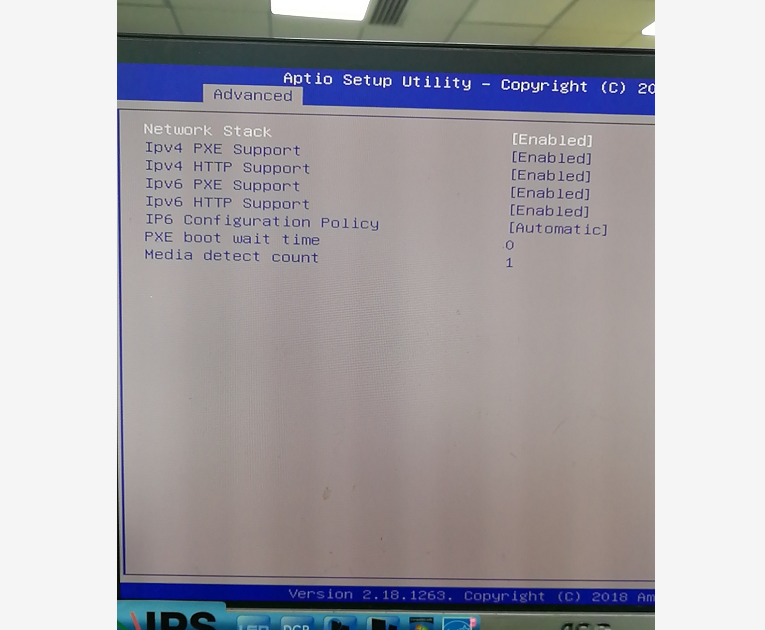
Step2: Into the “Advanced”, find the “Network Stack Configuration”.

Step 3: Make all the select become Enabled.
Step 4: After the previous step is completed, return to “Advanced”, into the “CSM Configuration”
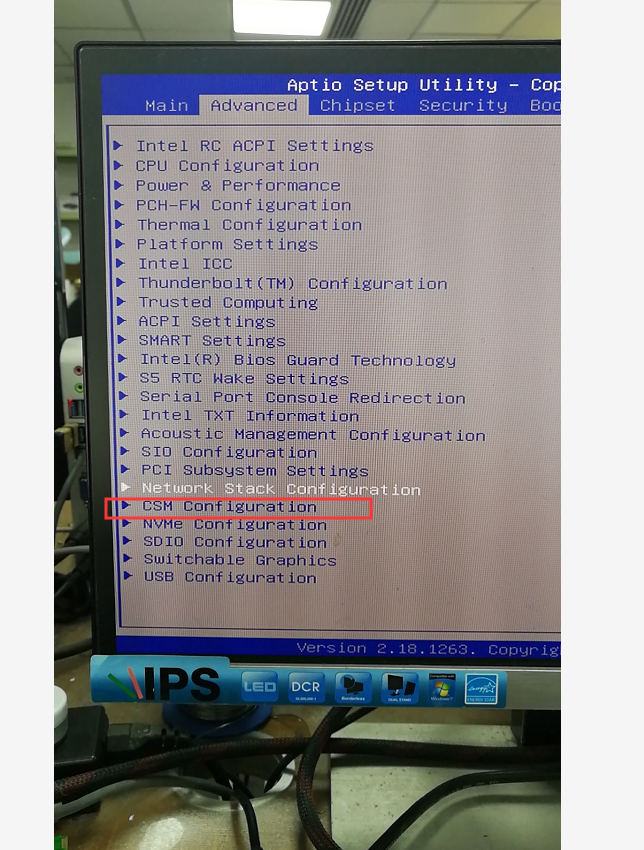
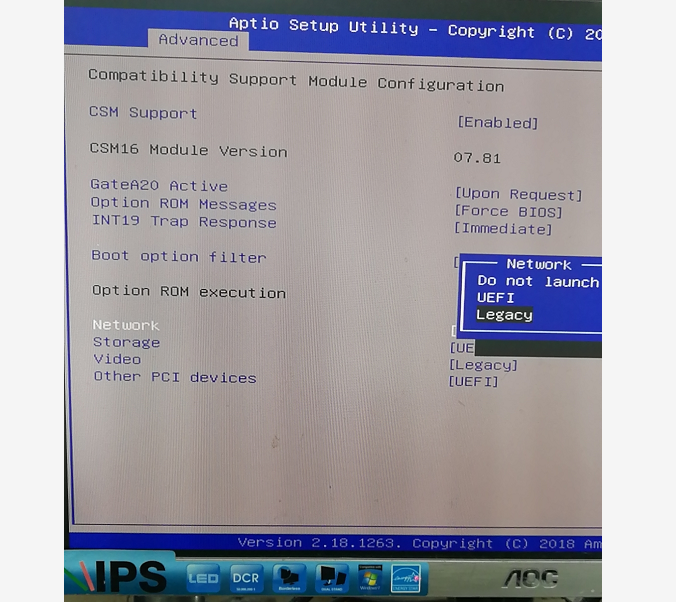
Step 5: Find the “Network” choose the “Legacy”.
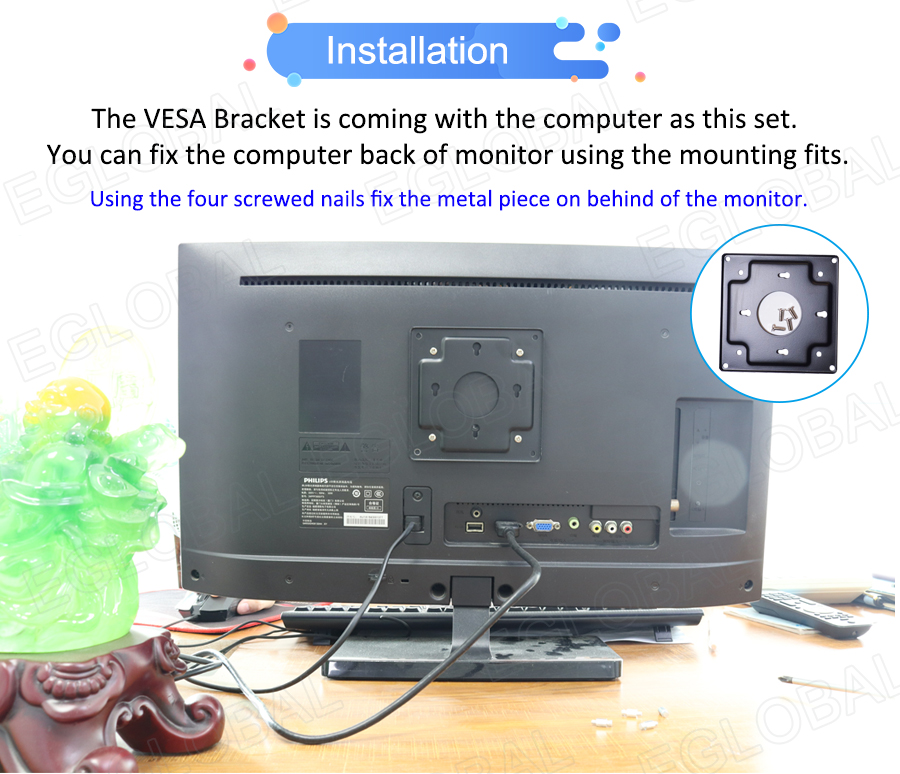
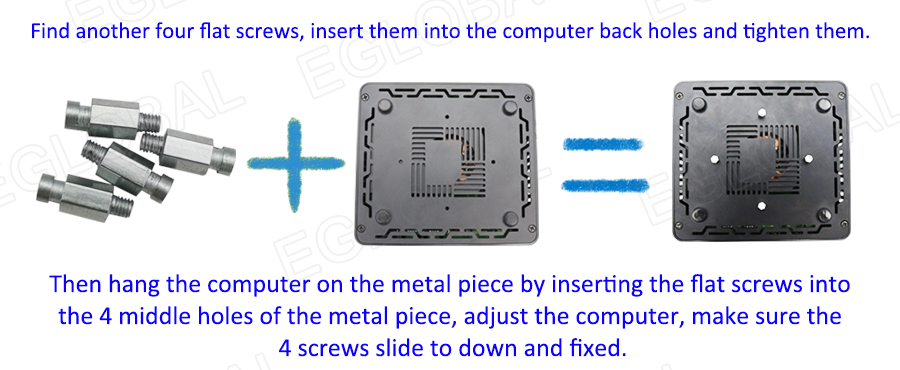
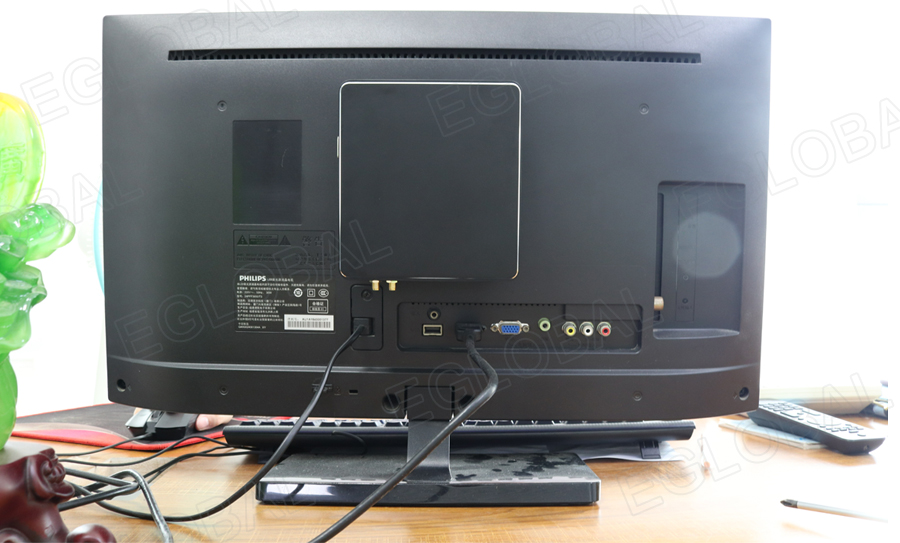
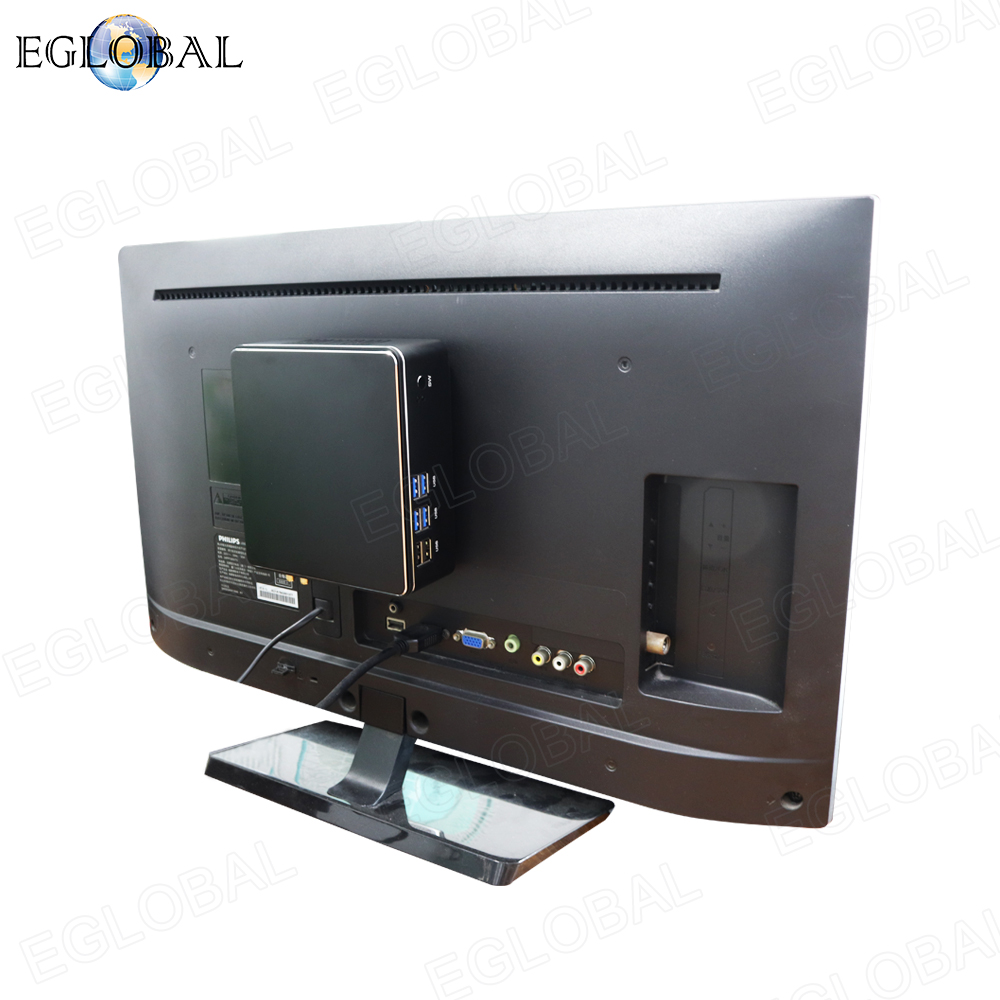
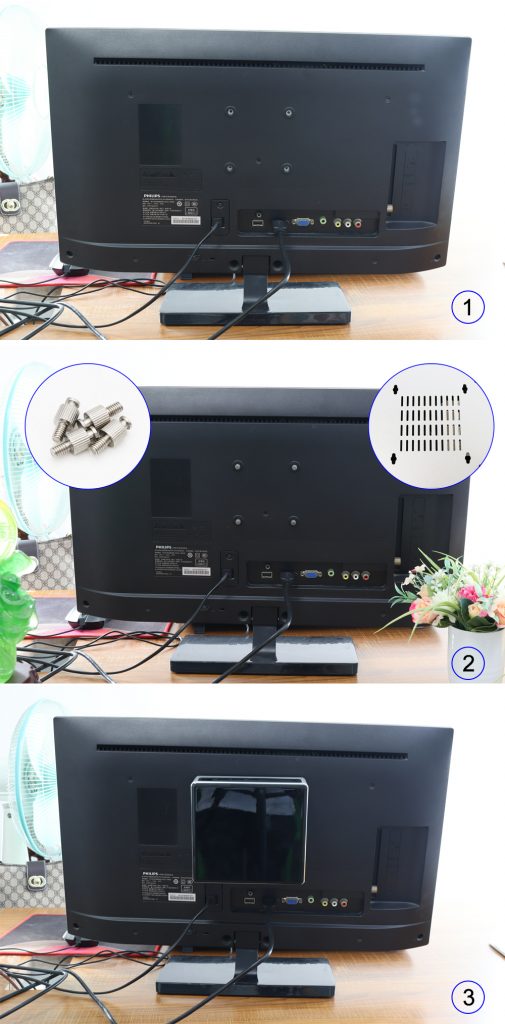
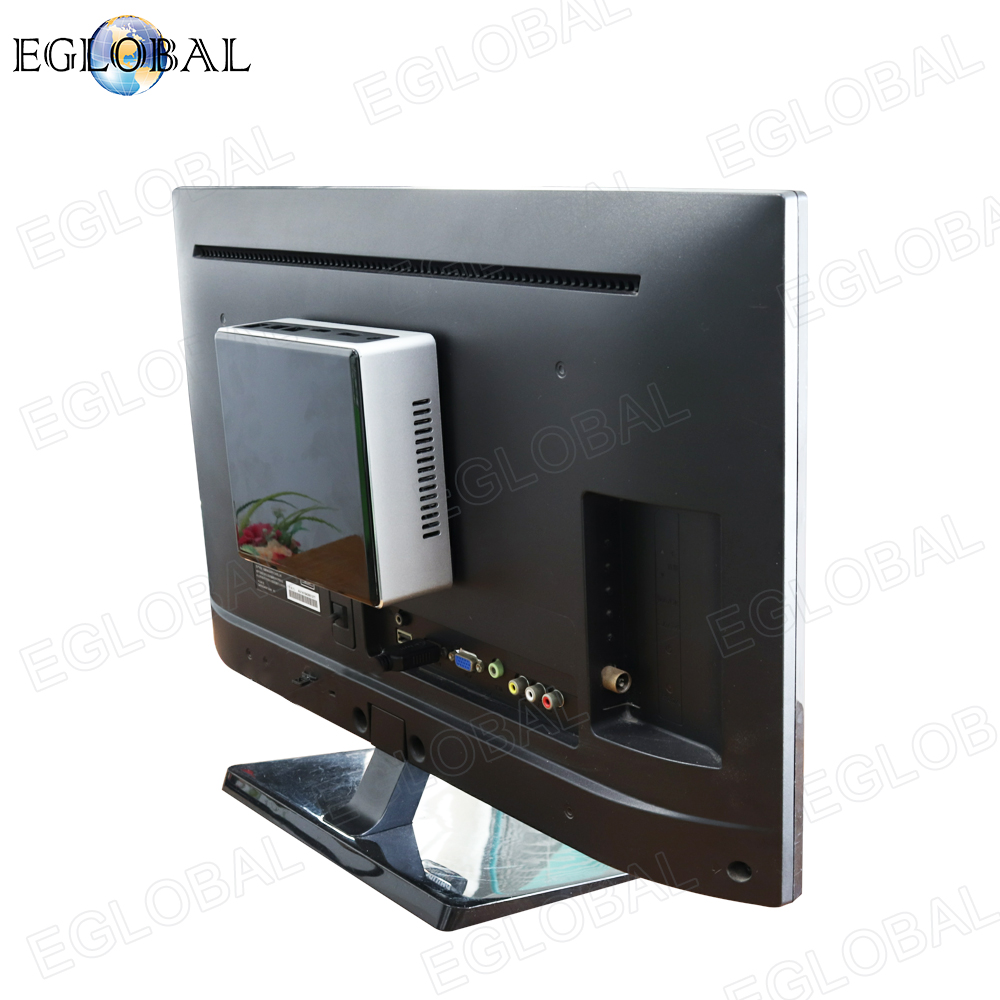
Step1: Have a monitor, a V310 mini pc and four screws ready. Previously, our computer needed a VESA after hanging it on the monitor. Now we can hang it directly behind the monitor without the VESA.
Step2: Screw the screw into the bolt behind the monitor.
Step3: Select the appropriate hanger according to the distance of the bolt.
If you don’t know how to do, please refer to the video.
Details or BUY via the link: https://www.pcstationcn.com/free-shipping-eglobal-mini-pcs/Desktop-pc